Wallet
Introduction
The Wallet page is where you manage your hAlpha, the native token of the Hippius network. From here you can check your balance, send and receive tokens, stake to earn rewards, bridge between Hippius and Bittensor, and view your full transaction history.
Every action on this page is signed on chain by your connected wallet extension. Hippius never holds or moves your funds.
Reach Wallet from the sidebar at
Connecting Your Wallet
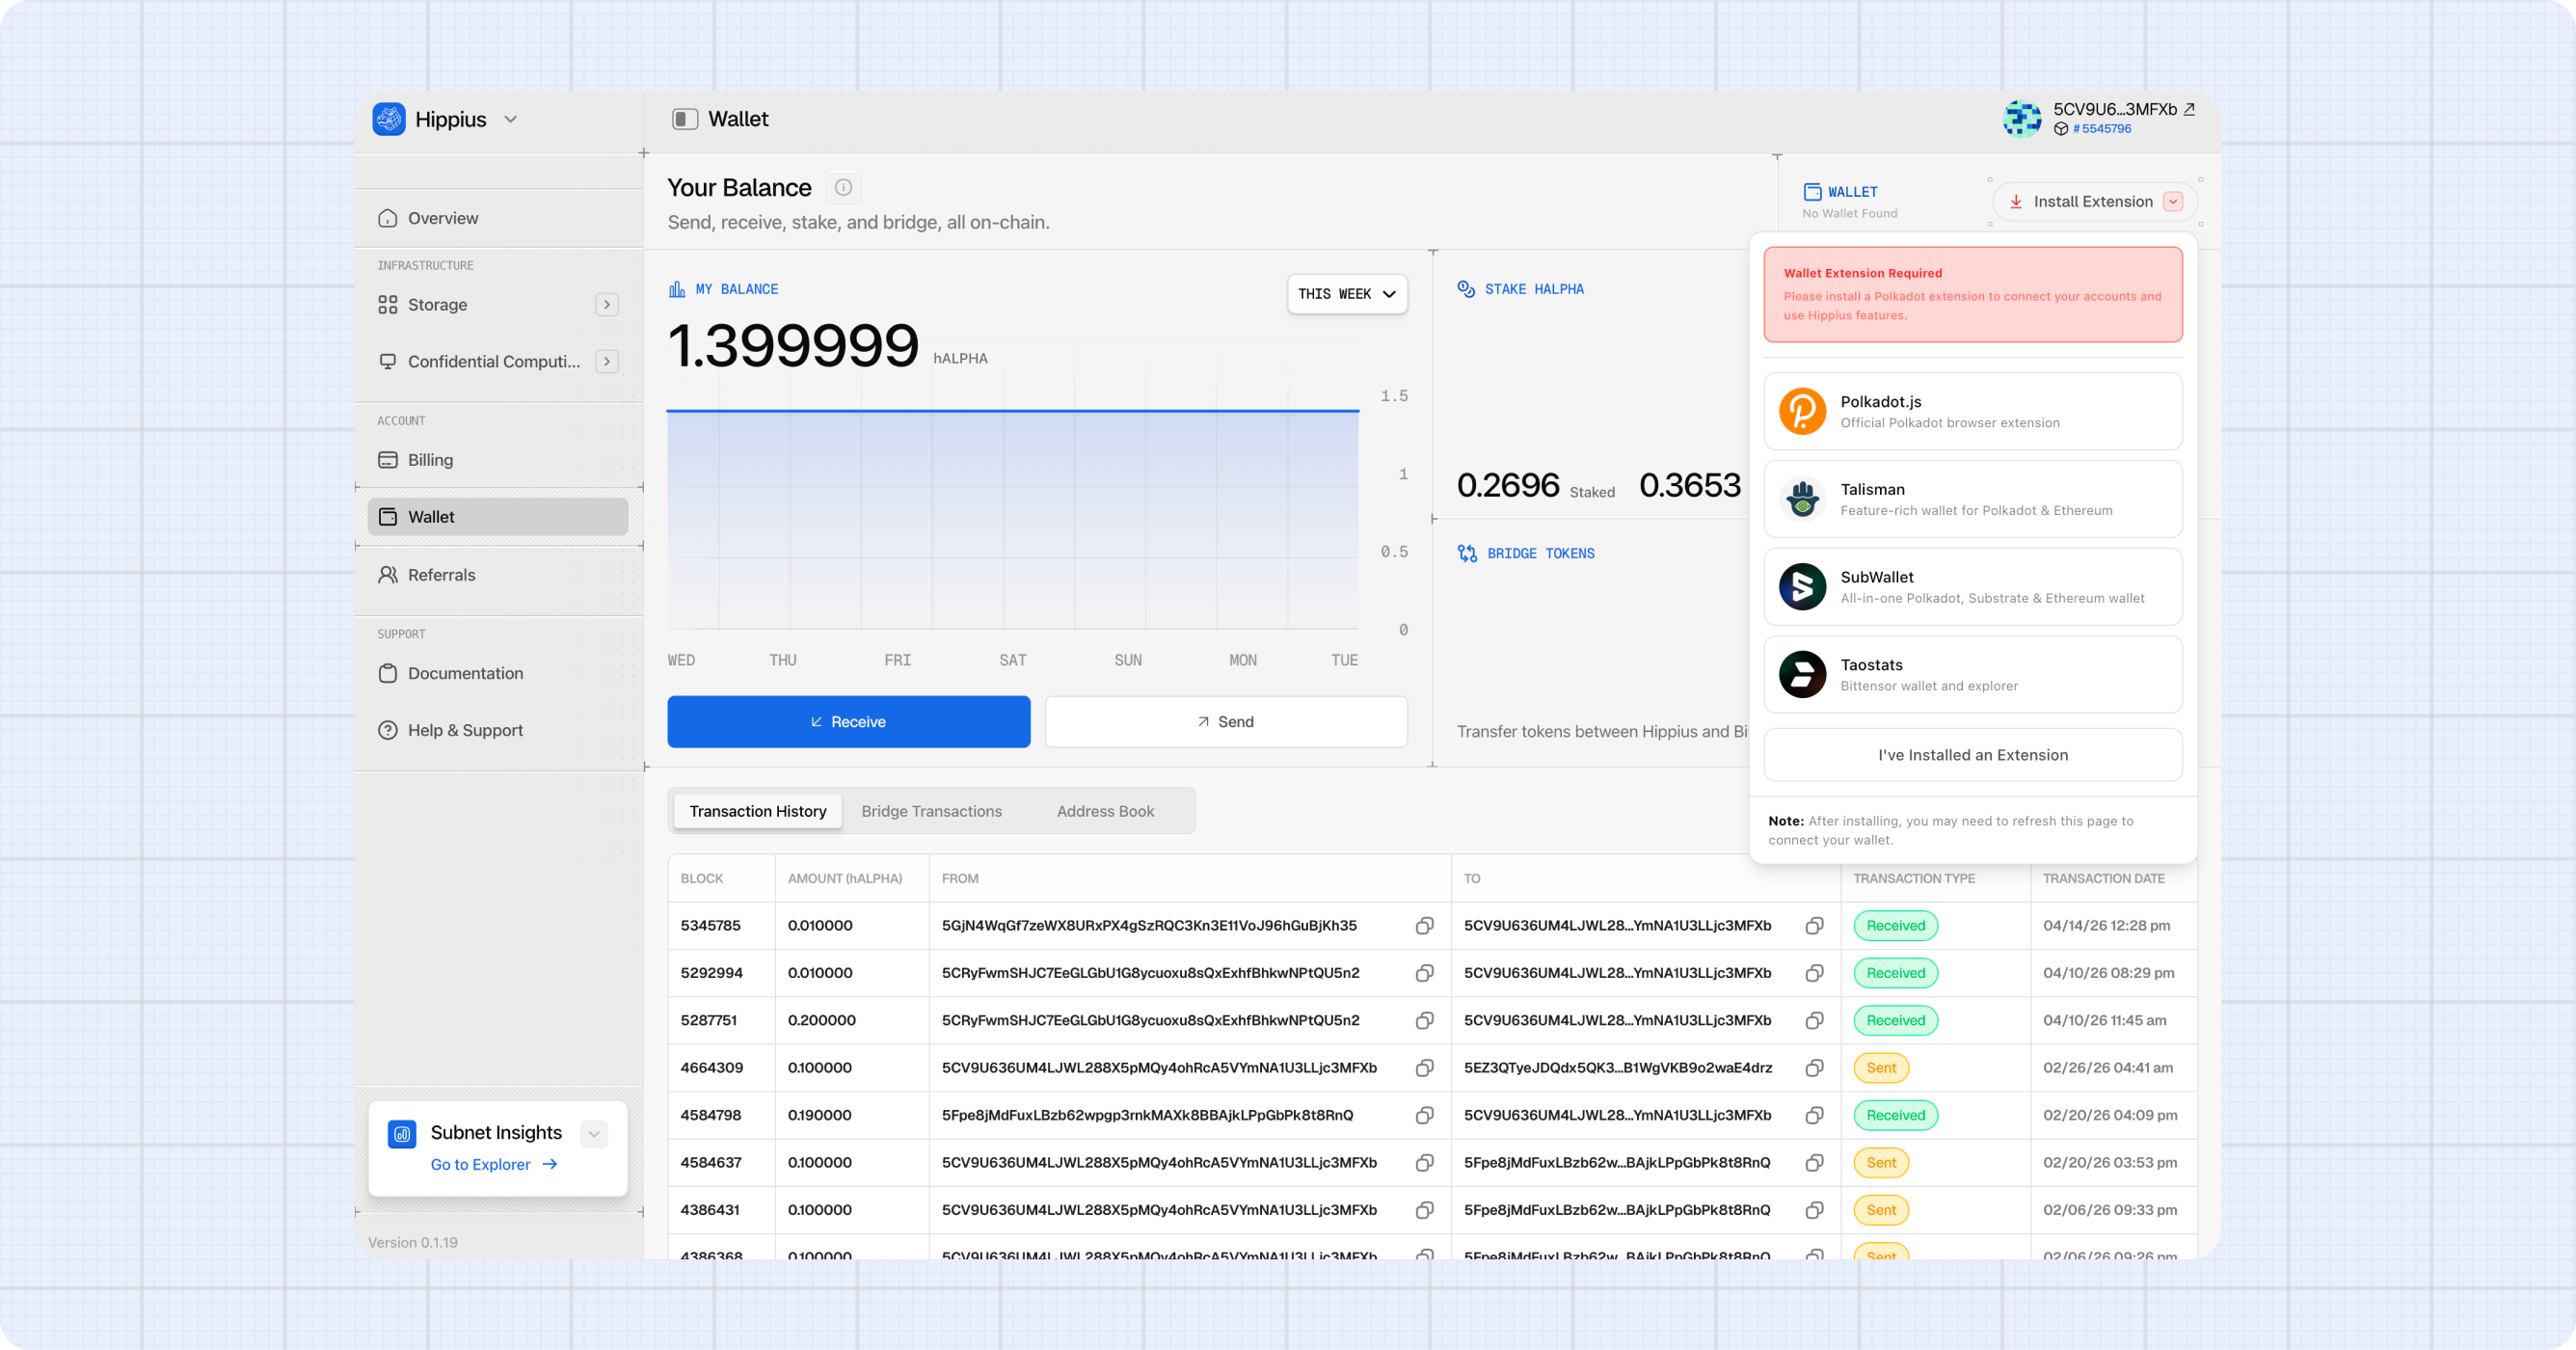
The console supports four browser extension wallets for signing on chain actions:
- Polkadot.js Extension: the official Polkadot extension, minimal and reliable.
- Talisman: feature rich, supports both Polkadot and Ethereum.
- SubWallet: multi chain with a mobile companion app.
- Taostats: built for Bittensor users.
You need one of these installed and connected before you can send, stake, bridge, or sign any transaction.
Installing a Wallet Extension
If no extension is detected, the Active Wallet button in the top right corner shows Install Extension. Click it to open a panel with install links for each supported wallet.
- Click the install link for your preferred extension. The provider's website opens in a new tab.
- Install the extension and create or import an account.
- Return to the Hippius Console and click I've Installed an Extension.
- Approve the connection request from the extension.
- Your accounts now appear in the Active Wallet dropdown.
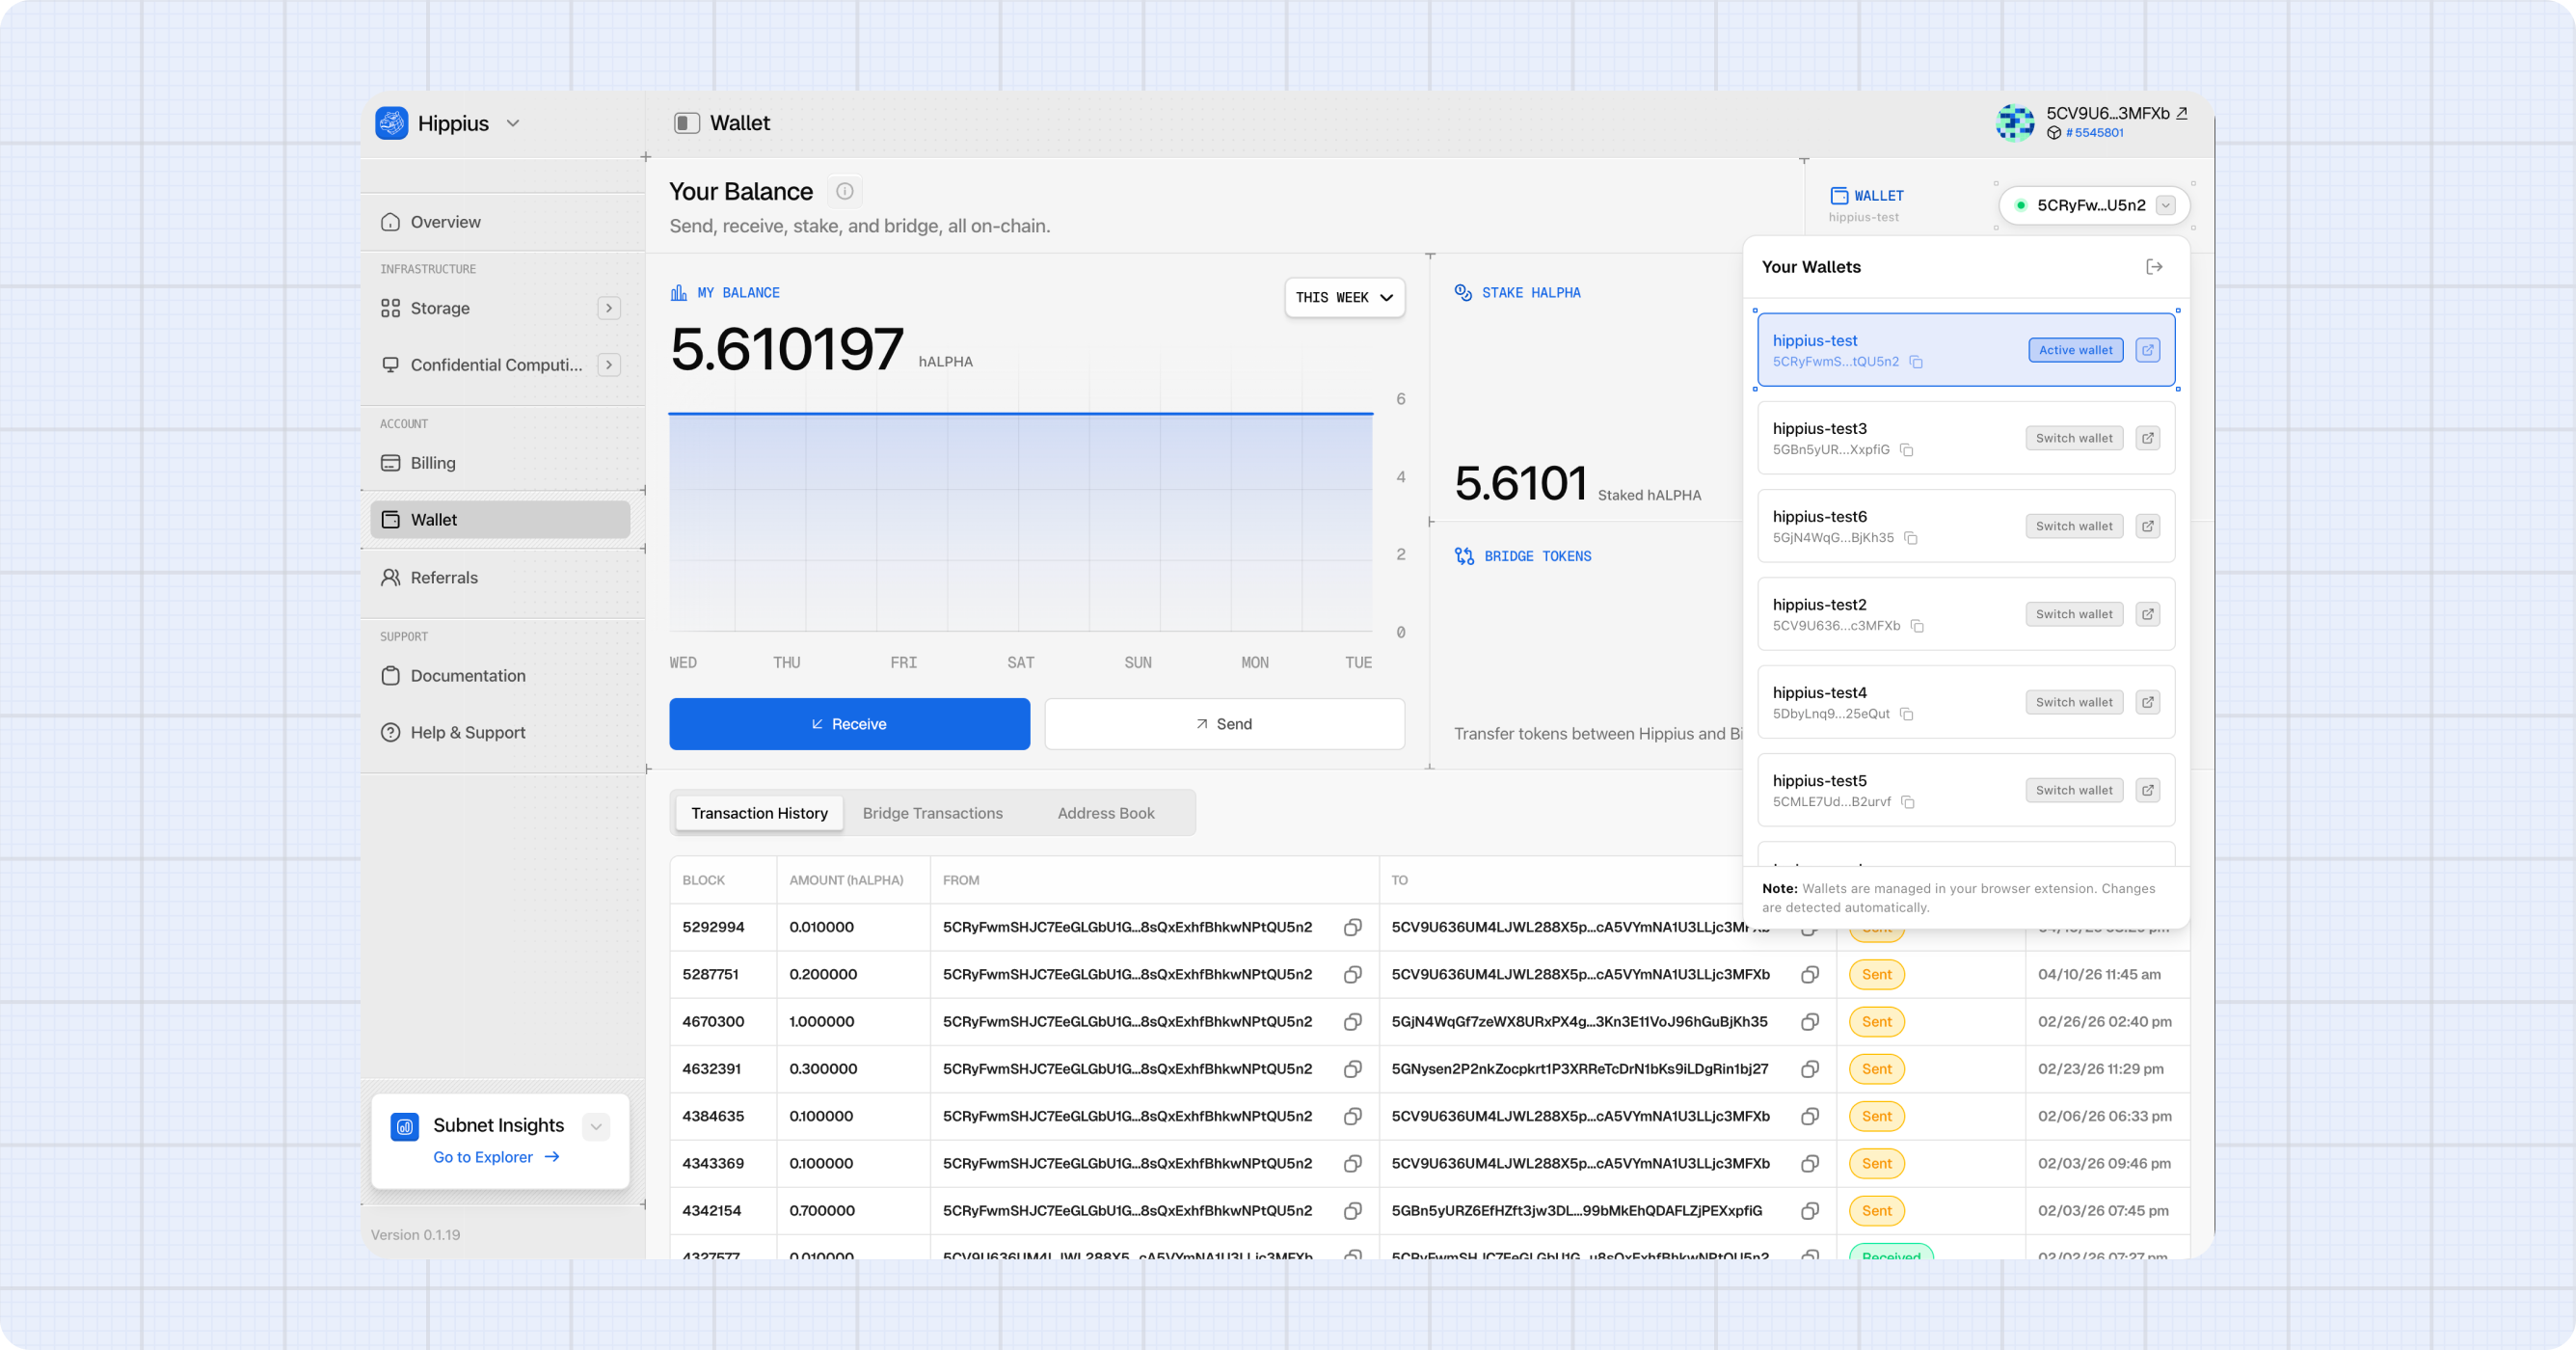
Selecting Your Active Wallet
Click the Active Wallet button in the top right (it shows a green dot, a truncated address, and a chevron). A dropdown lists every account from your connected extension.
- Find the account you want to use.
- Click Switch Wallet next to it.
Hover over any truncated address to see it in full. Click the copy icon to copy it, or the link icon to open it on hipstats.com. Your selection is remembered across sessions.
Disconnecting
Open the Active Wallet dropdown and click the logout icon at the top of the list. Your active wallet is cleared from the console. Your funds stay in your extension wallet, untouched.
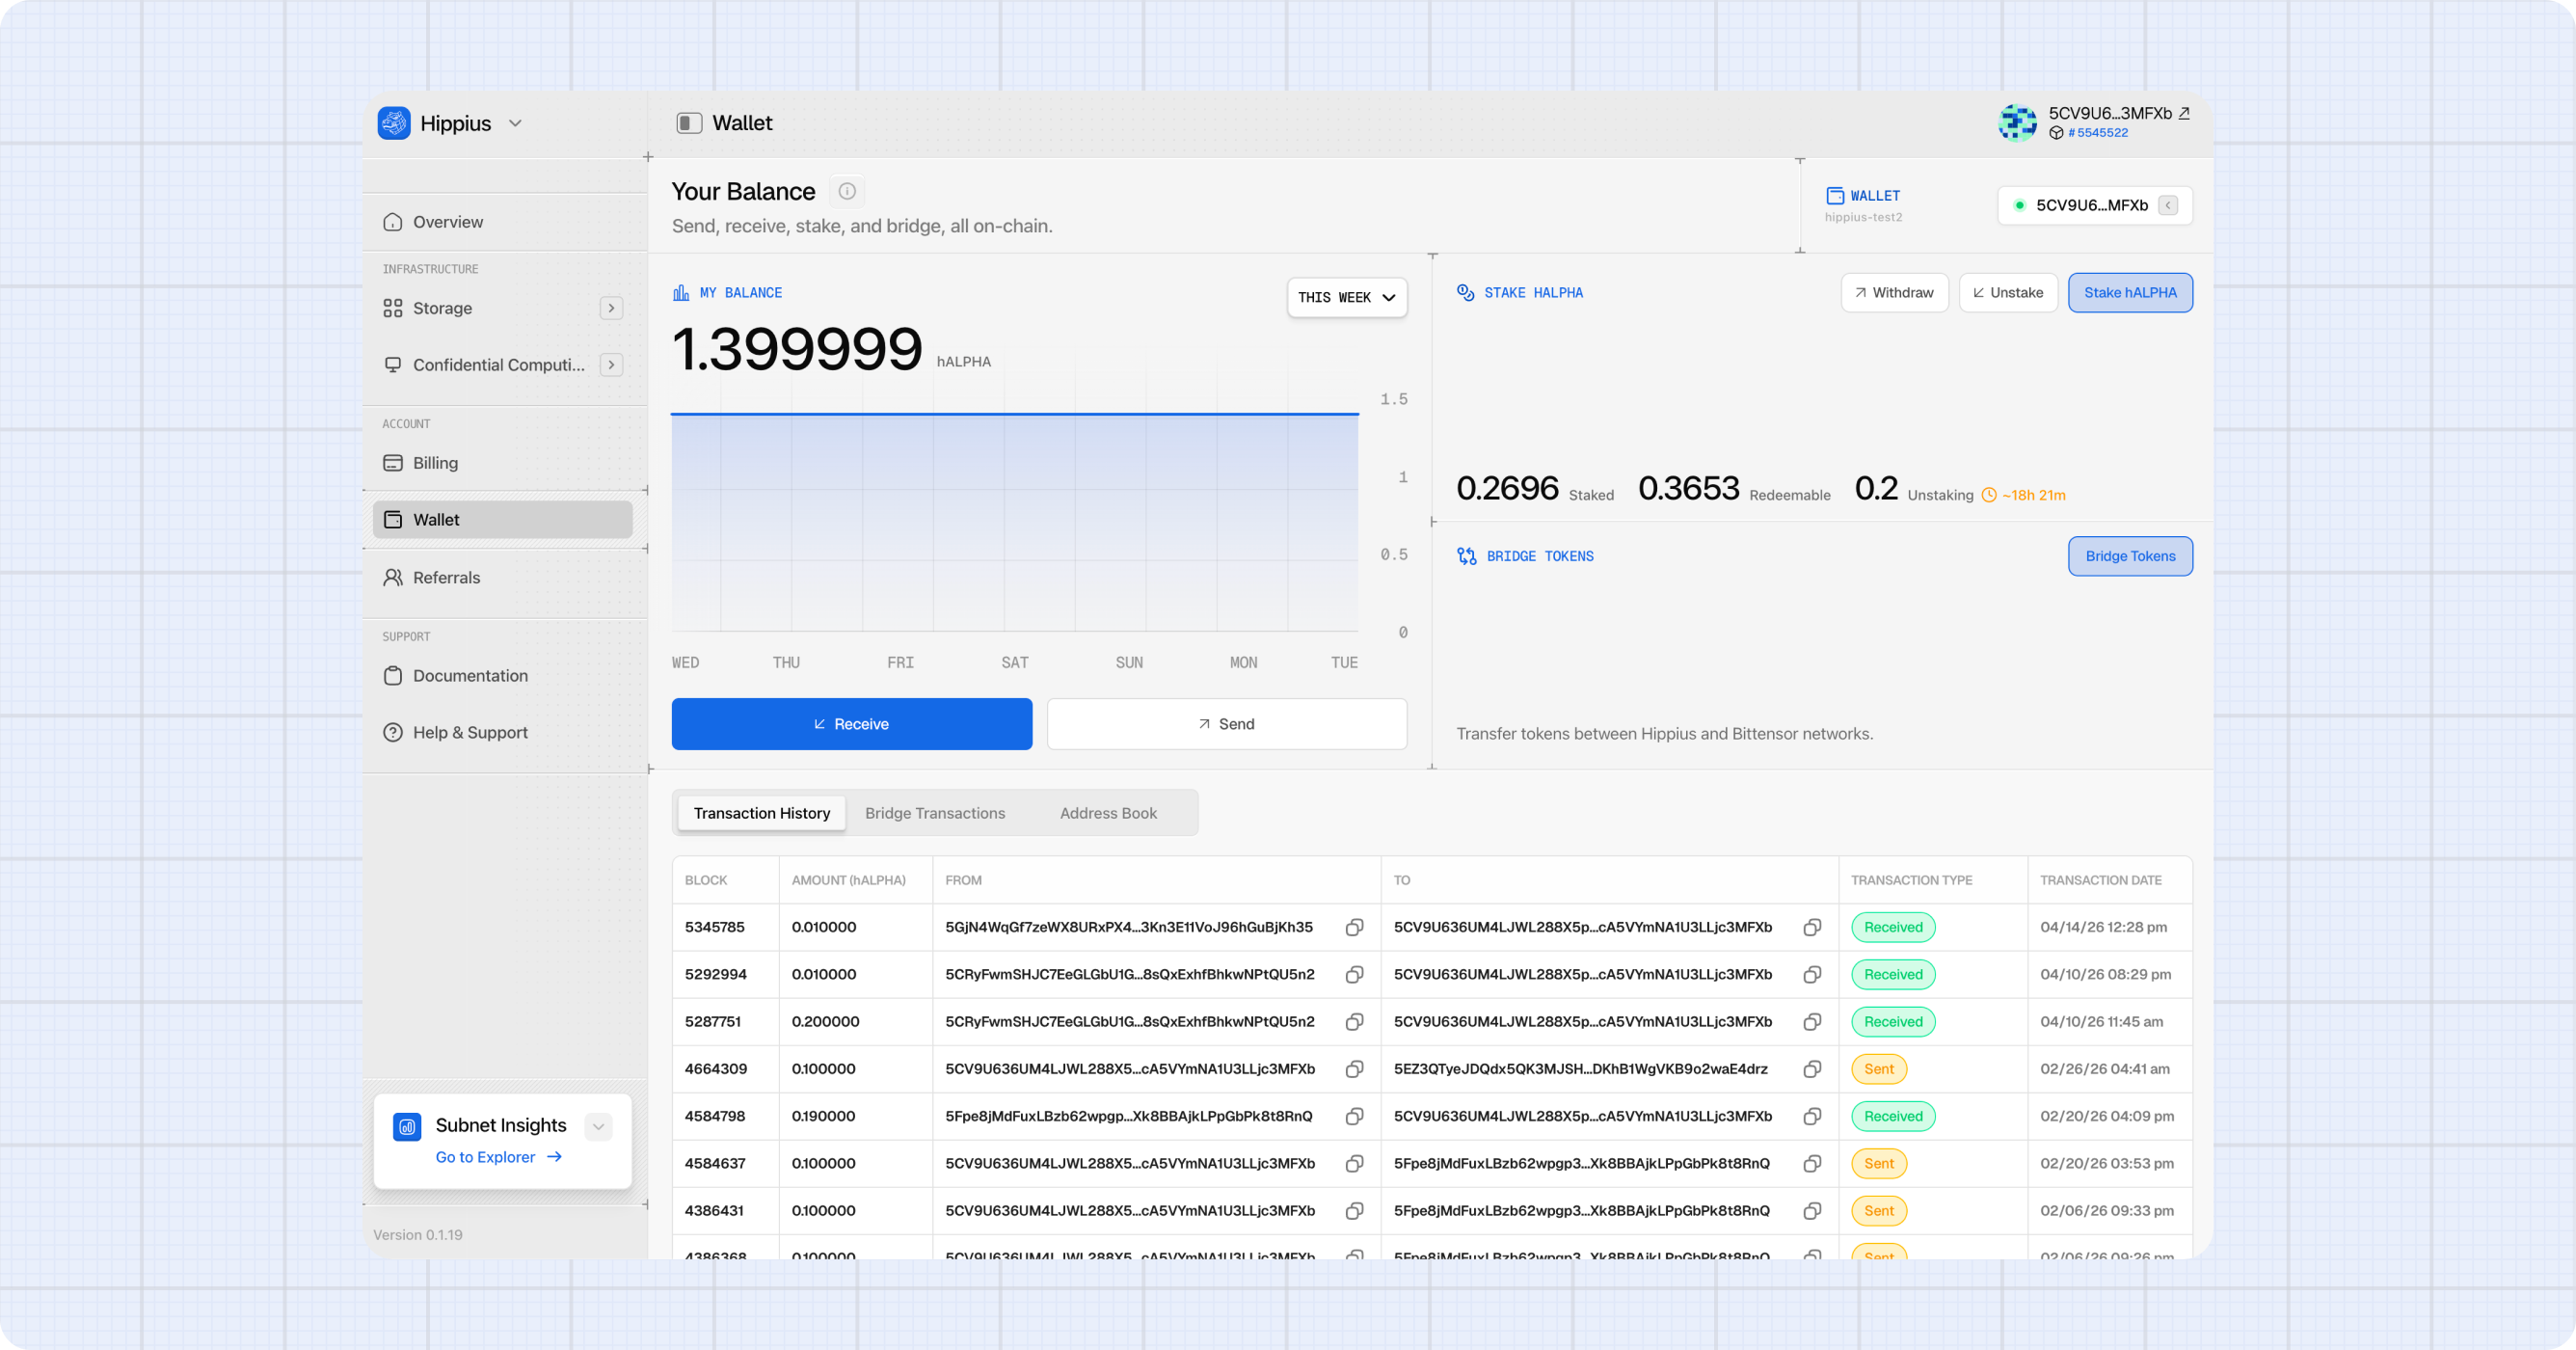
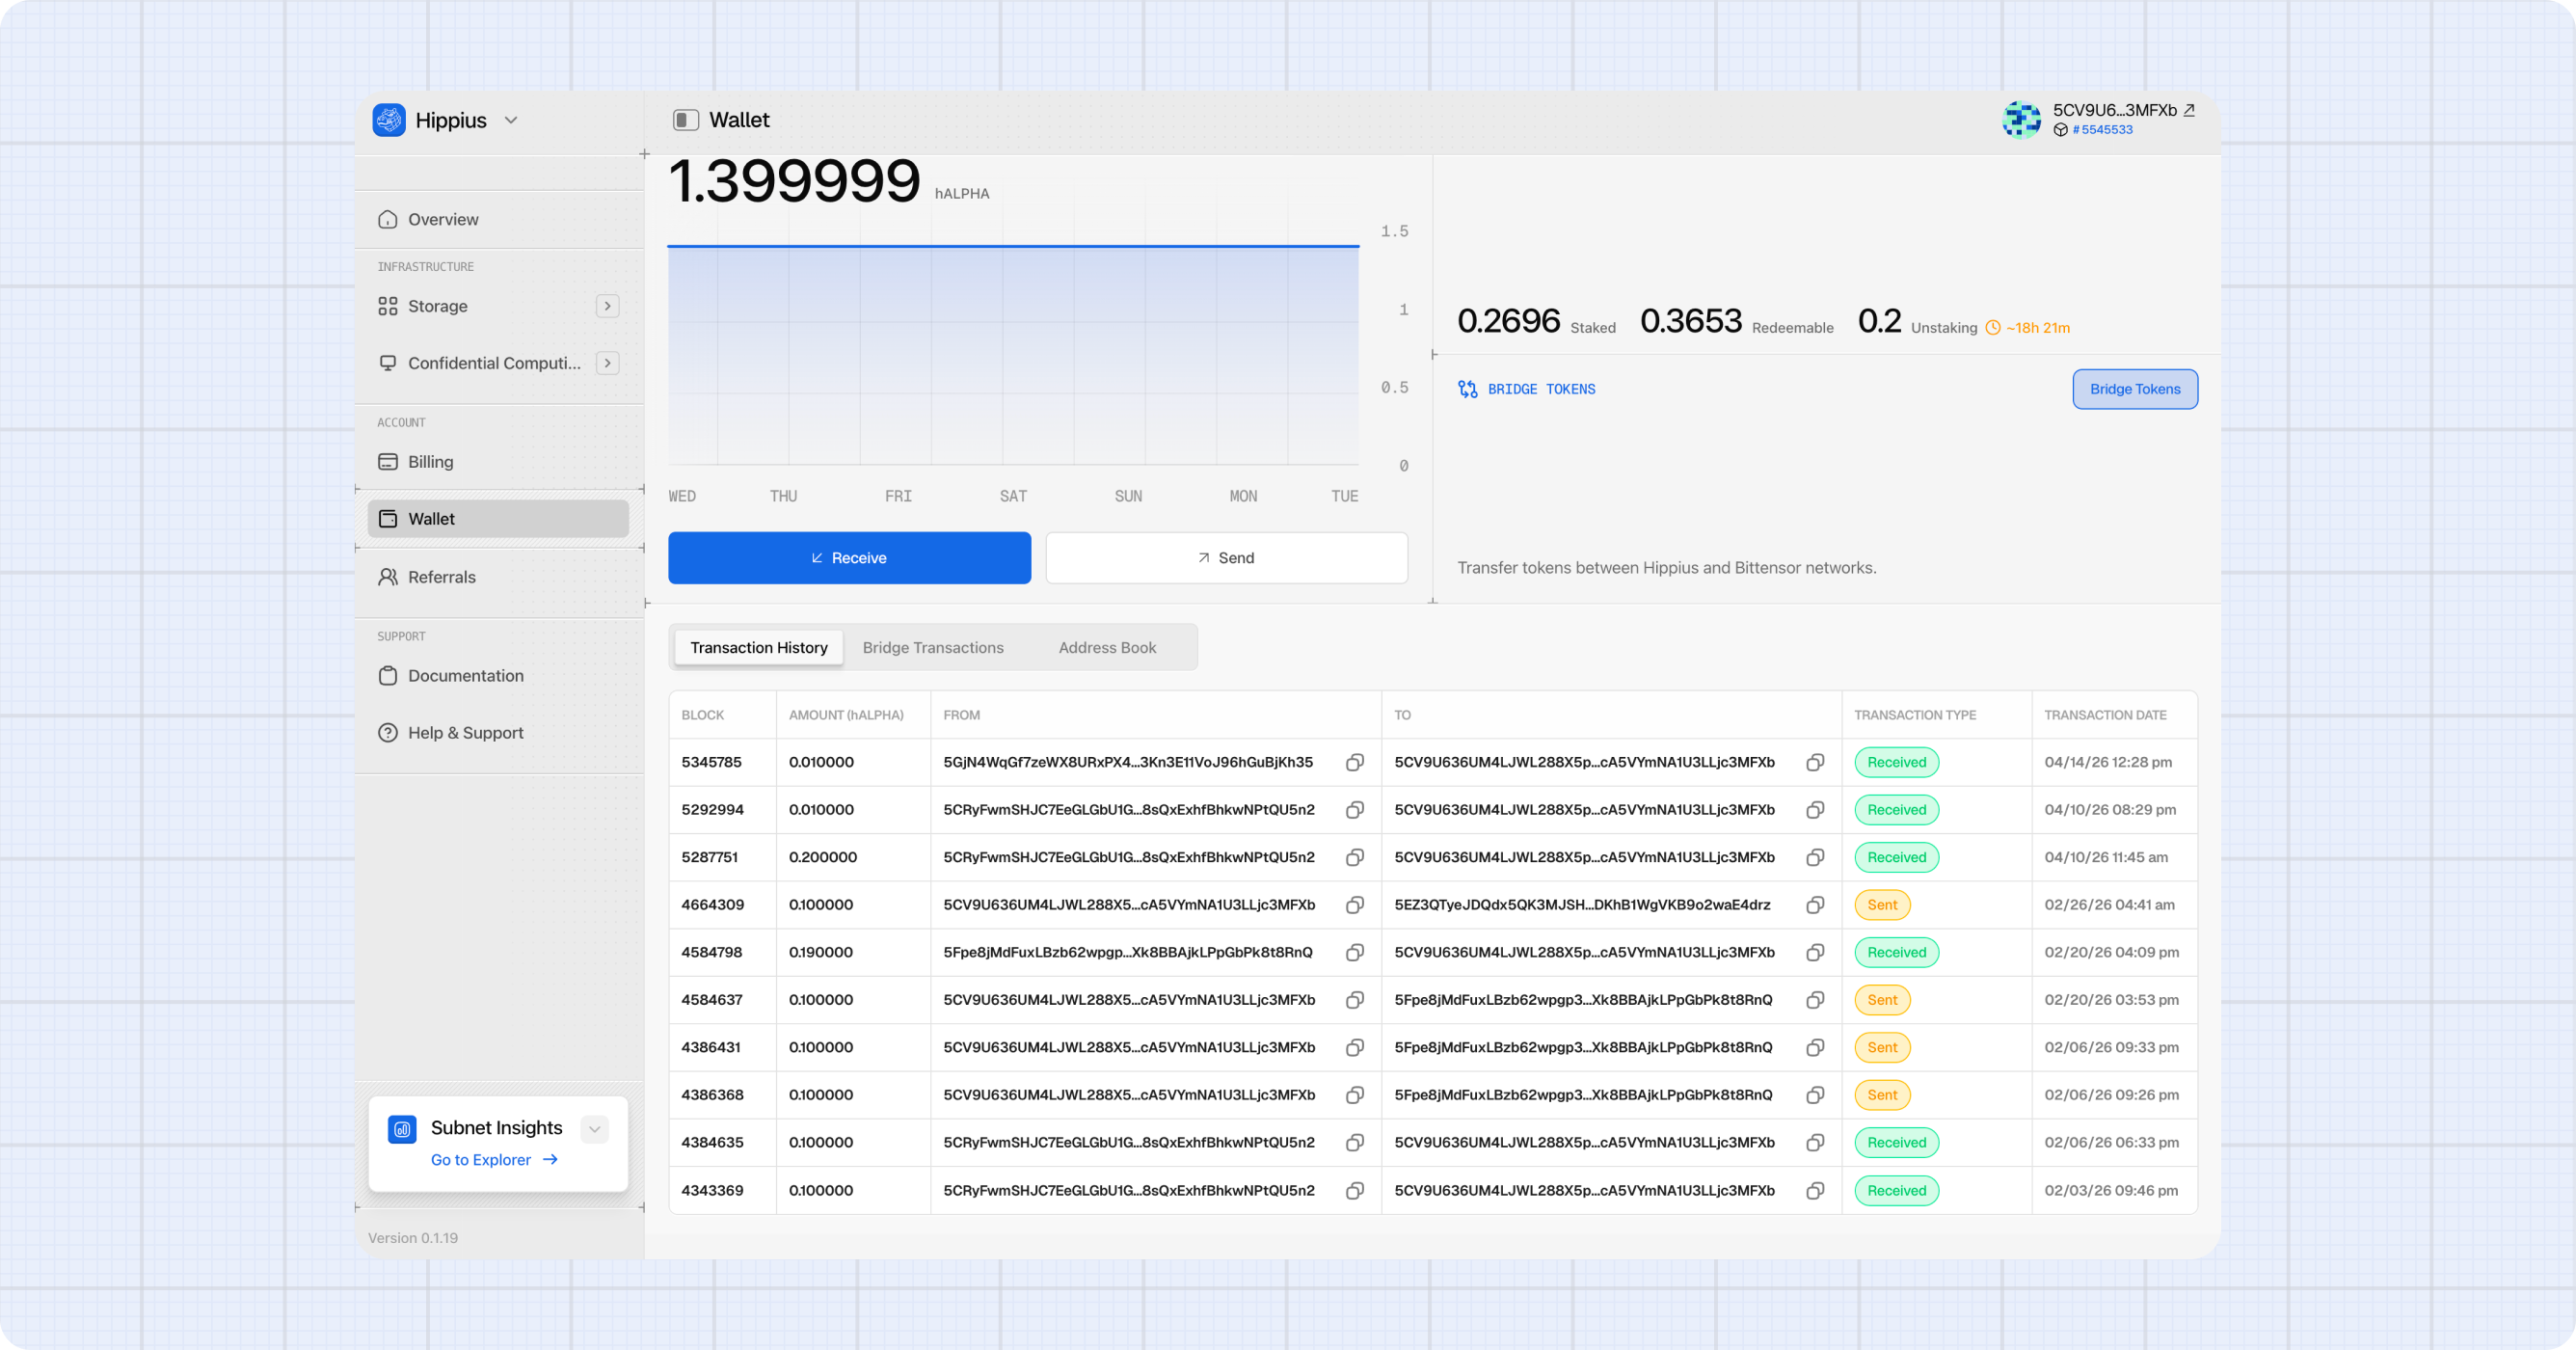
Your Balance
The My Balance panel on the left shows your current spendable hAlpha balance with a line chart of your balance over time.
Use the time range selector (THIS WEEK / LAST 30 DAYS / LAST 60 DAYS / 1 YEAR / MAX) to change the chart window. Hover over any point on the chart to see the exact balance at that moment.
Sending hAlpha
- Click Send below the balance chart.
- Enter the recipient address, or click Address Book to pick a saved contact.
- Enter the amount. Click MAX to send your full transferable balance minus the gas fee.
- Review the summary: amount, estimated fee, and recipient.
- Click Send. Your wallet extension opens for signature approval.
- Approve in the extension. A toast confirms when the transaction is finalized, with a link to the block explorer.
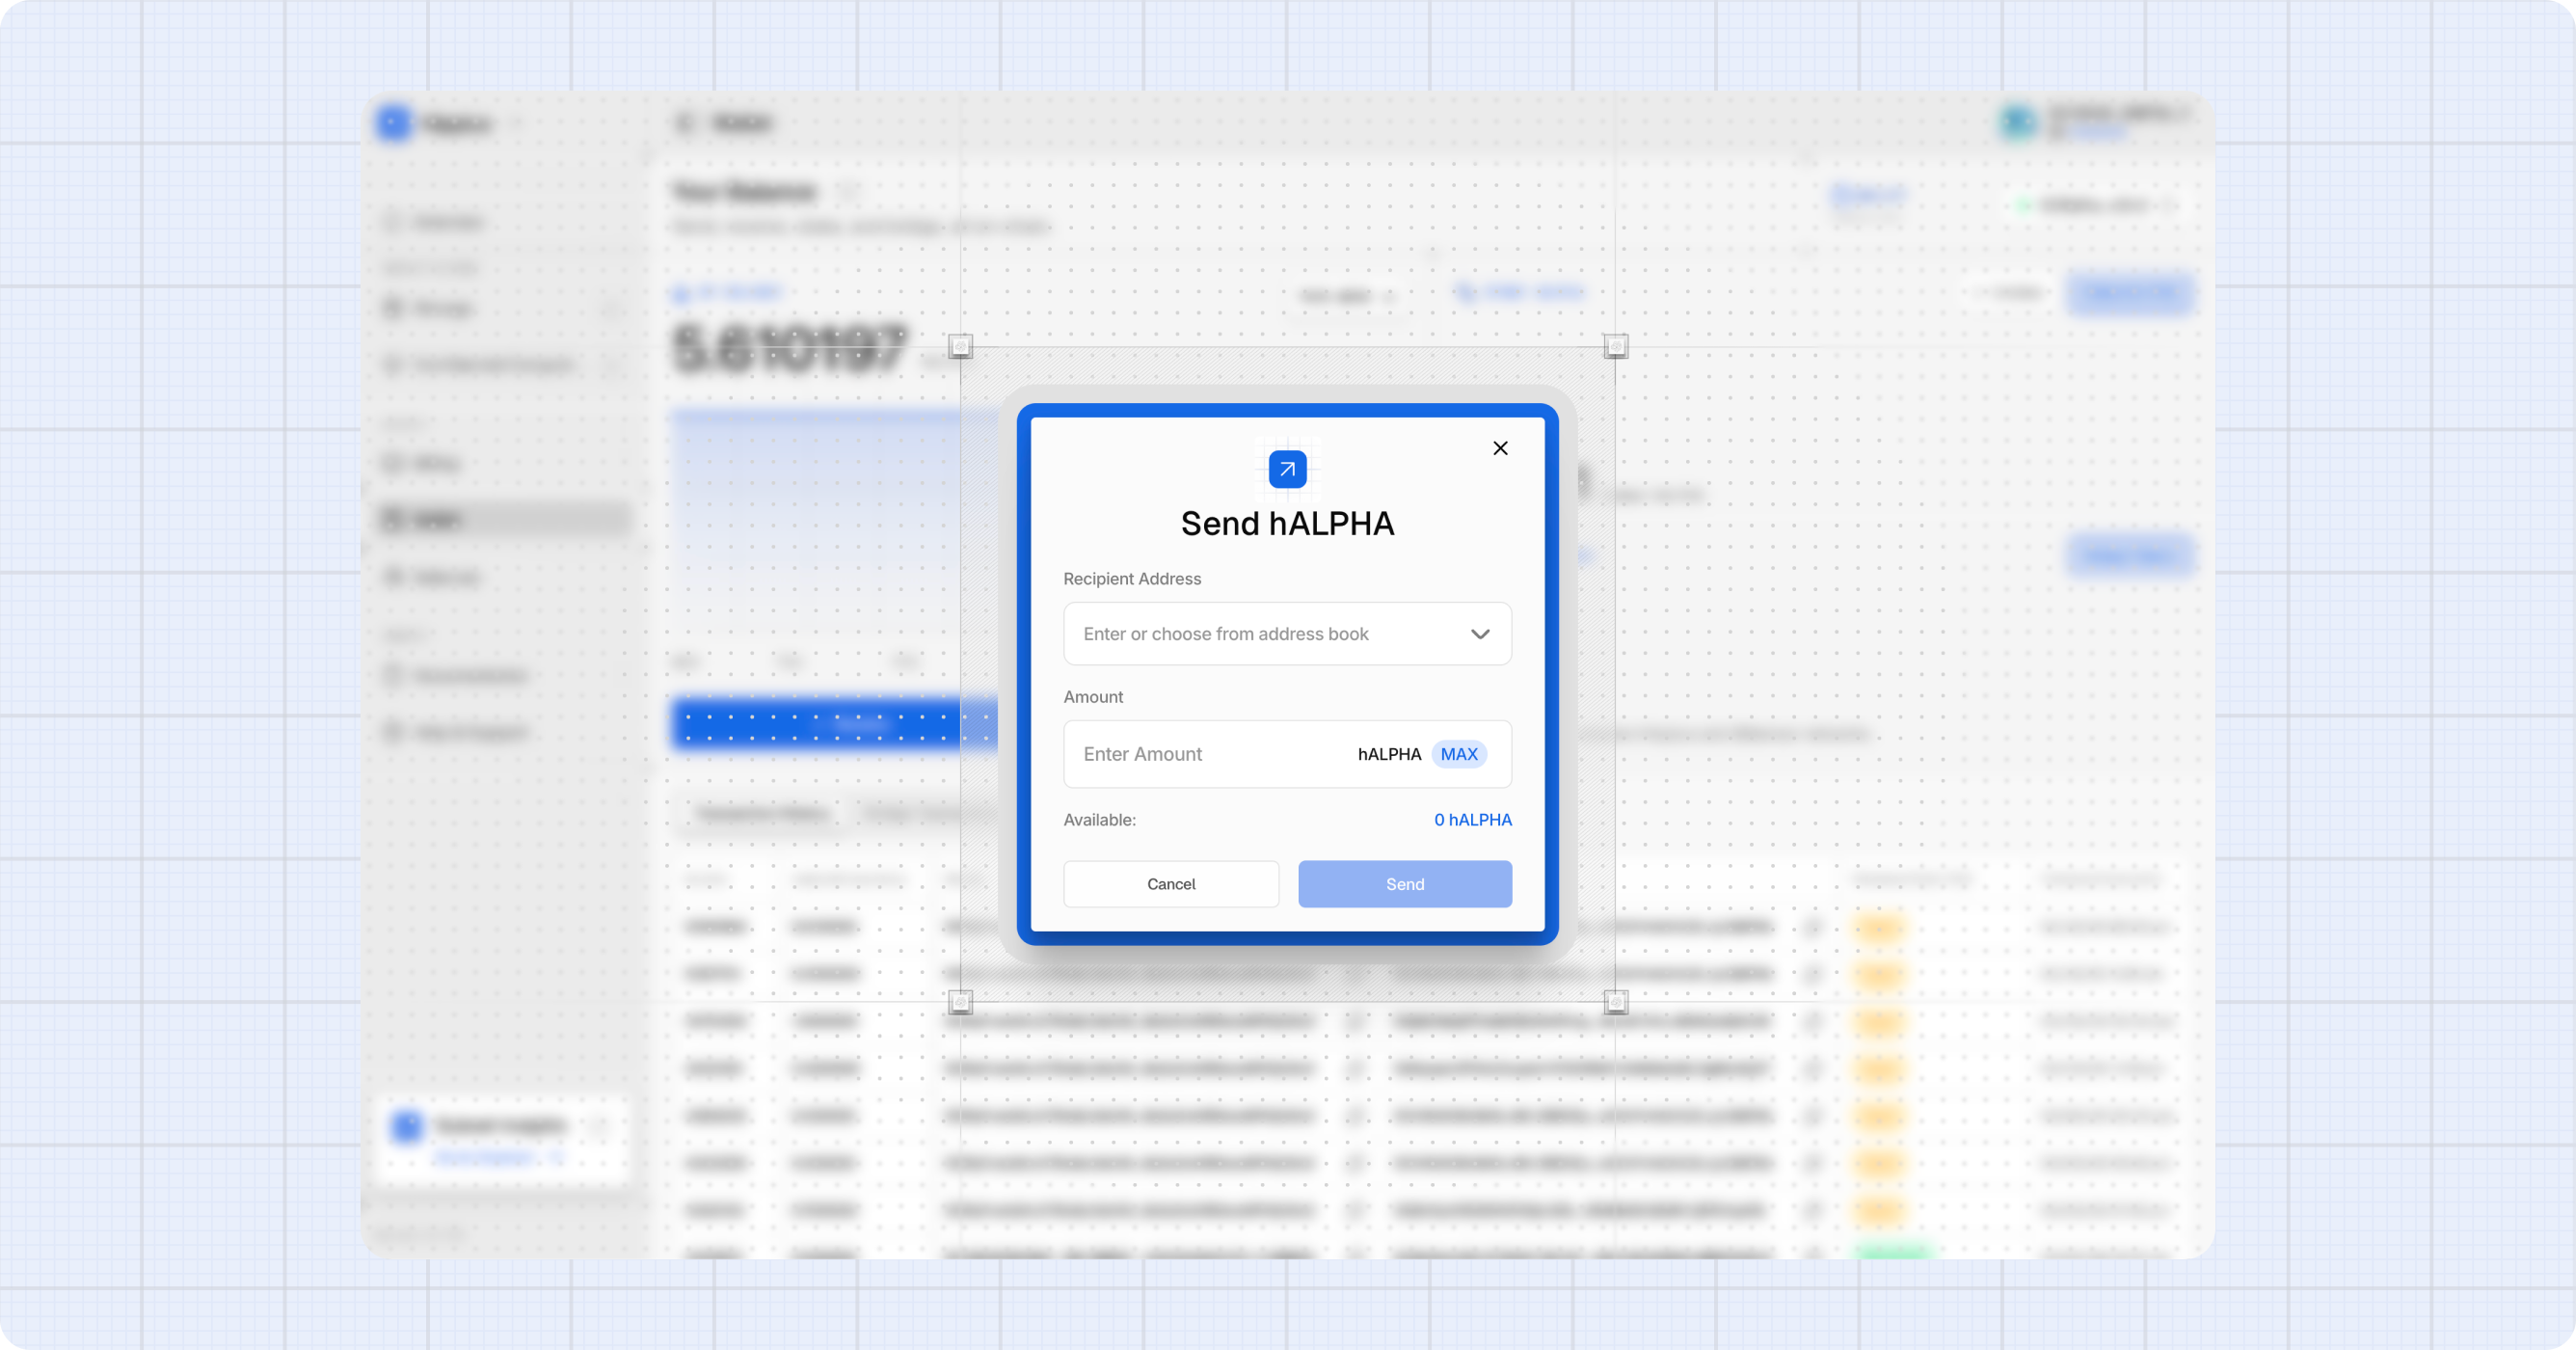
The Max button subtracts the estimated gas fee so the transaction won't fail. Your transferable balance excludes any staked, unstaking, or redeemable amounts.
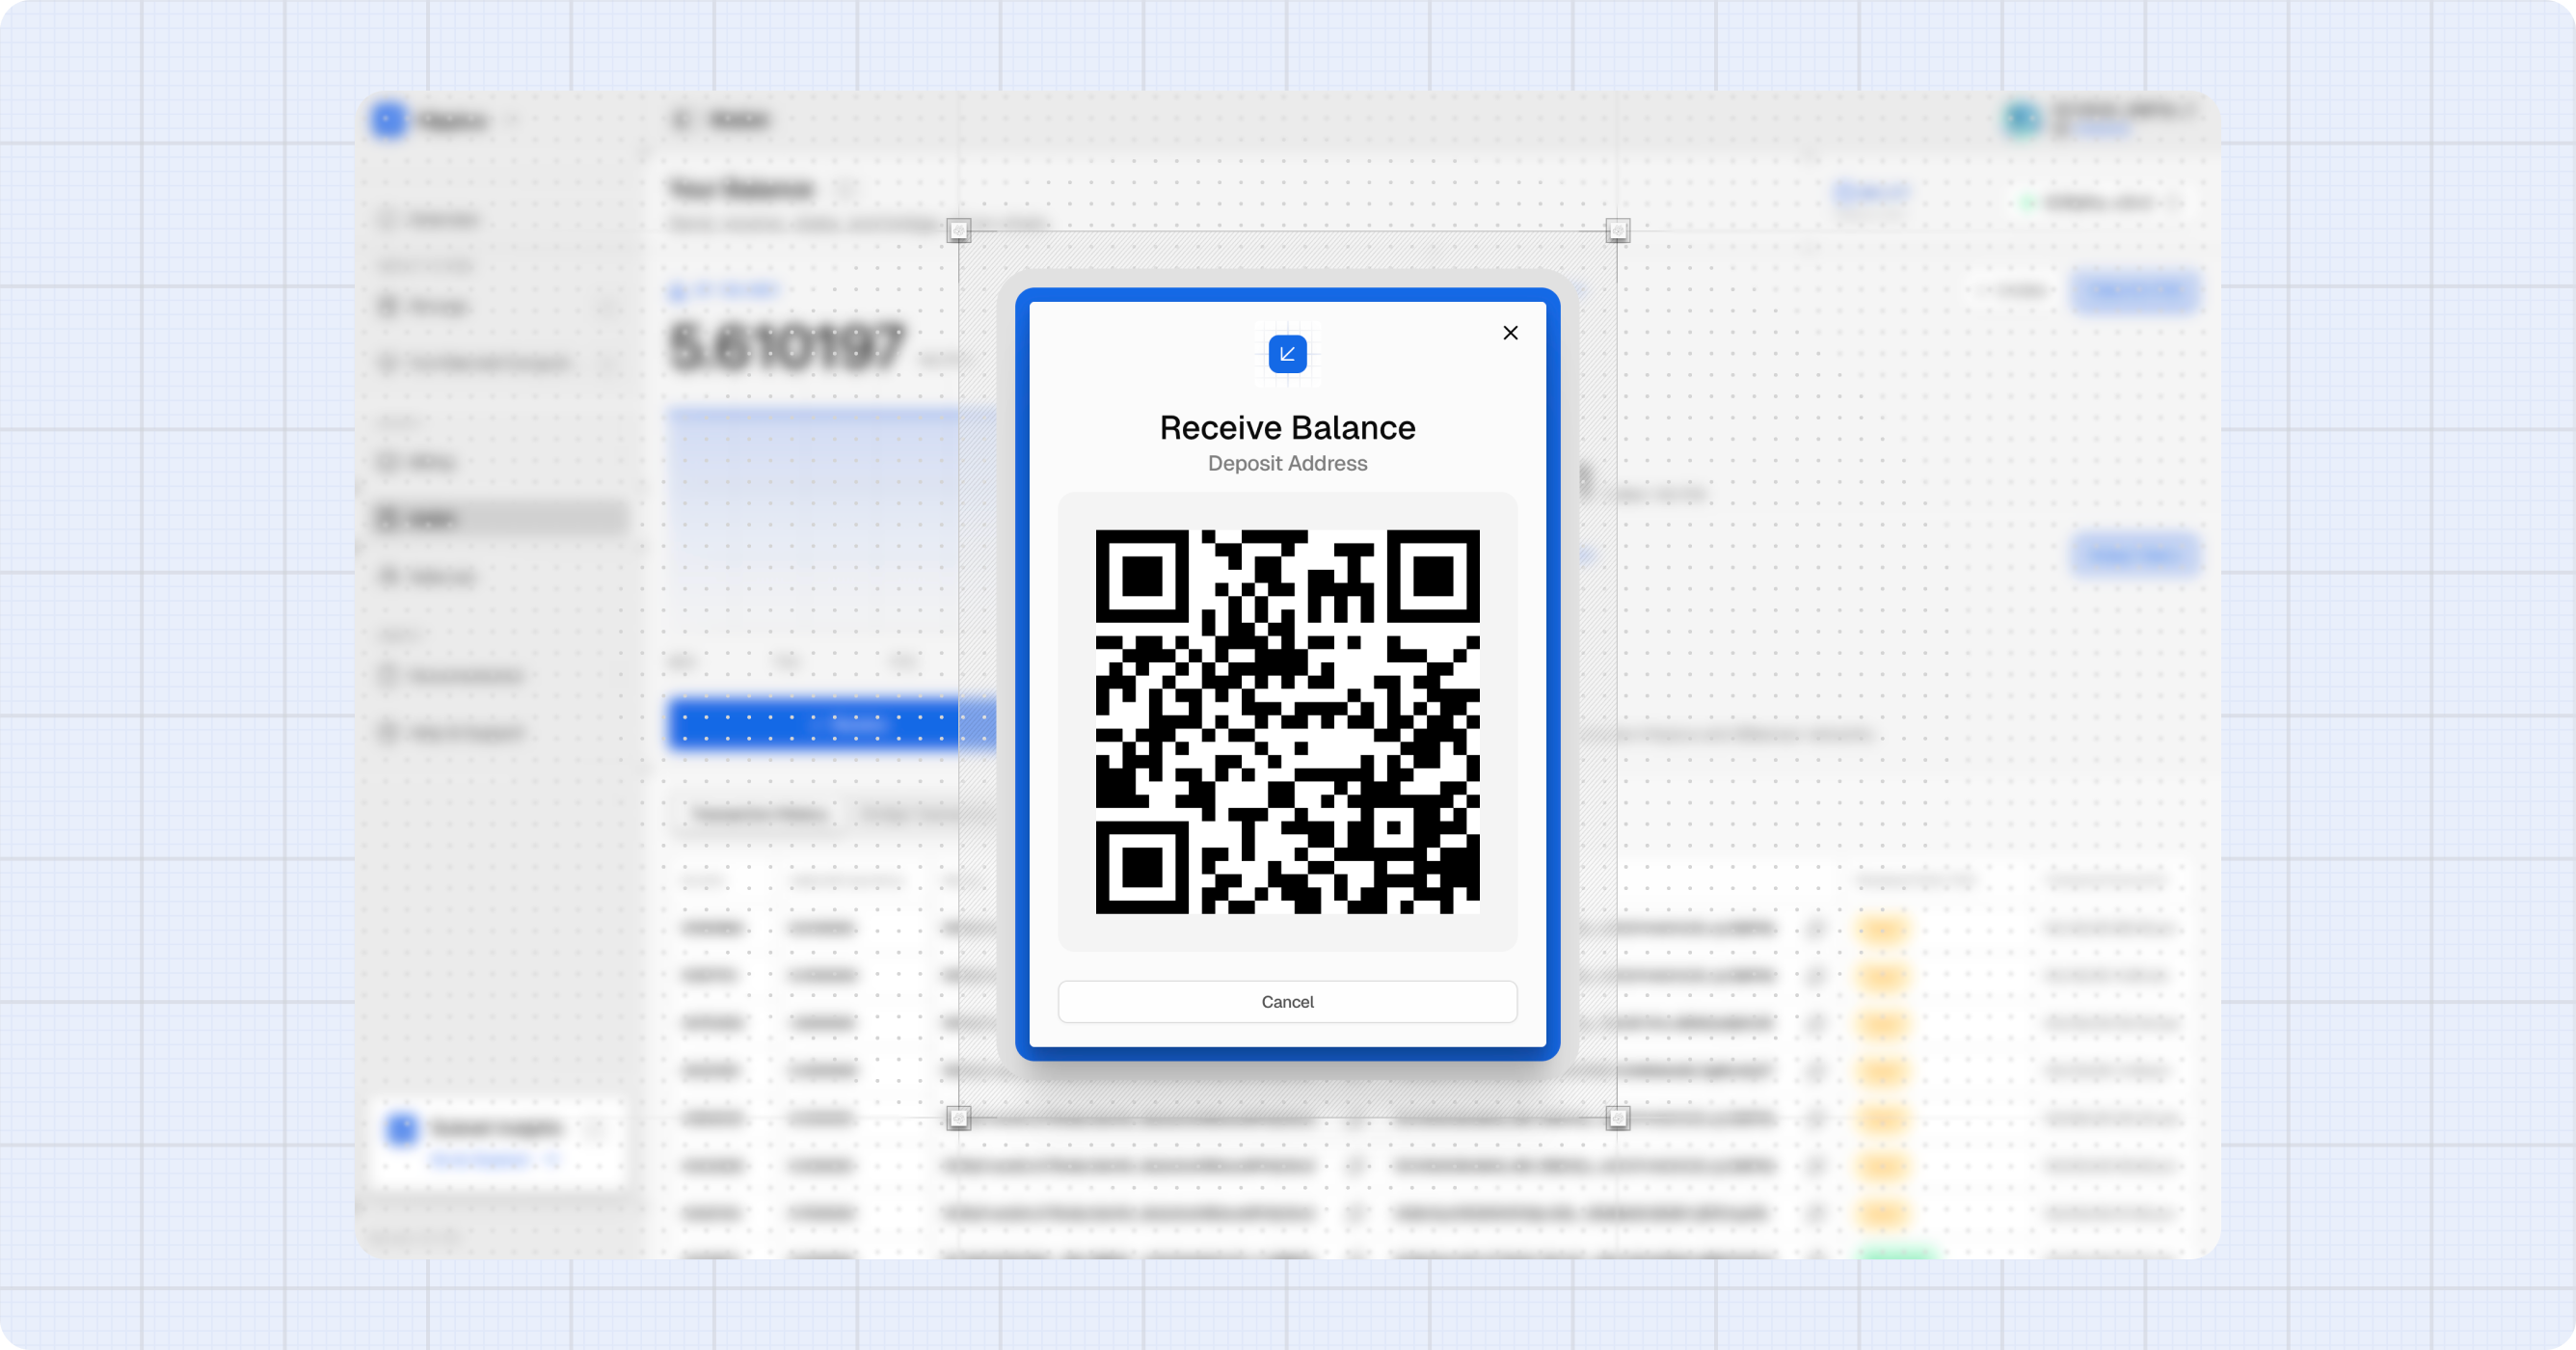
Receiving hAlpha
- Click Receive below the balance chart.
- The dialog shows your deposit address as a QR code and plain text.
- Share the QR code with the sender, or click the copy icon to grab the address.
- The new balance appears within a block or two after the transfer confirms.
Staking hAlpha
The Stake hAlpha panel shows your current staking position. Depending on what's active, you'll see up to three entries:
| Entry | What it means |
|---|---|
| Staked | Bonded to validators. Earns staking rewards. |
| Redeemable | Unbonded and ready to withdraw to your free balance. |
| Unstaking | In the unbonding period. The clock icon shows the time remaining. |
When all three entries are showing at once, the values use a smaller font to keep everything on one line.
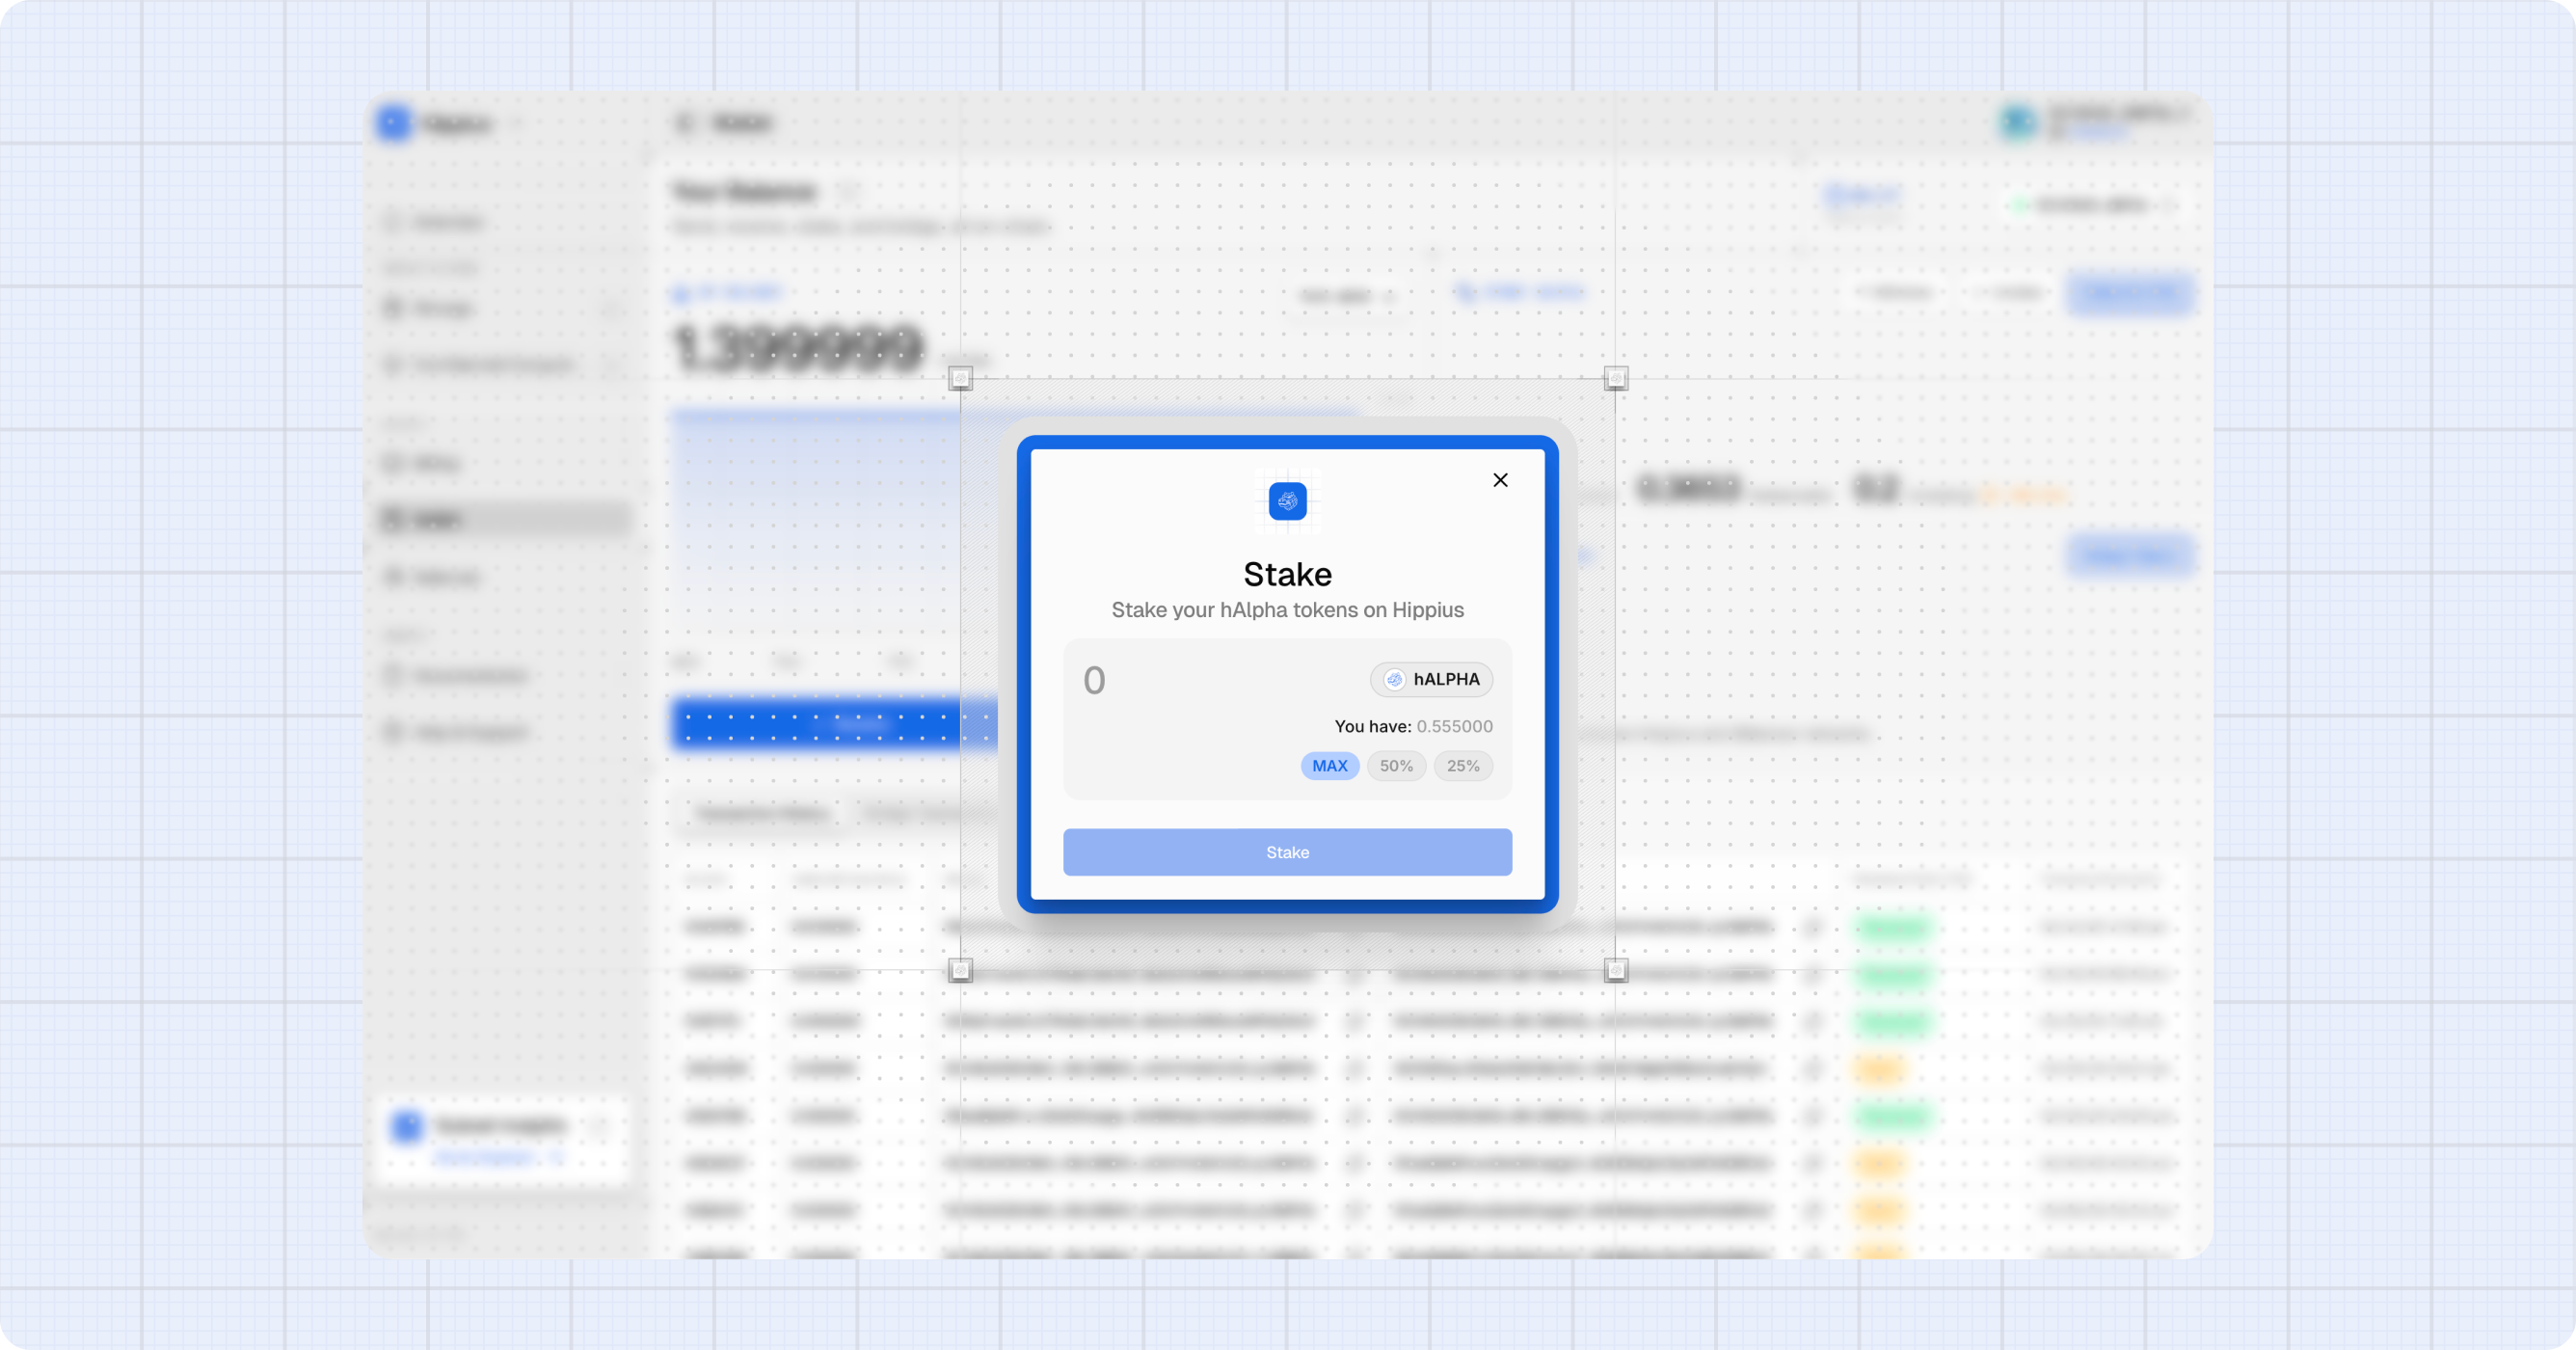
Staking
- Click Stake hALPHA in the top right of the Stake panel.
- Enter the amount to stake (or click MAX).
- Click Stake, then review the confirmation screen showing the amount and estimated gas fee.
- Click Confirm Staking and approve the signature in your extension.
- A success screen confirms once the transaction finalizes.
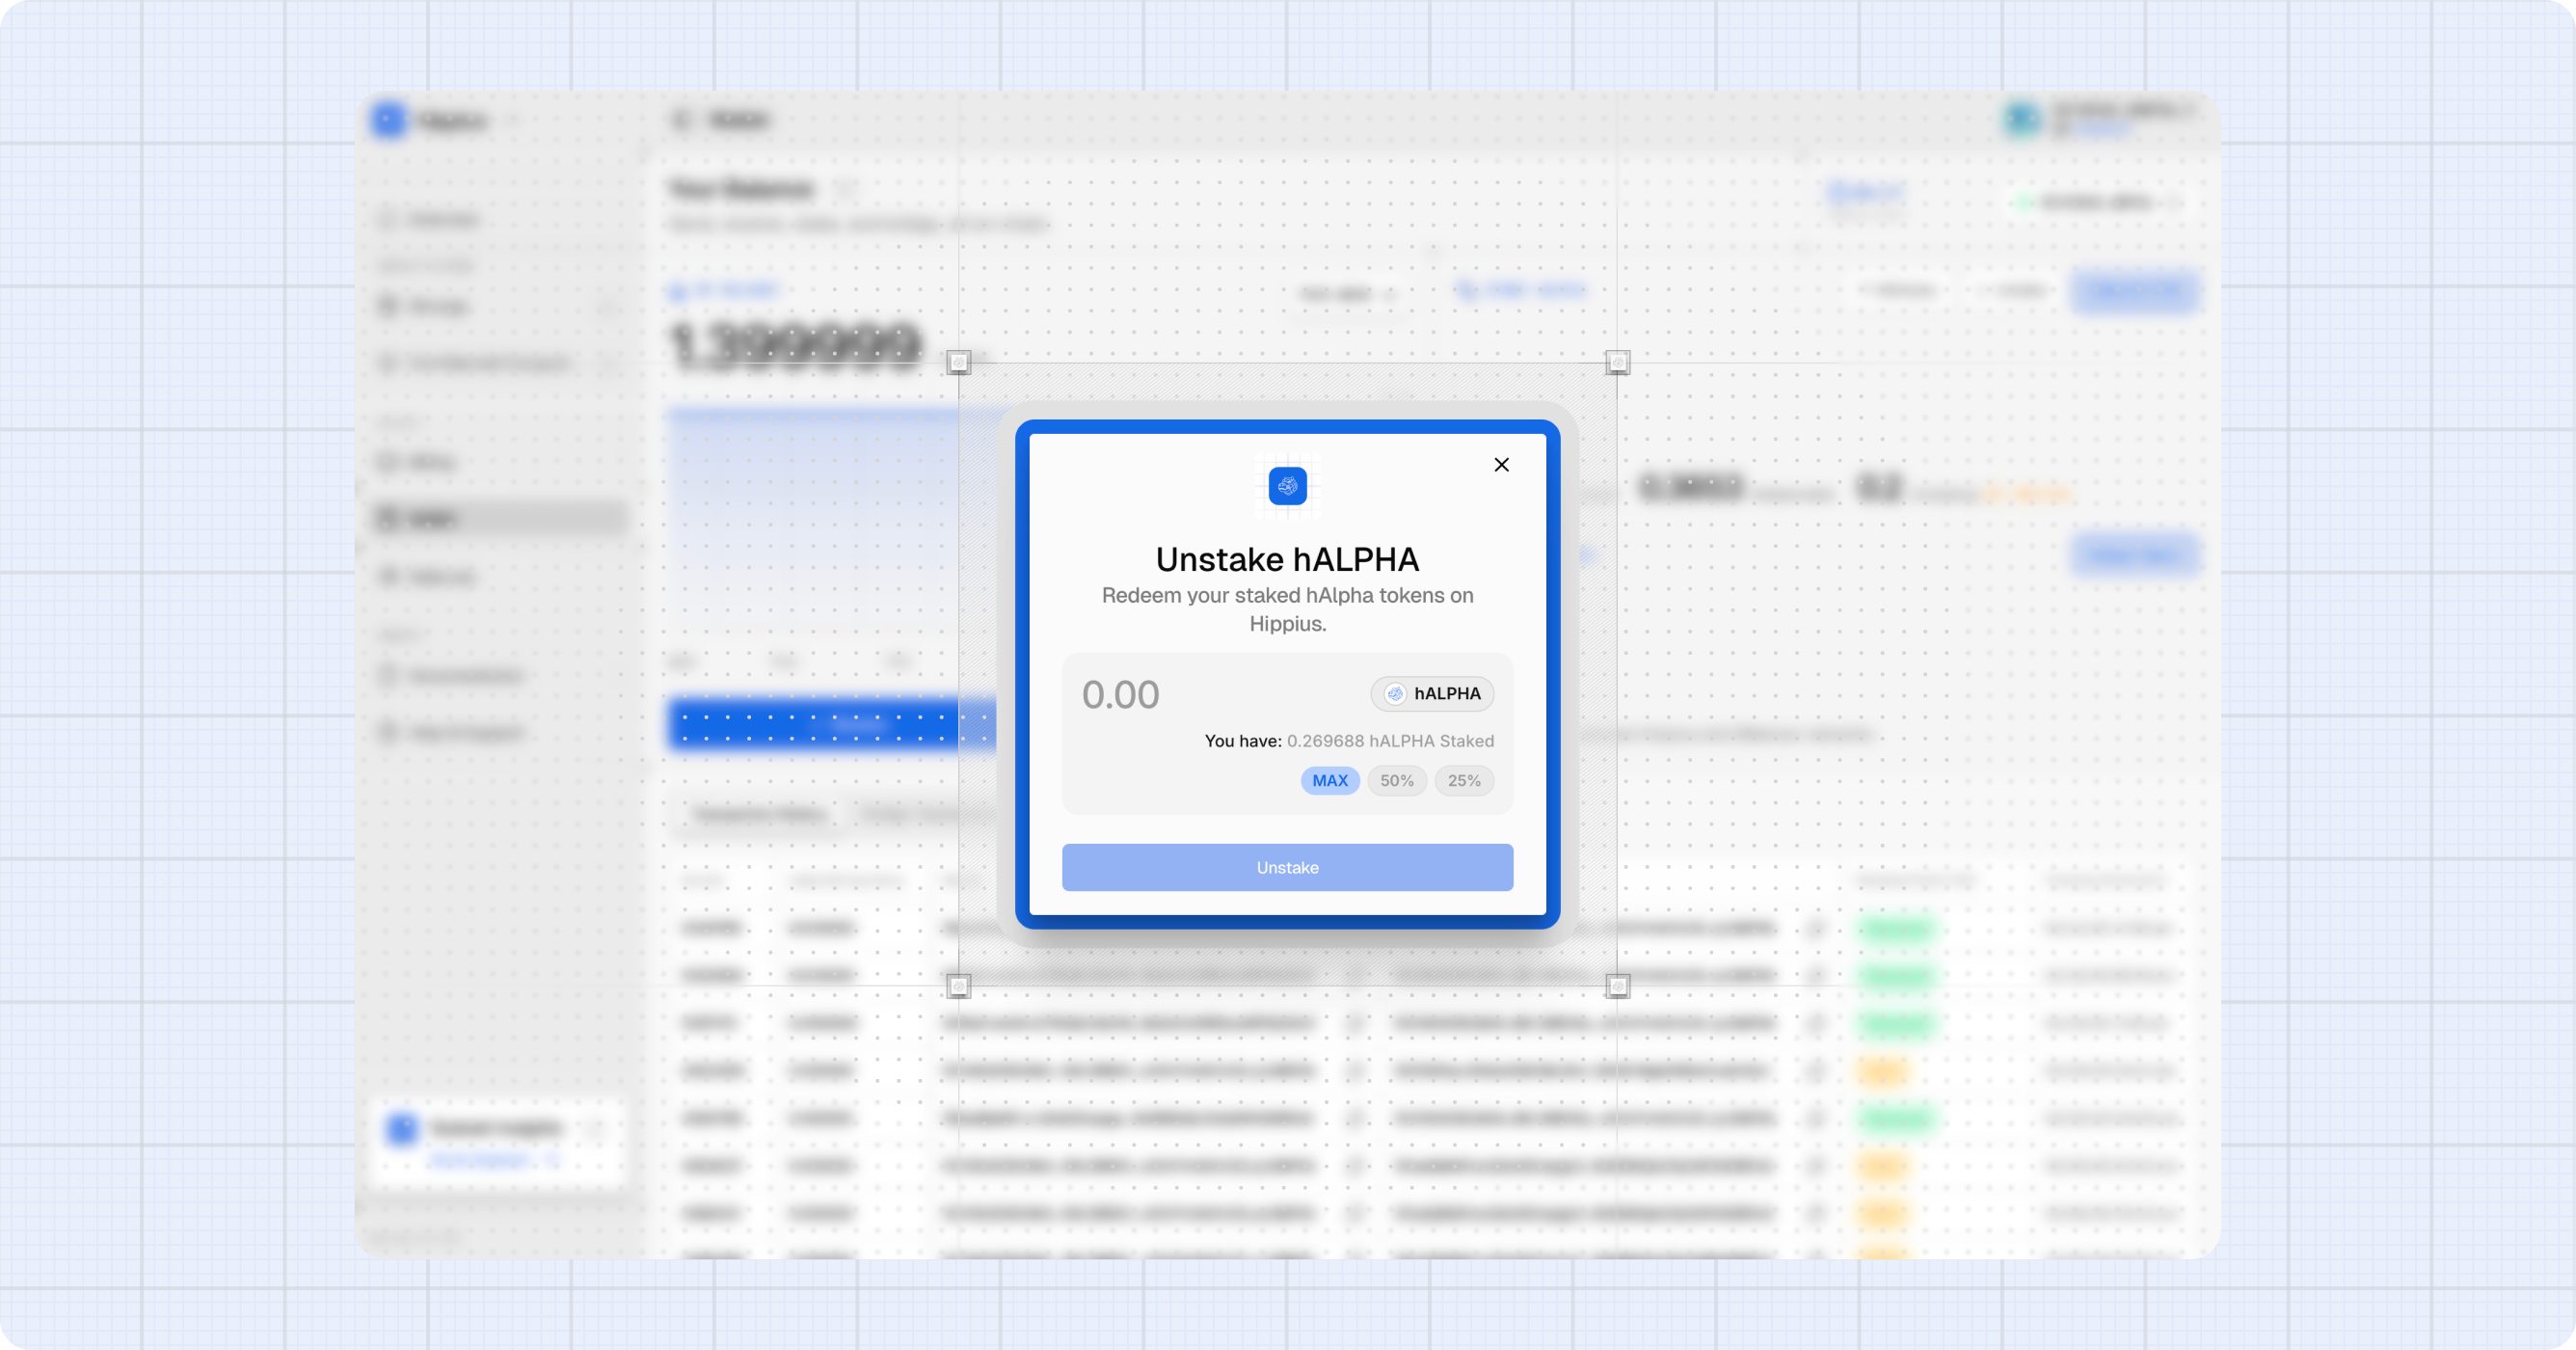
Unstaking
The Unstake button appears only when you have a staked balance.
- Click Unstake.
- Enter the amount to unstake (or click MAX).
- Click Unstake, review the confirmation, then click Confirm Unstake.
- Approve the signature in your extension.
The unstaked amount enters the Unstaking state. After the unbonding period ends (shown by the clock icon), it moves to Redeemable.
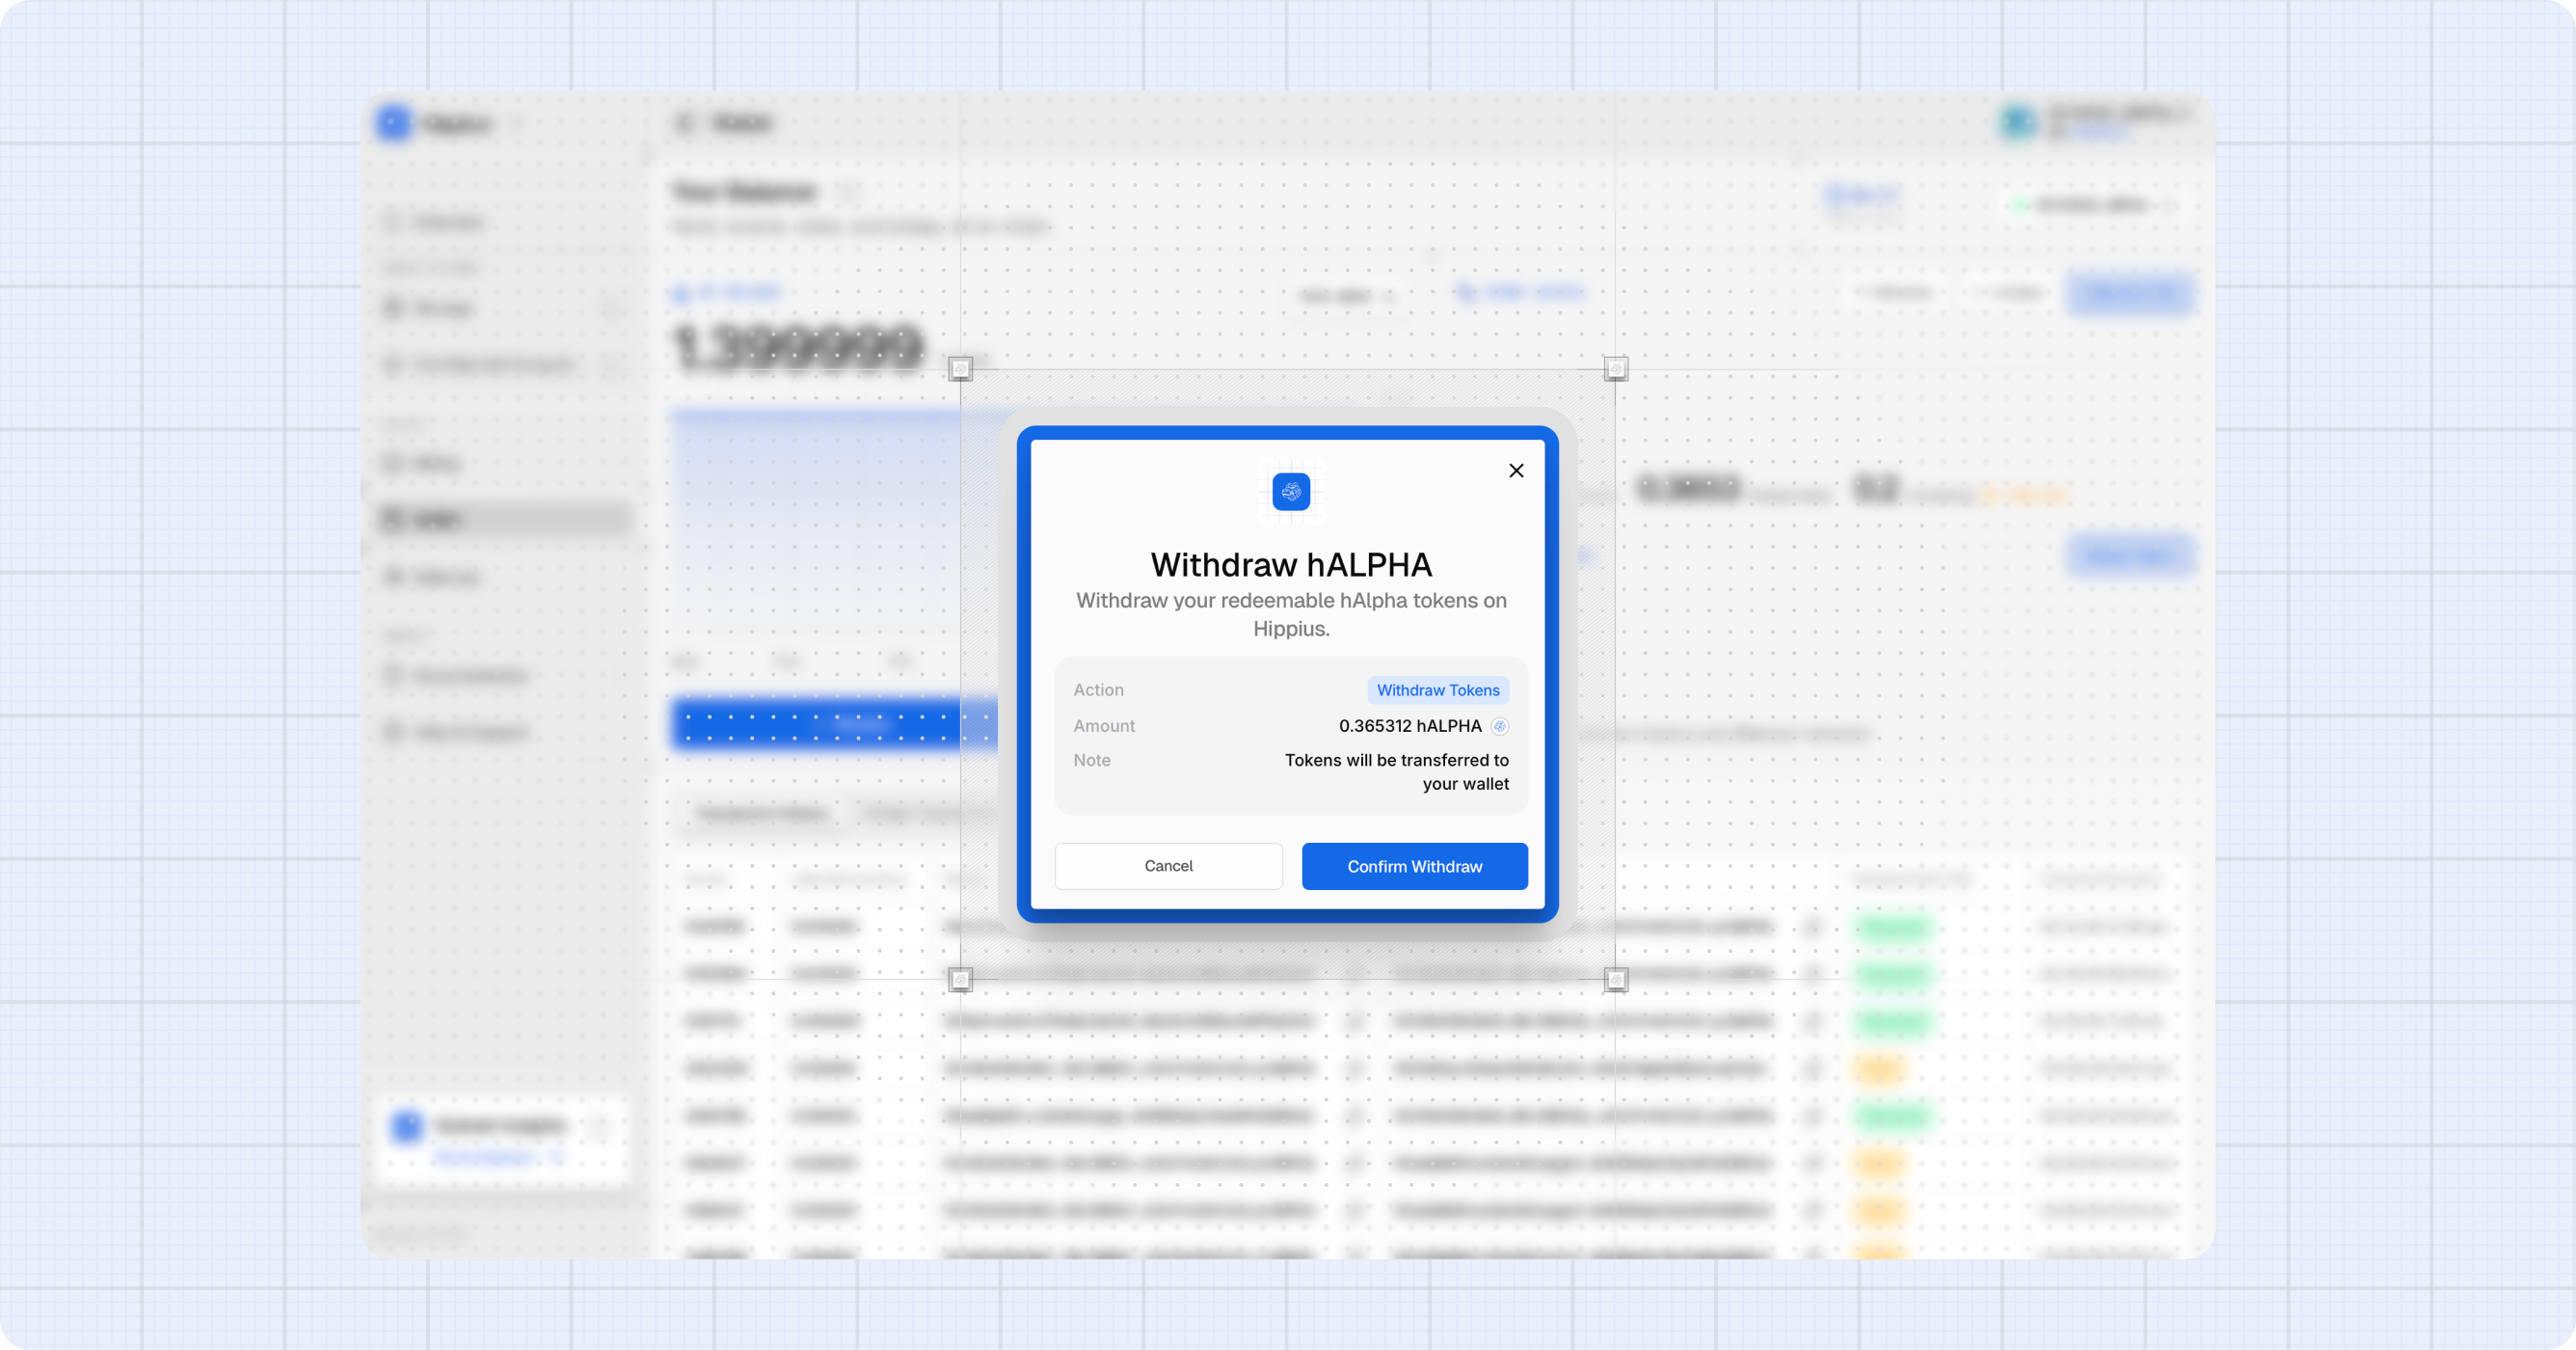
Withdrawing
The Withdraw button appears only when you have a redeemable balance.
- Click Withdraw.
- Confirm the amount (your full redeemable balance) and click Confirm Withdraw.
- Approve the signature. The amount moves into your free balance.
The clock next to Unstaking shows a tooltip with each unbonding chunk listed separately, including the remaining time and amount for each. Useful if you've unstaked at different times and the chunks have different unlock dates.
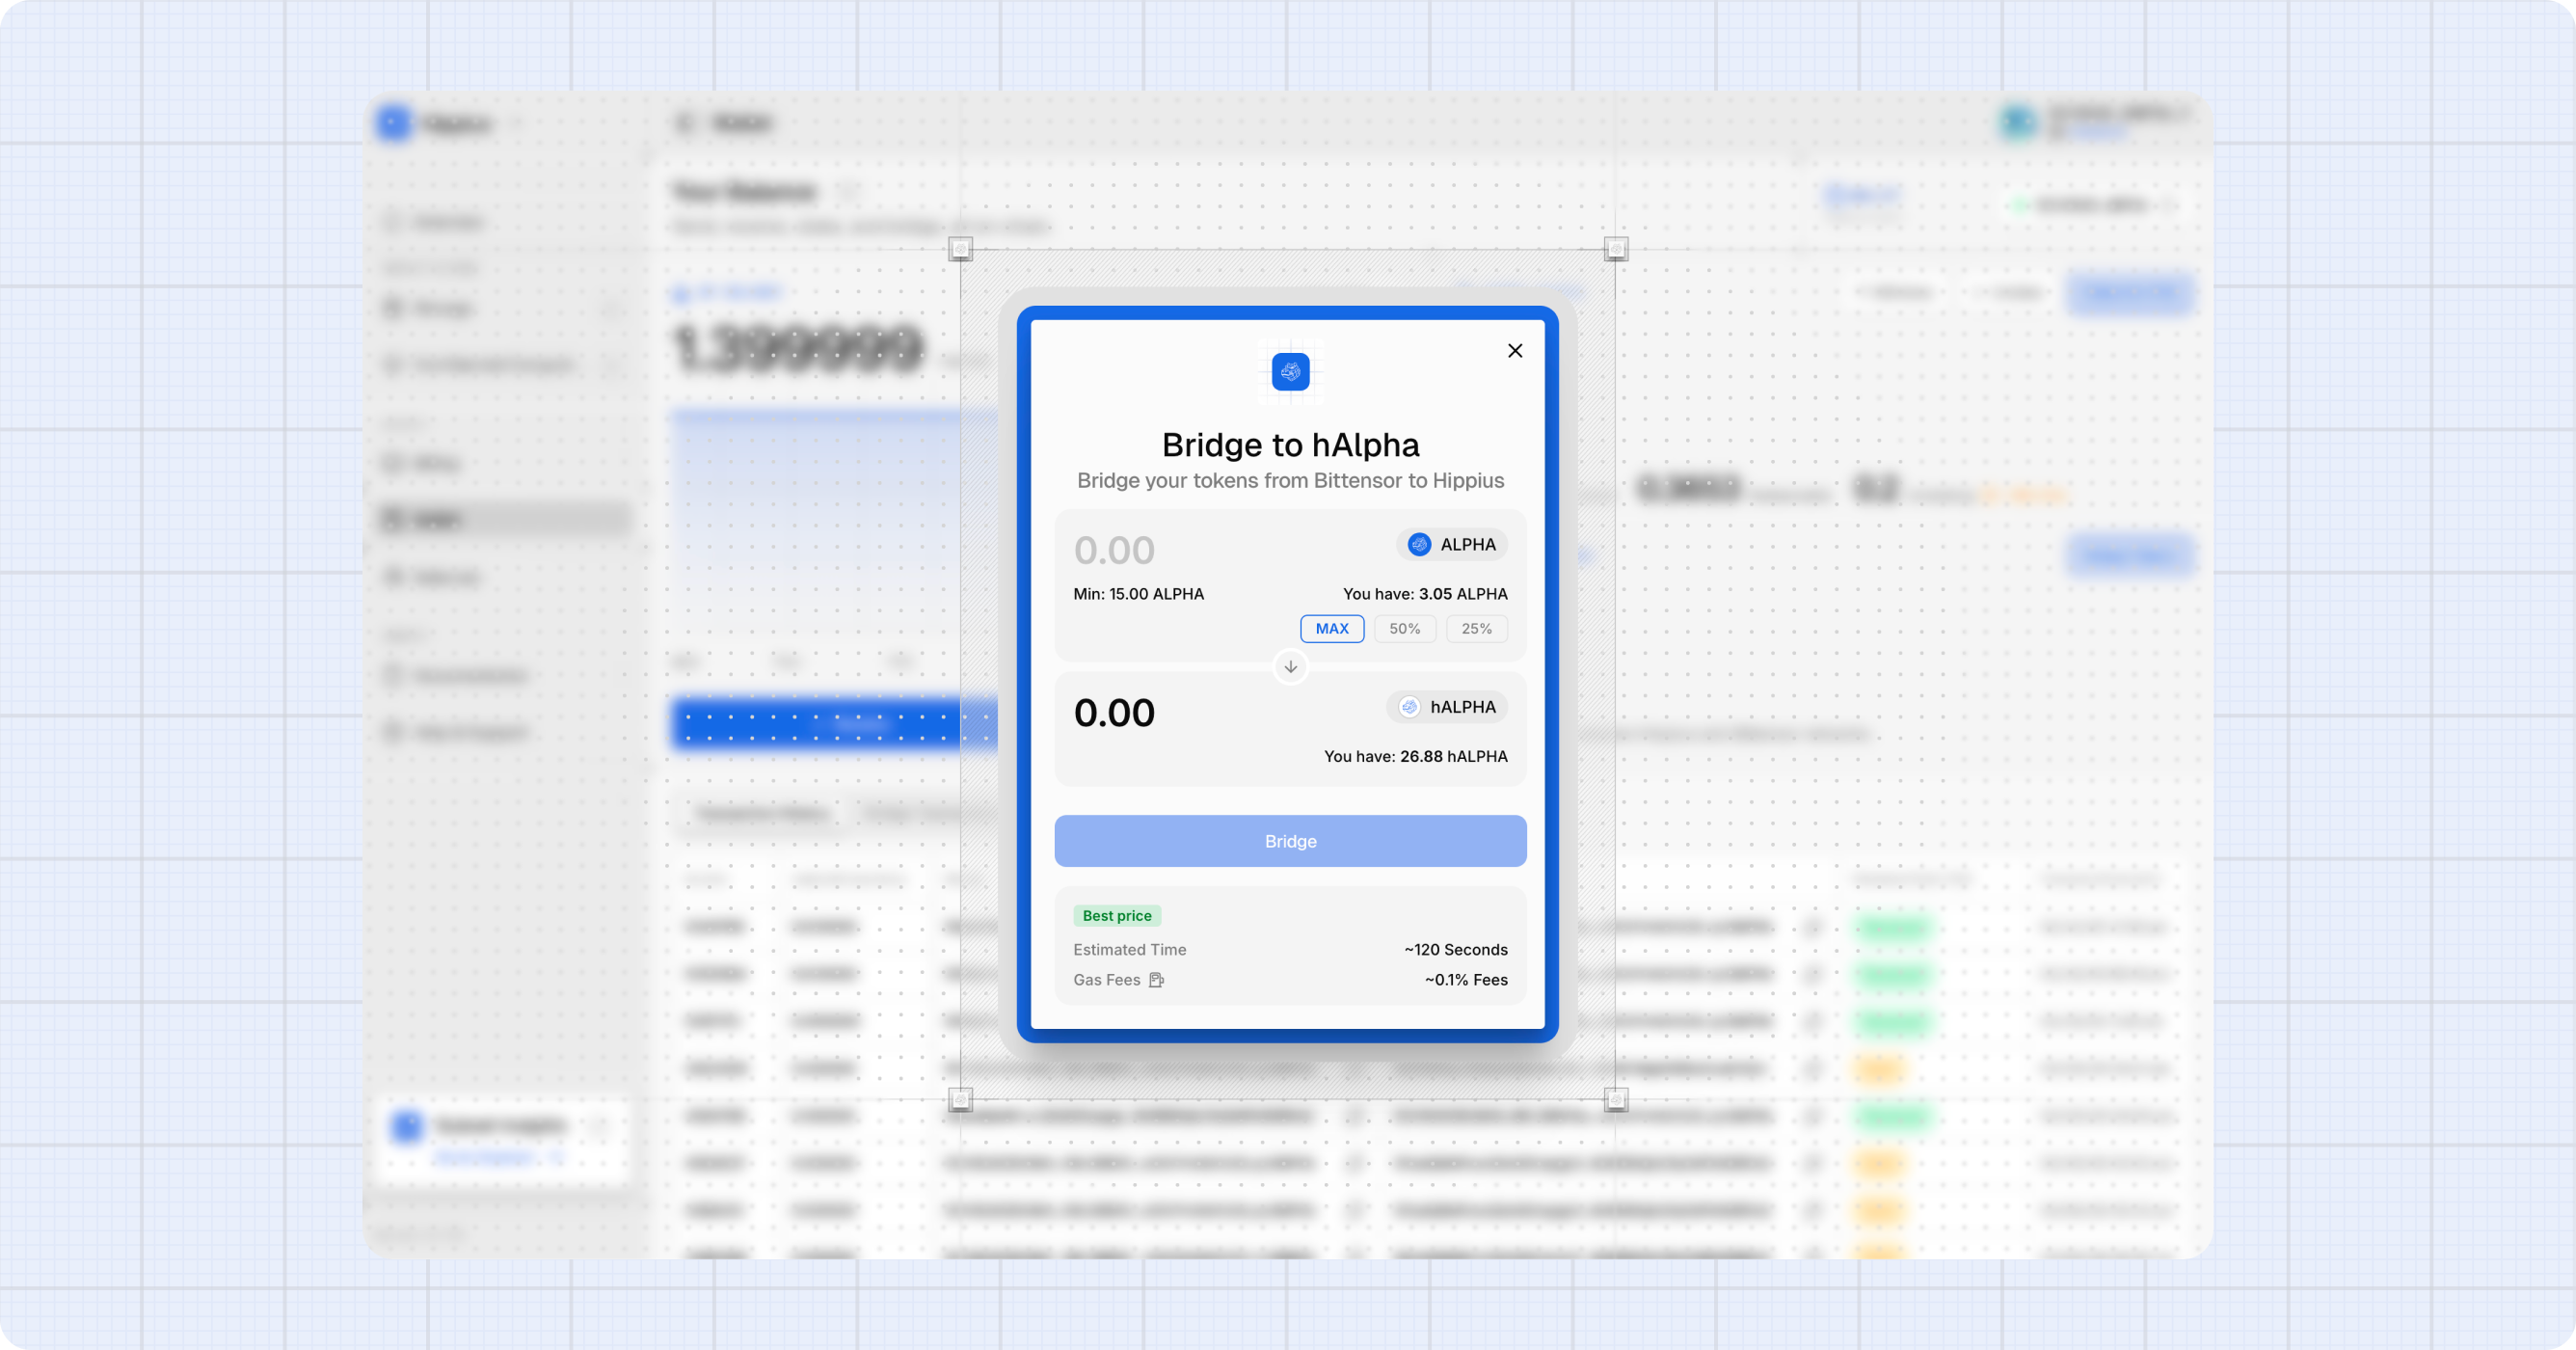
Bridging Tokens
The Bridge Tokens button lets you move tokens between the Hippius and Bittensor networks. hAlpha and Bittensor Alpha are pegged 1:1.
- Click Bridge Tokens in the Stake panel.
- Choose the direction: Bridge Alpha to hAlpha or Bridge hAlpha to Alpha.
- Enter the amount to bridge.
- Review the estimated time, bridge fee, and destination address.
- Click Bridge, then Confirm Bridge on the confirmation screen.
- Approve the signature in your extension.
- The dialog tracks progress and shows a success screen when the destination chain confirms.
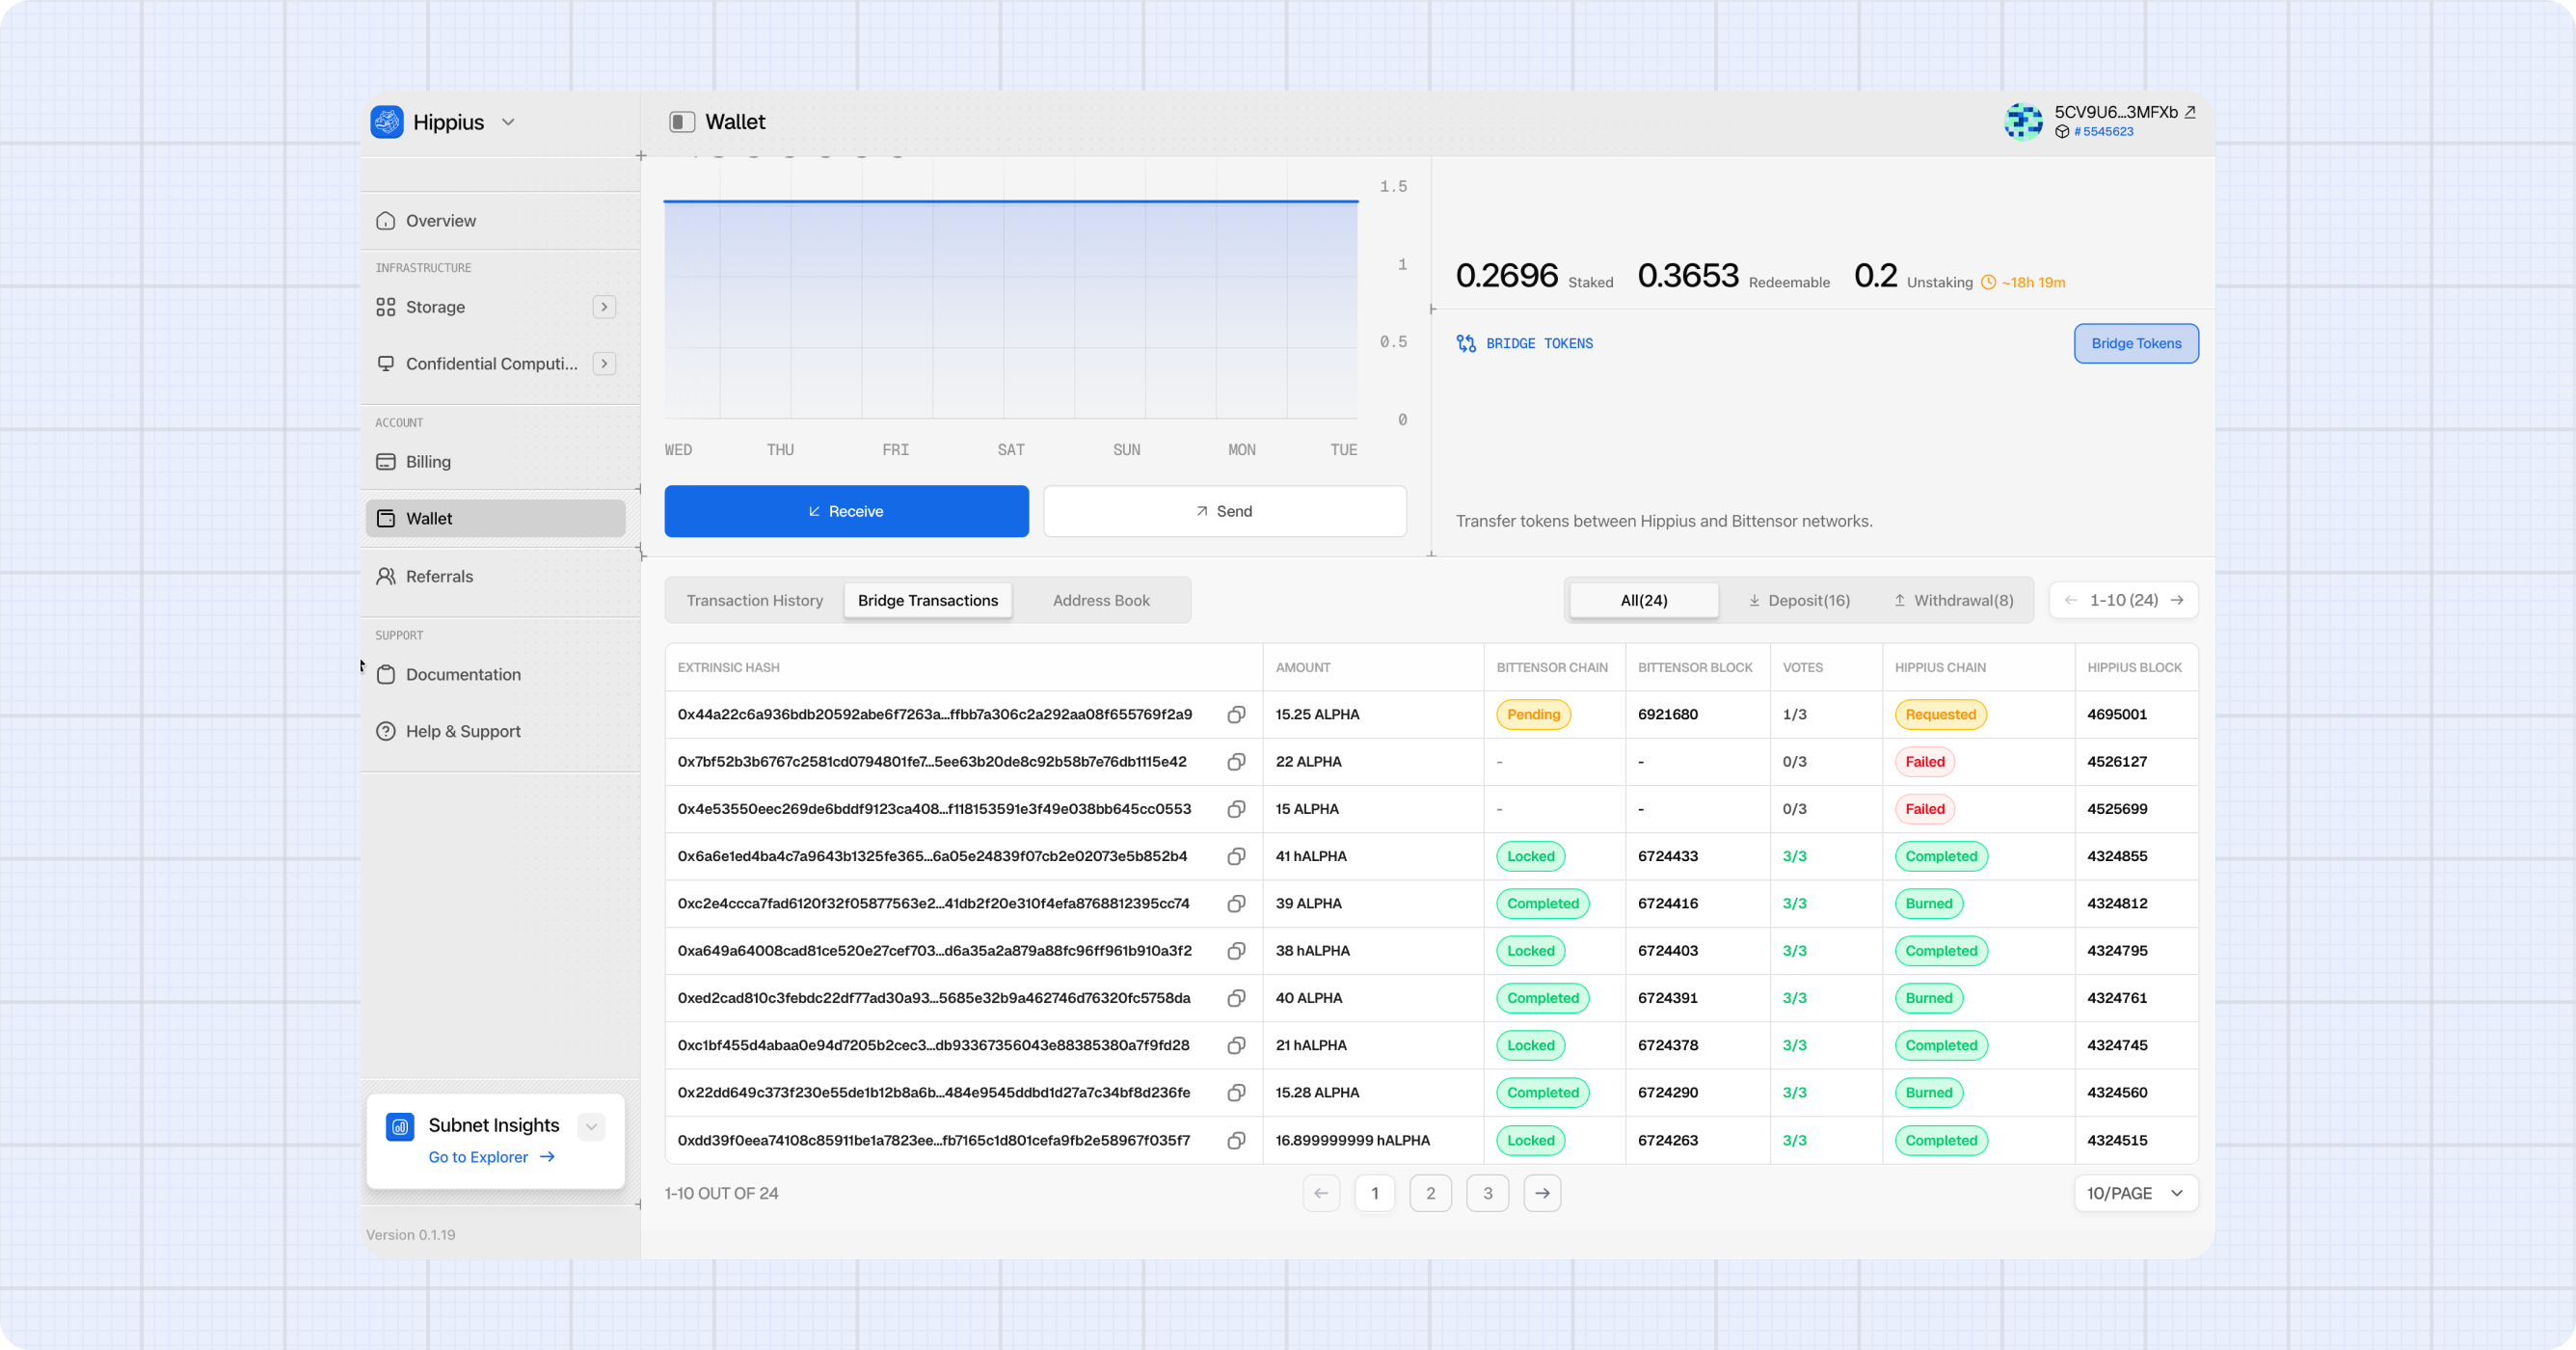
You can track in flight bridge operations in the Bridge Transactions tab at the bottom of the page.
You need a small amount of TAO on the source side to cover gas. If you see "Failed to add escrow proxy. Please ensure you have enough TAO for gas fees", top up TAO in your source wallet and try again.
For more on the bridge, see Bridge Tokens.
Transaction History
The Transaction History tab shows every incoming and outgoing hAlpha transfer for your active wallet.
| Column | What it shows |
|---|---|
| Block | The block number. Click to open it on hipstats. |
| Amount (hALPHA) | The transfer amount. |
| From / To | Sender and recipient addresses (truncated, with copy icons). |
| Transaction Type | Sent or Received, relative to your active wallet. |
| Date | Local time timestamp. |
Use the search box to filter by address, click any column header to sort, and use pagination to move between pages.
Bridge Transactions
The Bridge Transactions tab lists every bridge operation. Each row shows the direction, amount, status (Pending / Completed / Failed), source and destination transaction hashes with explorer links, and the date the bridge was initiated.
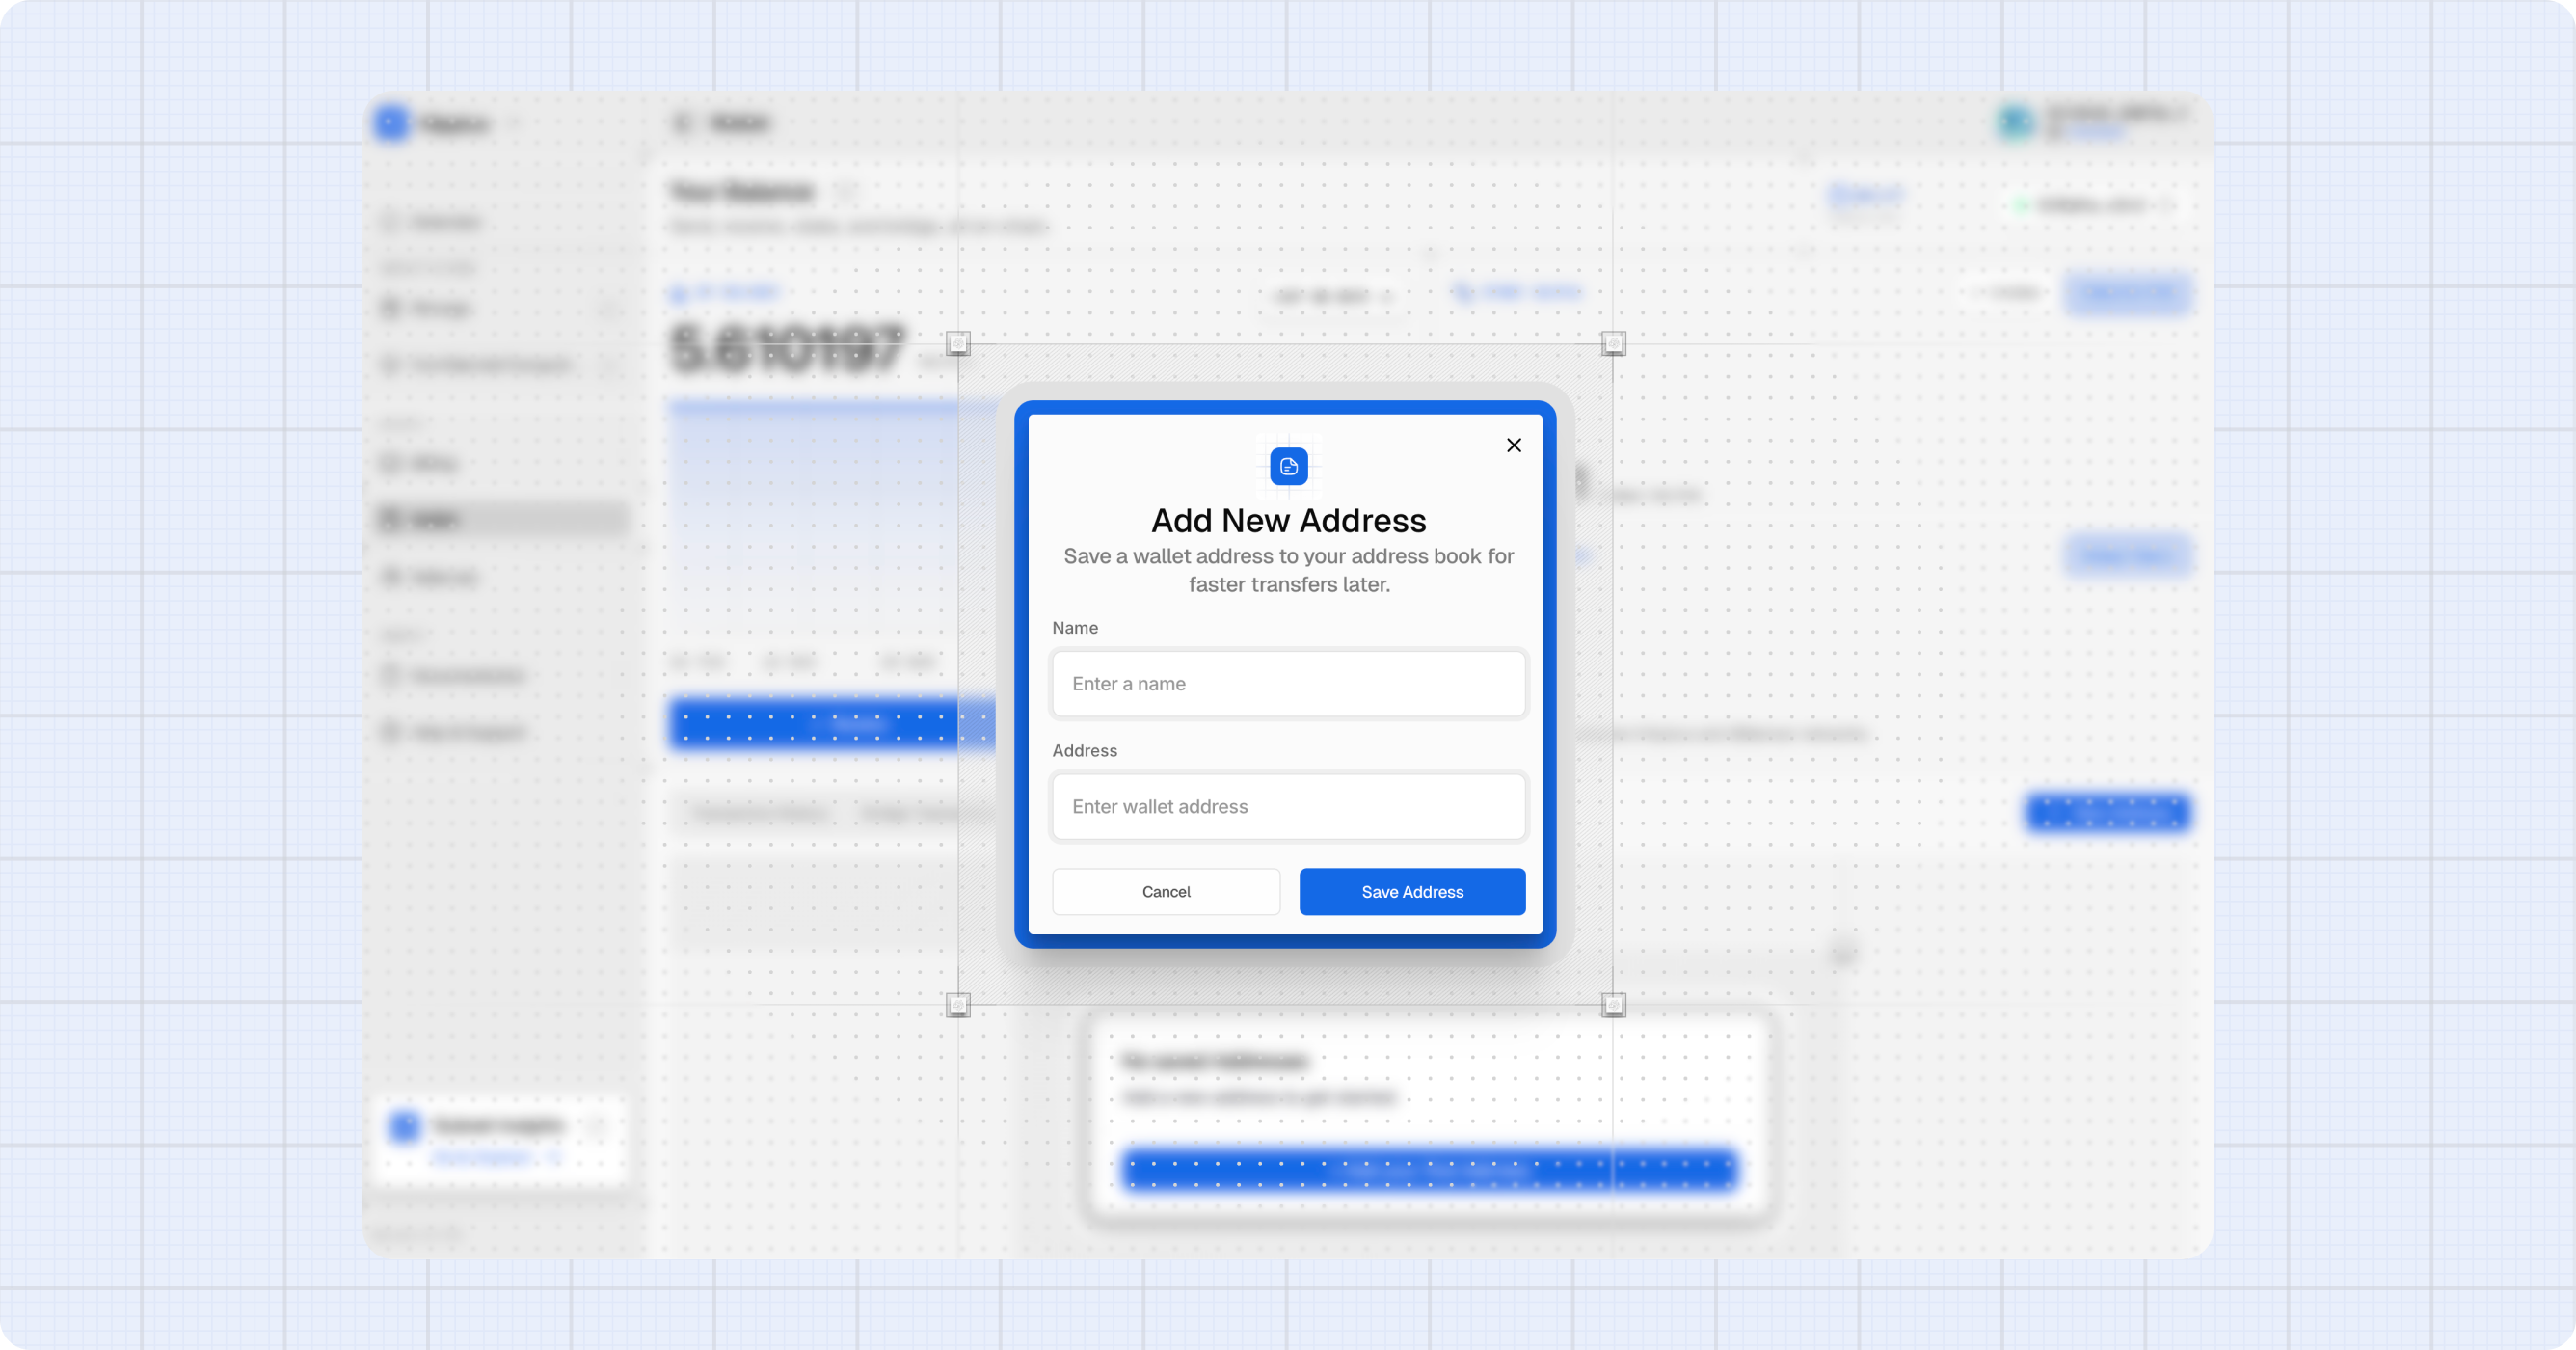
Address Book
The Address Book tab lets you save frequently used wallet addresses with friendly names, so you can pick them from a list when sending instead of pasting long addresses every time.
Adding an Address
- Click + New Address.
- Enter a name (e.g. "Alice's wallet") and the wallet address.
- Click Save. The dialog validates the address format before saving.
Editing or Removing
Click the action menu on any address row to Edit the details or Delete the entry (with a confirmation dialog).
The address book is stored in your local browser. It is not synced across devices.
Using a Saved Address When Sending
When you open the Send dialog, click Address Book in the recipient field to open a quick pick list of your saved contacts. Click one to fill the address in automatically.
Where to next
- Billing: convert hAlpha or fiat into platform credits.
- Bridge Tokens: full bridge guide with troubleshooting.
- Substrate Staking: how the staking mechanism works at the protocol level.
- Staking on Hippius: staking strategy and rewards.