S3 Buckets
Introduction
S3 Buckets gives you S3 compatible object storage directly in the console. It uses the same standard S3 API as AWS, MinIO, and other providers, so any existing S3 client (AWS CLI, rclone, Boto3, Cyberduck, and more) works with Hippius without modification.
From this page you can create and manage buckets, upload and download objects, and generate credentials for your S3 clients.
Reach S3 Buckets from the sidebar at
For a full reference of supported S3 API operations, see S3 Compatibility. For setup guides for specific clients, see S3 Quickstart.

Master Tokens
Before you can create buckets or connect any S3 client, you need a master token. This is your top level S3 credential, the equivalent of AWS root keys, and it has access to every bucket and every operation on your account.
The first time you open the S3 page, you'll be prompted to create one.
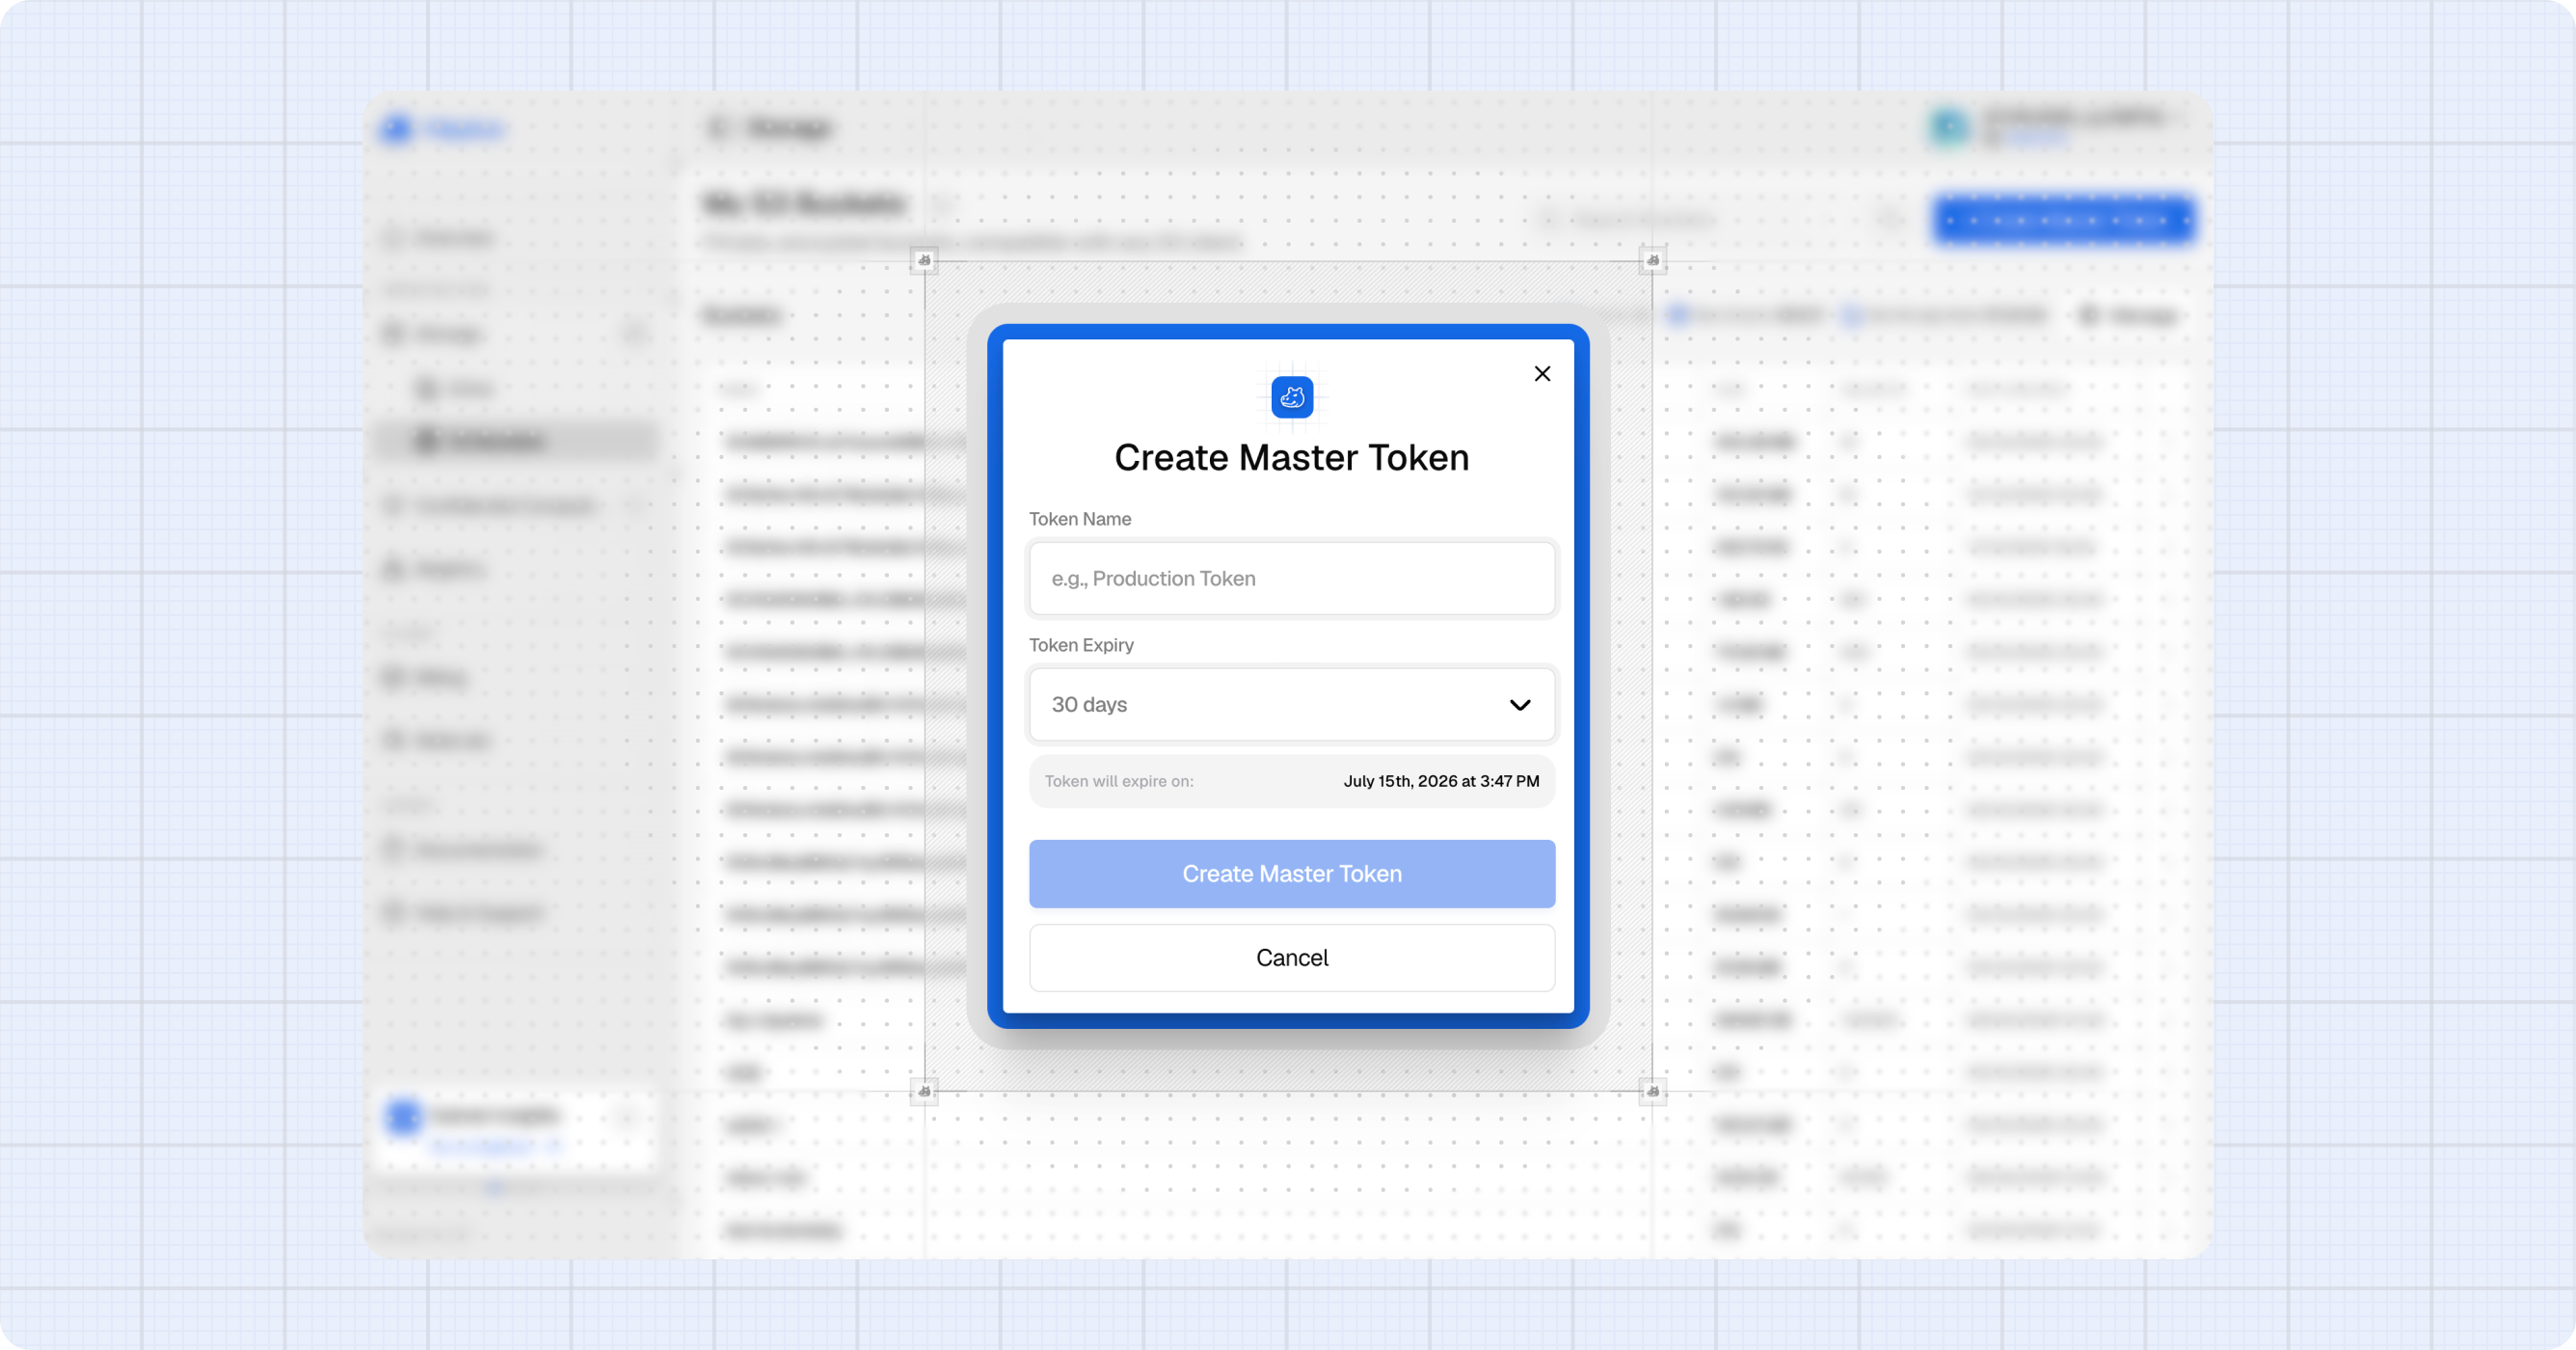
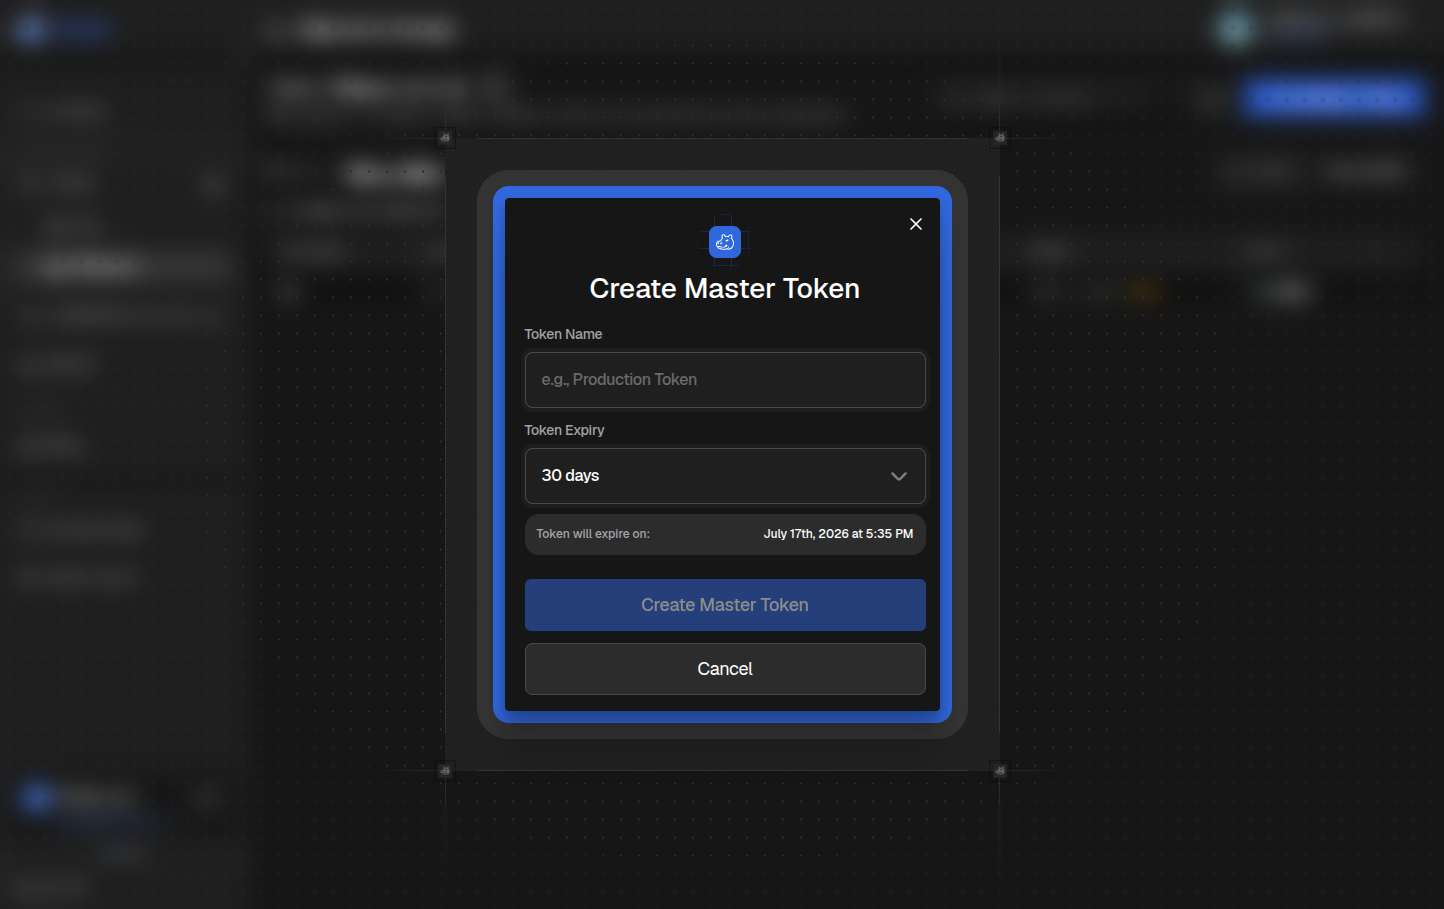
Creating a Master Token
- Click + Create Master Token in the page header (or click the prompt in the empty buckets table).
- Enter a Token Name to help you identify it later (e.g. "Production Token").
- Pick an expiry: 7 days, 30 days, 1 year, or a custom date.
- Click Create Master Token.
- The dialog shows your new access key and secret key. Copy both now using the copy buttons.
- Click Done to close.
Once you close this dialog, the secret key is gone forever. If you lose it, you'll need to revoke the token and create a new one. The access key remains visible, but the secret is never shown again.
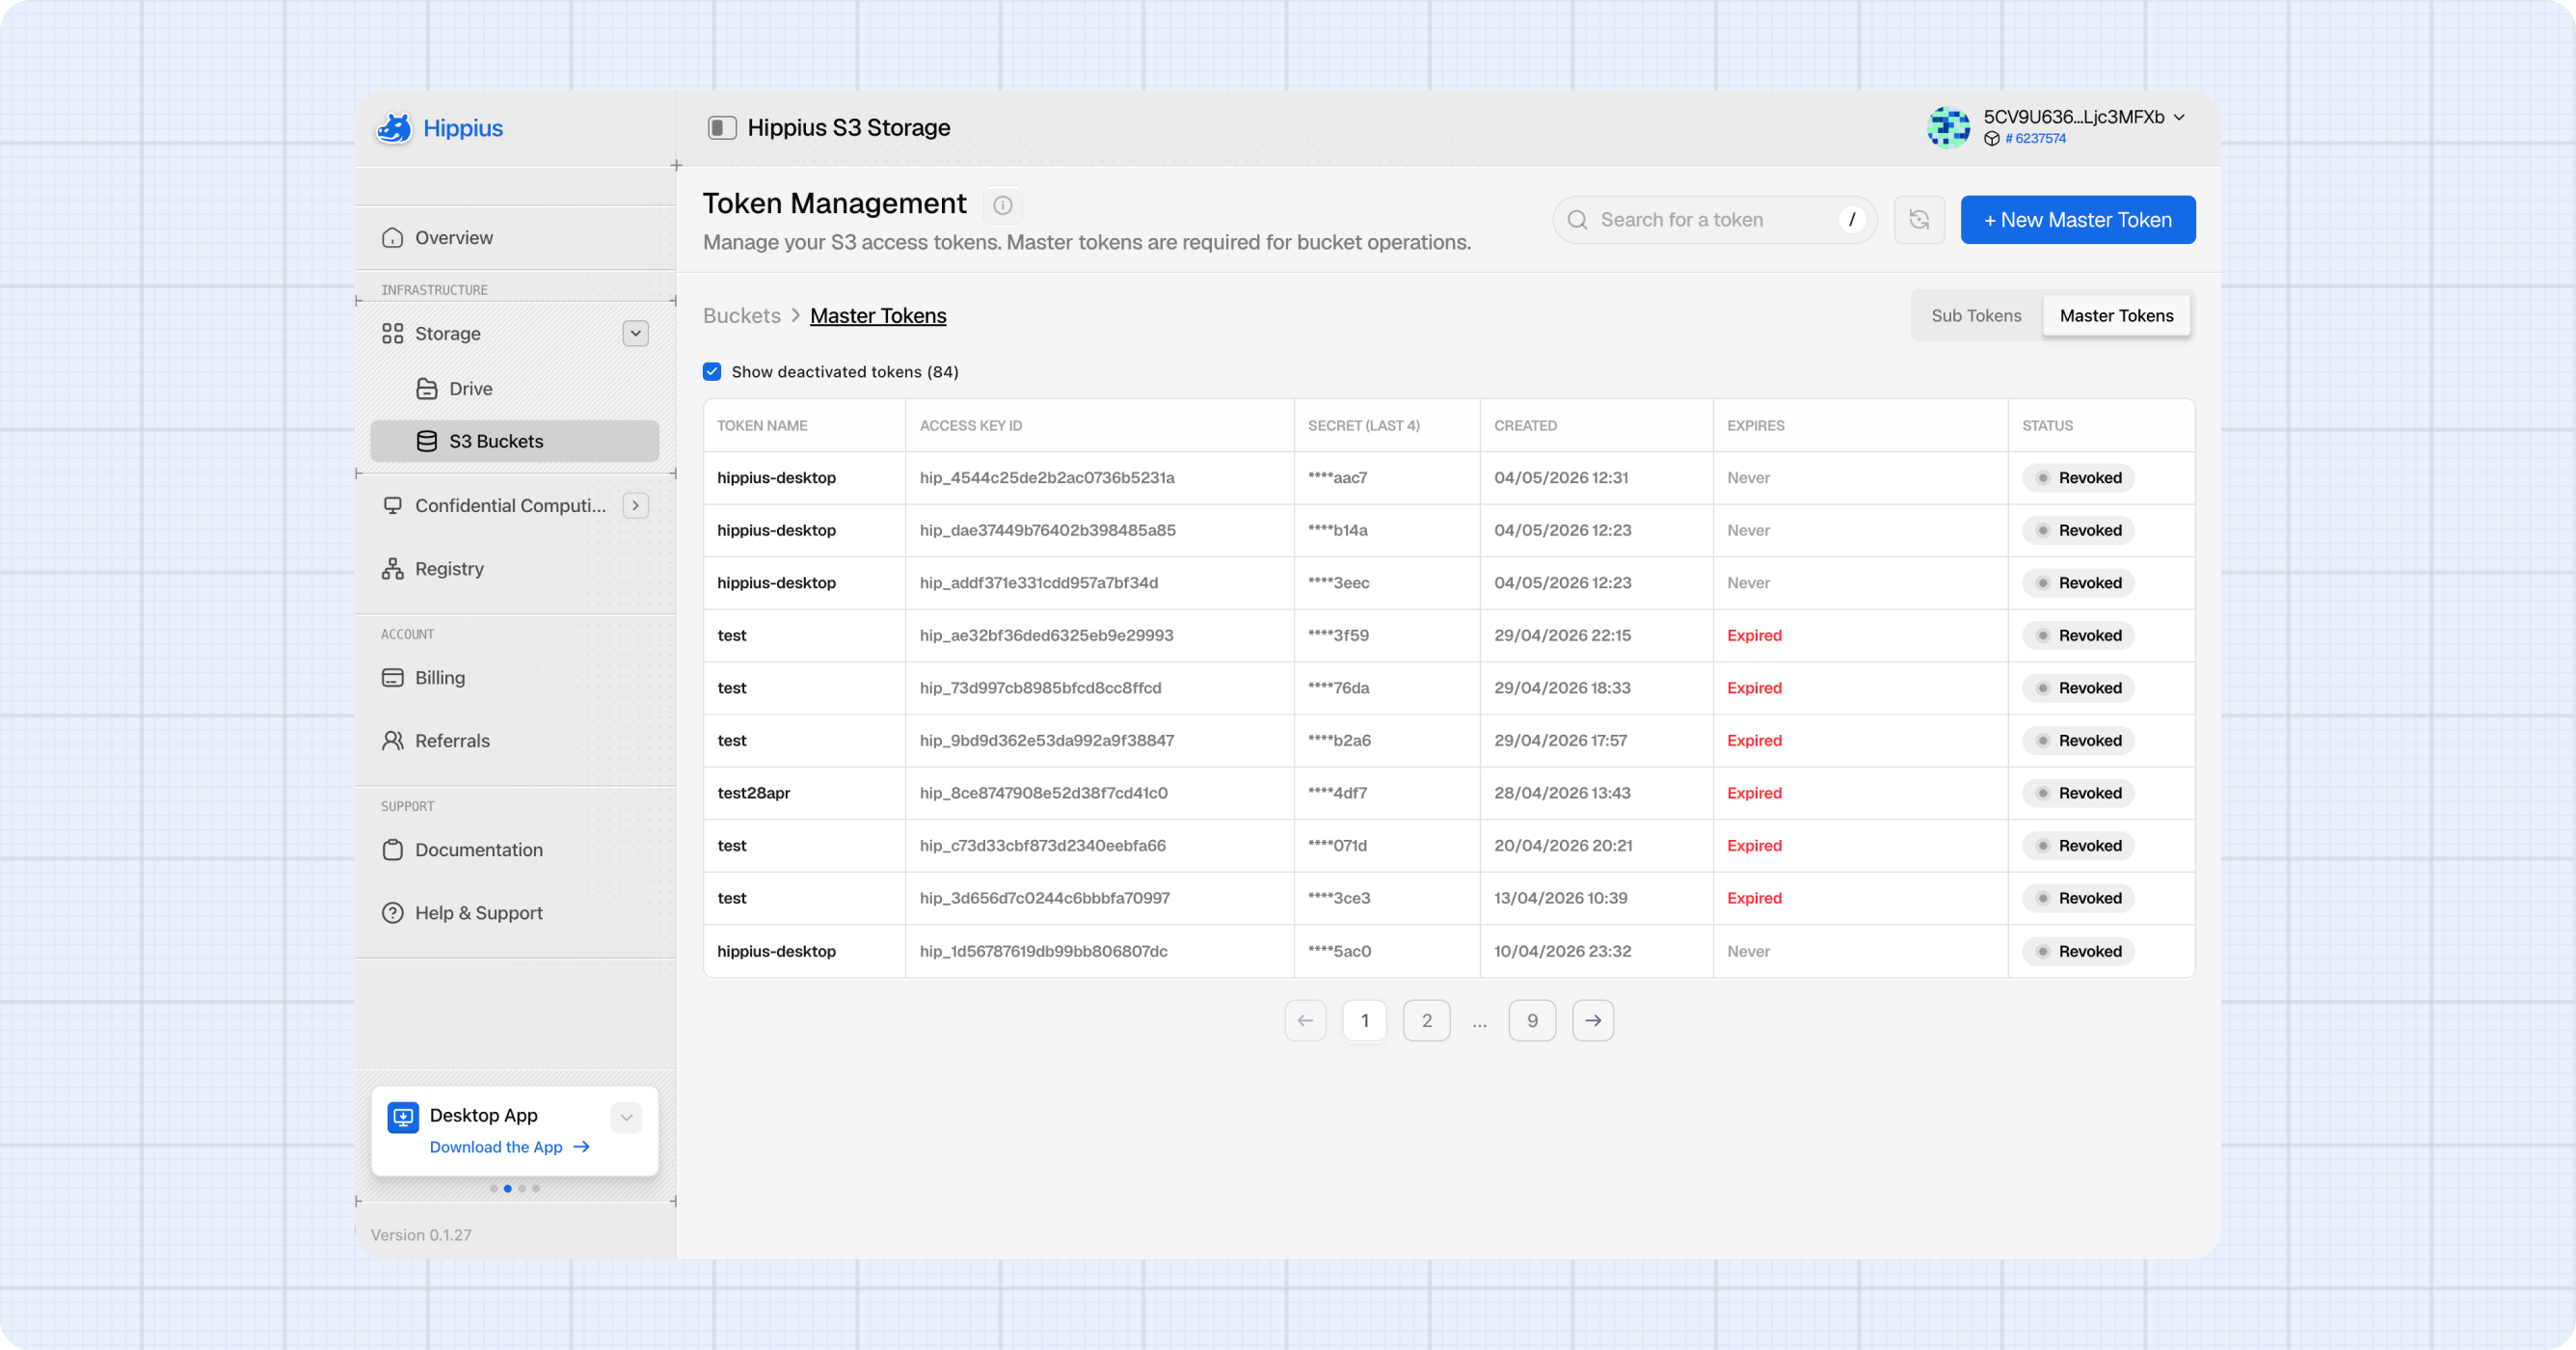
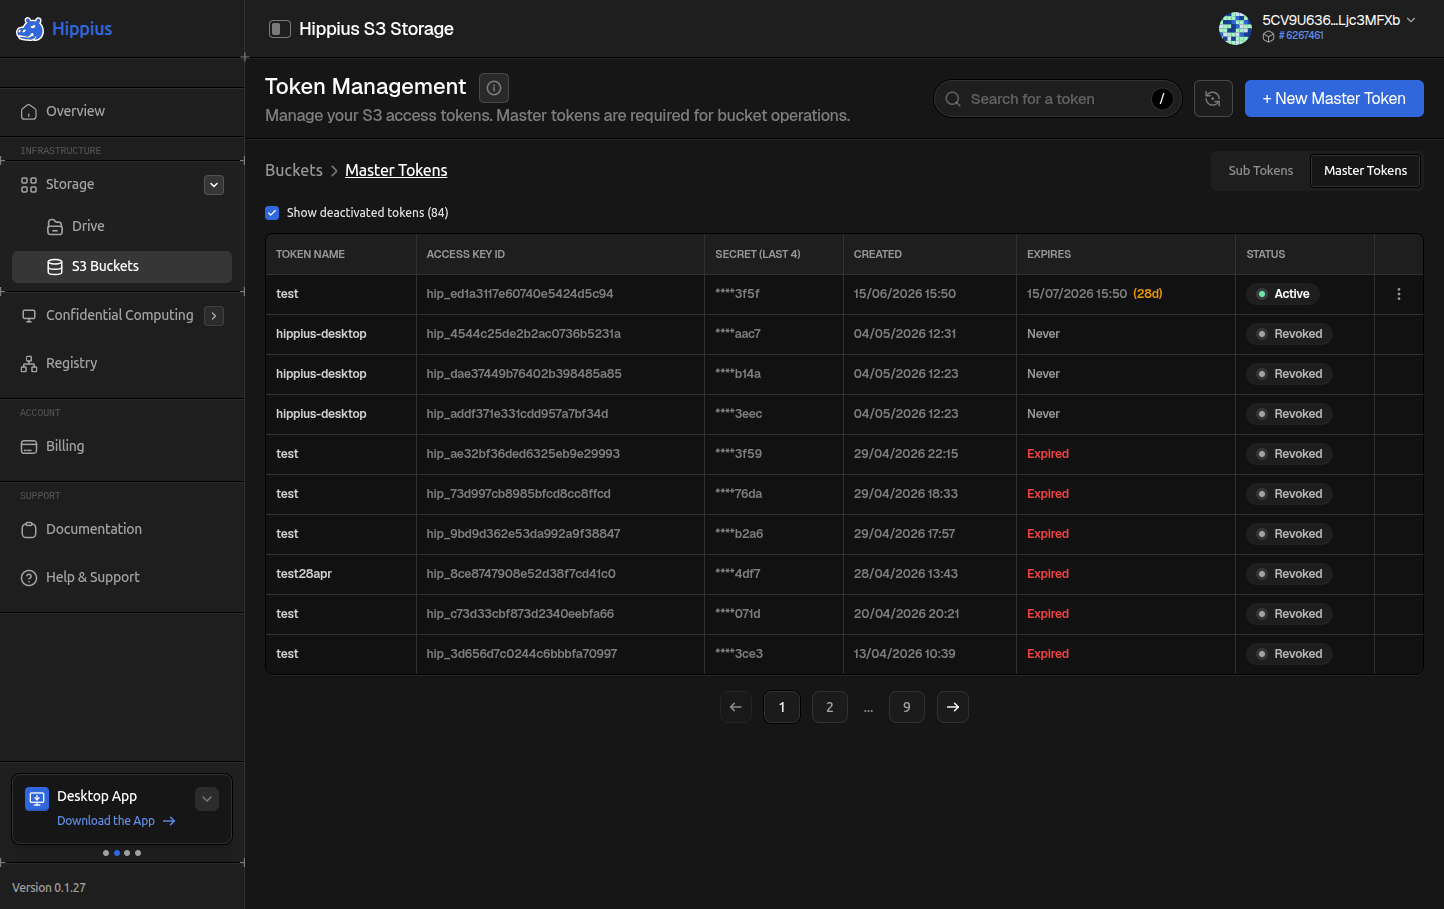
Managing Master Tokens
Click Manage in the bucket browser toolbar to open the master tokens page. From there you can:
- See all your master tokens with their access keys, creation dates, and expiry dates.
- Revoke a token immediately. Any client using it will start getting auth errors right away.
- Create additional master tokens (useful for rotating credentials without downtime).
- Drill into the sub tokens for each master.
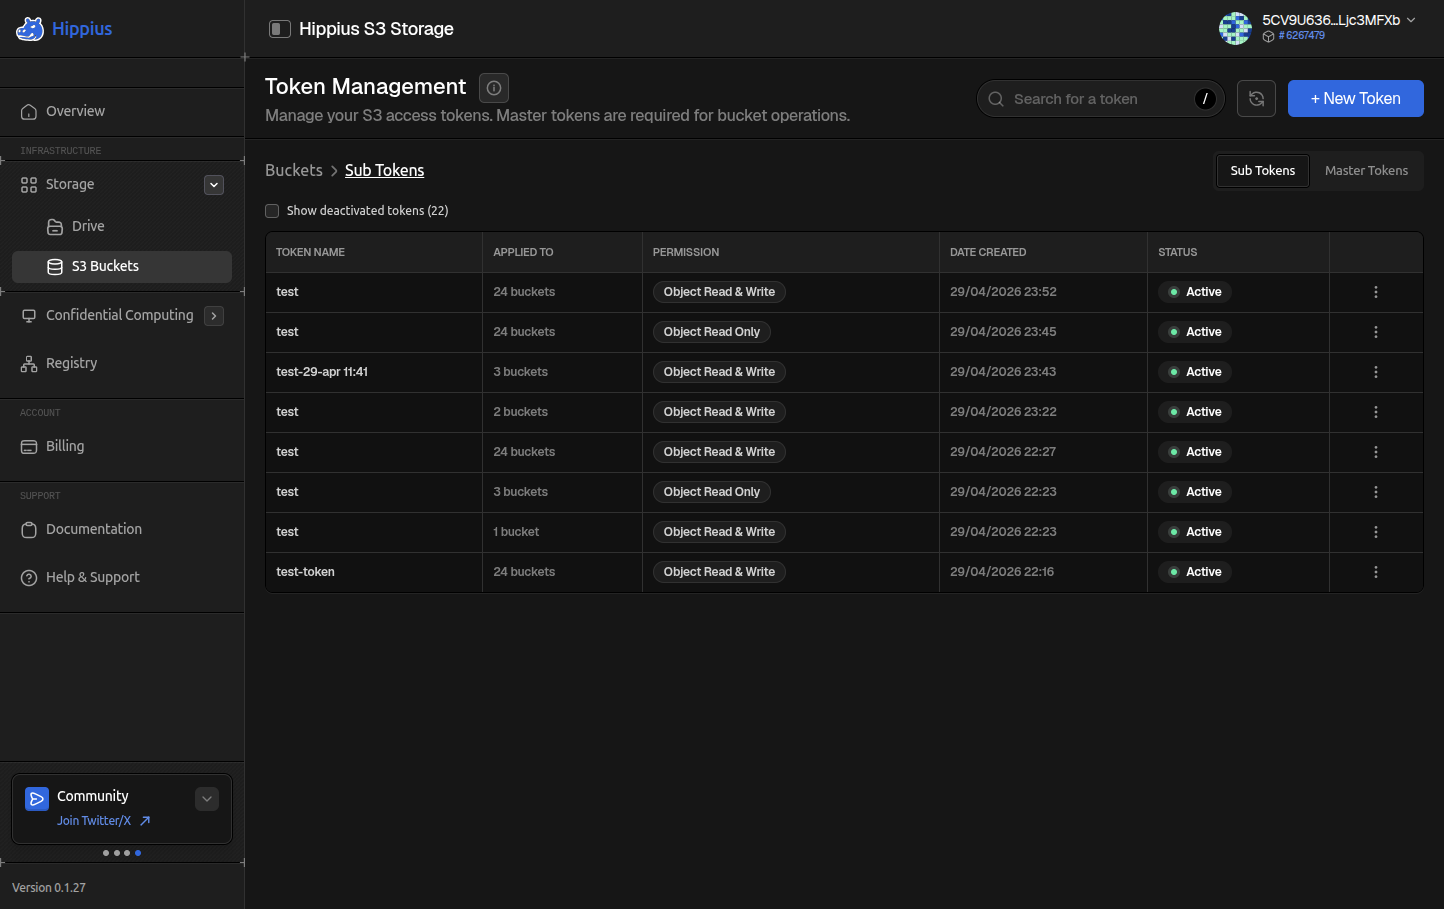
Sub Tokens
A sub token is a scoped credential derived from a master token. Use sub tokens to share access without handing out your master credentials.
| Why use sub tokens | Example |
|---|---|
| Per bucket access | A backup script that only needs one specific bucket. |
| Read only | A CDN that should never be able to delete or overwrite. |
| Time limited | A vendor access that expires after one week. |
| Easy revocation | Revoke a sub token without touching the master. |
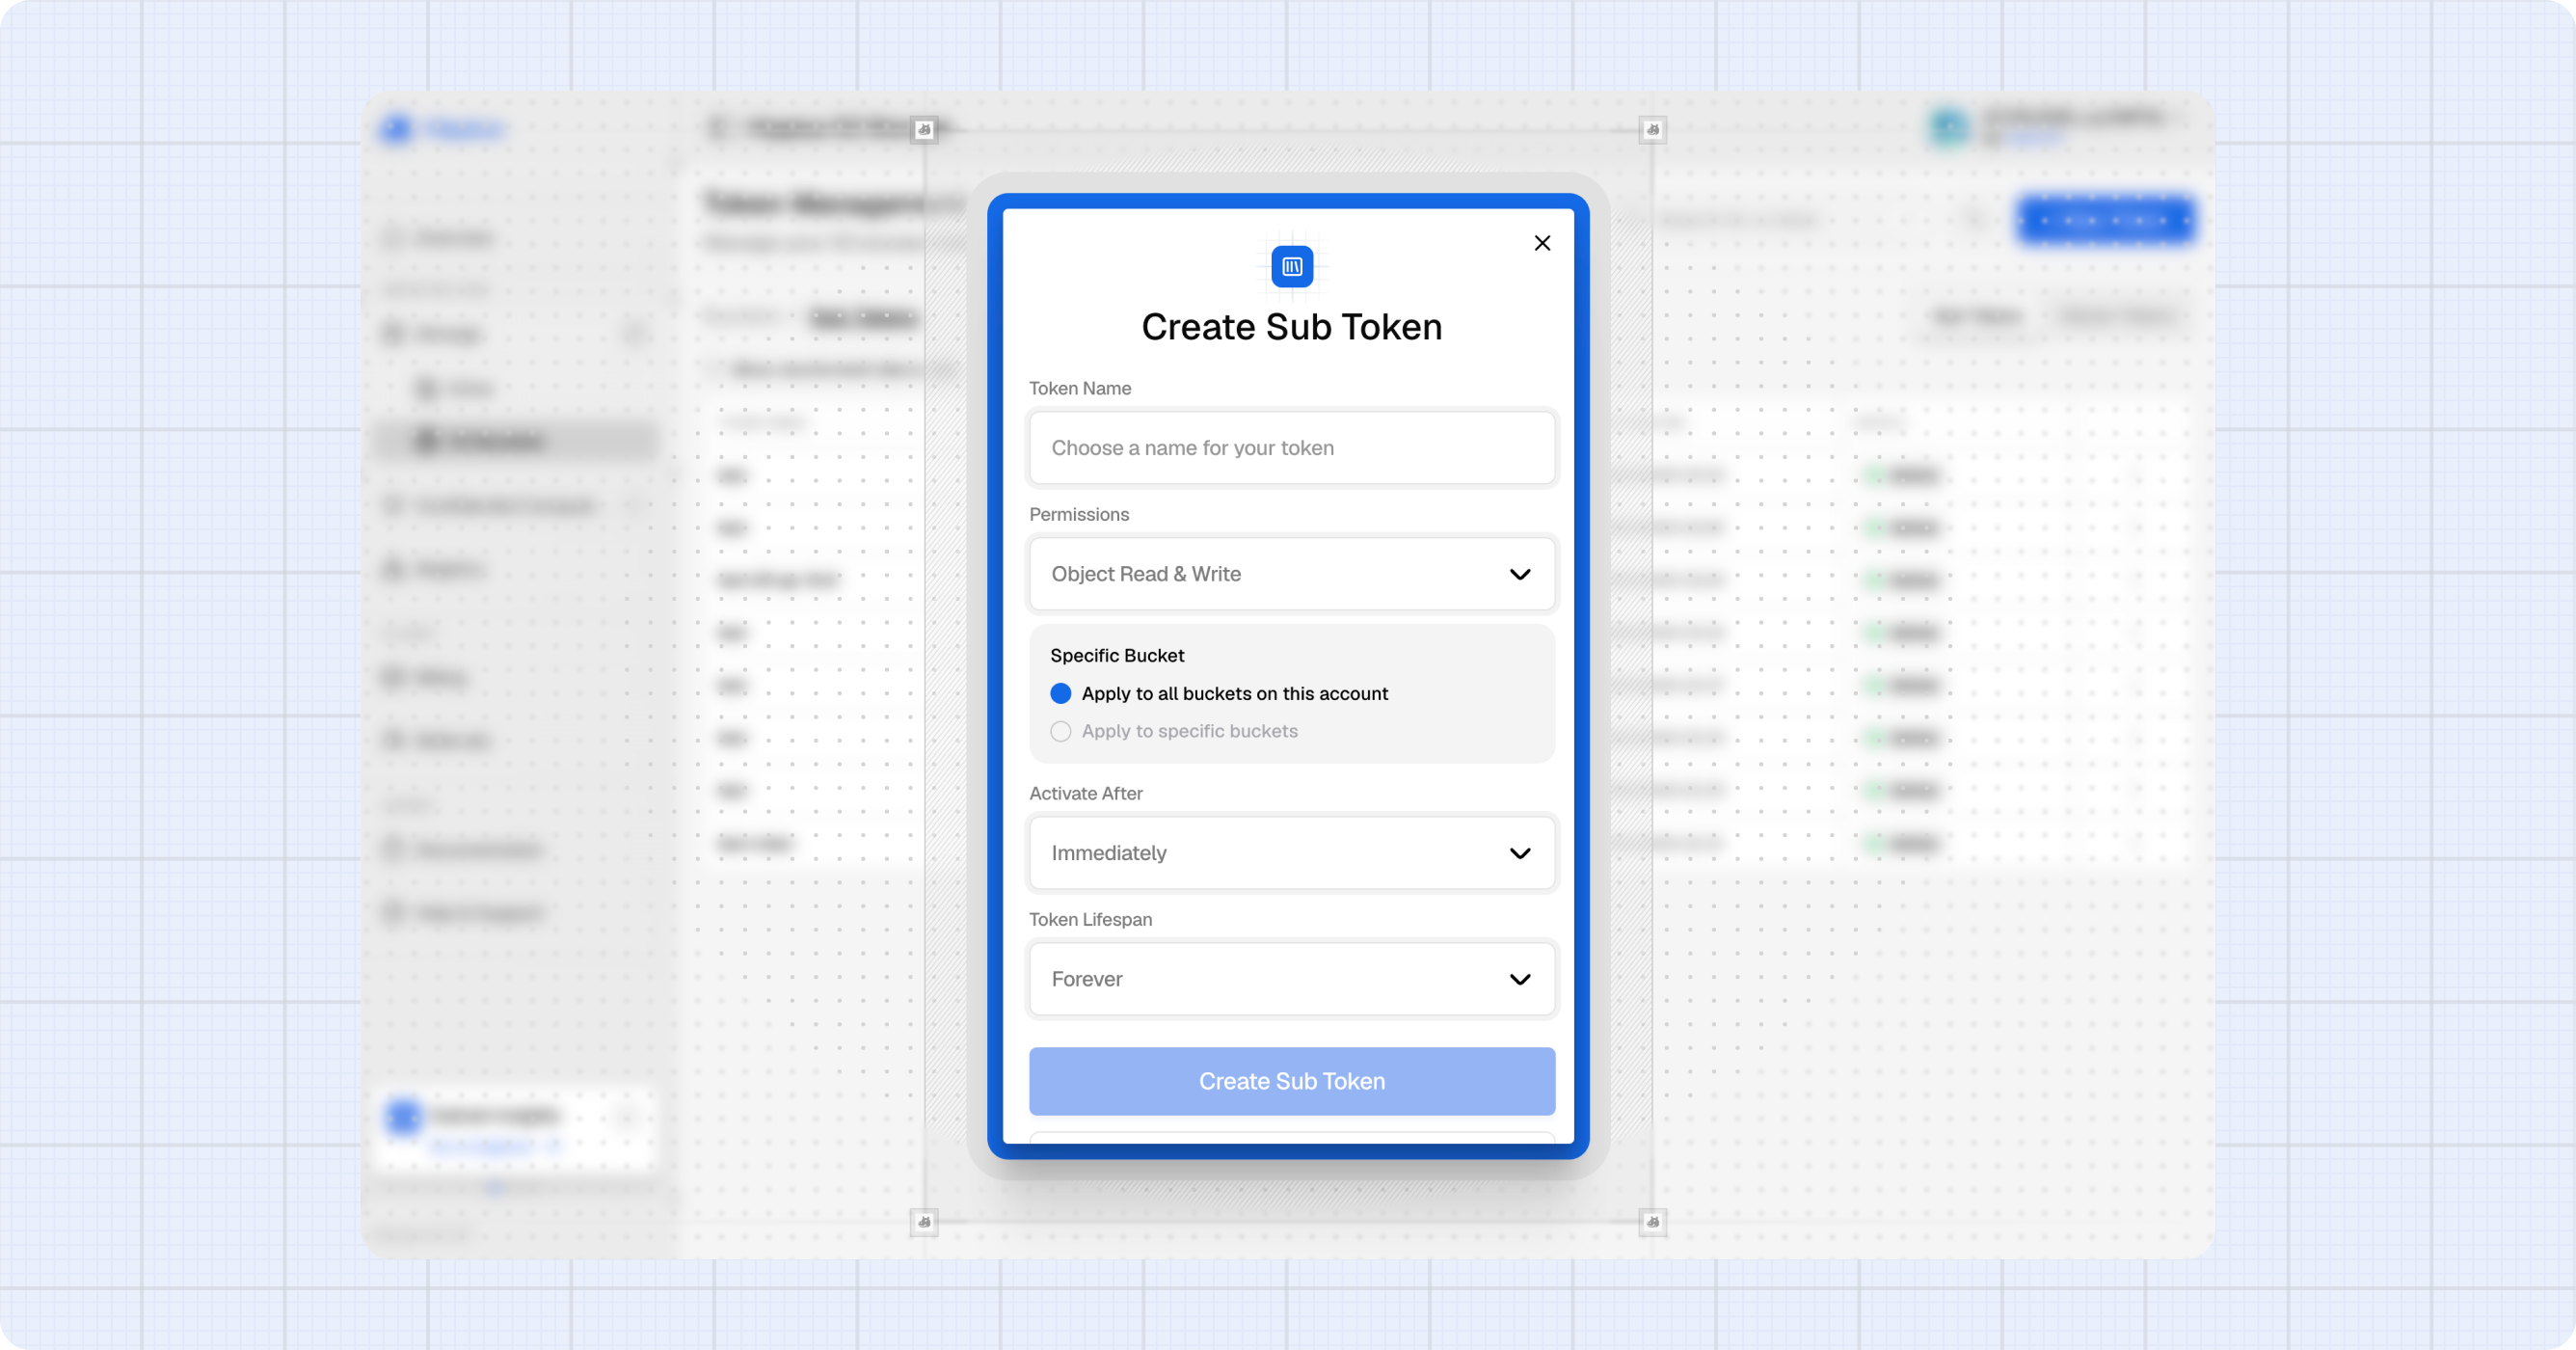
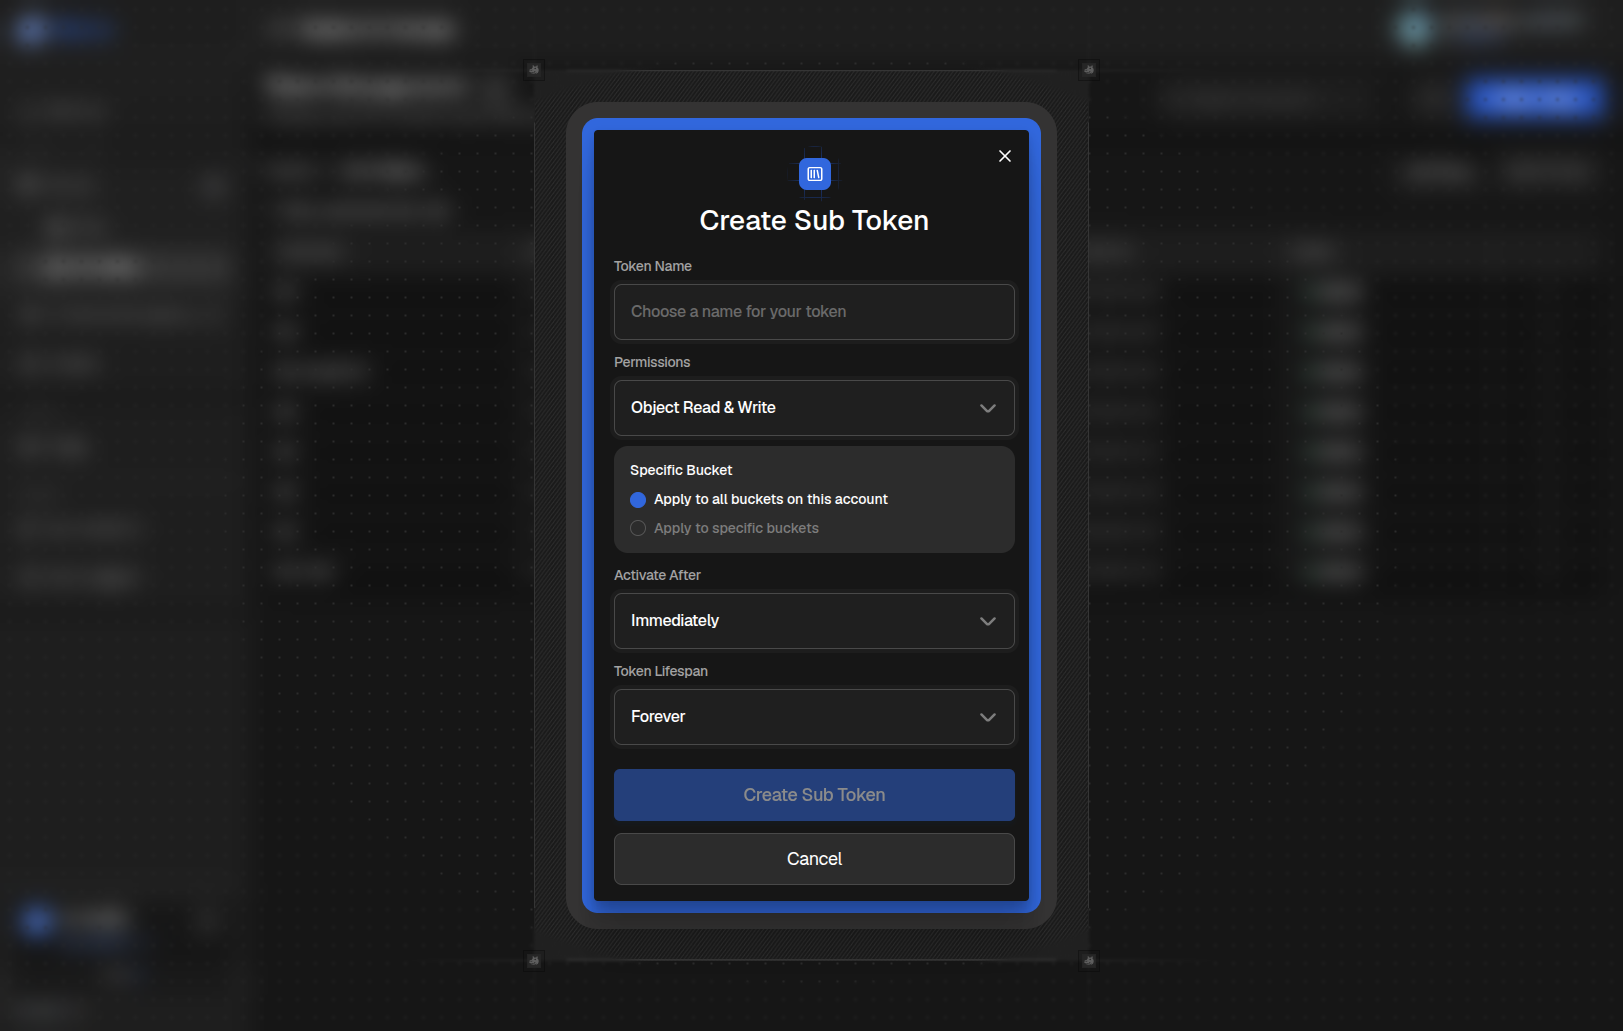
Creating a Sub Token
- From the master tokens page, find the master you want to derive from and click Manage Sub Tokens on its row.
- Click + Create Sub Token.
- Enter a Name: a label so you remember what this token is for (e.g. "Production backups").
- Pick the Buckets this sub token can access: one, several, or all.
- Choose Permissions: read only (Get / List) or read/write (Get / List / Put / Delete).
- Set an Expiry: pick from the preset options or choose a custom date.
- Click Create Sub Token.
- Copy the access key and secret key before closing the dialog.
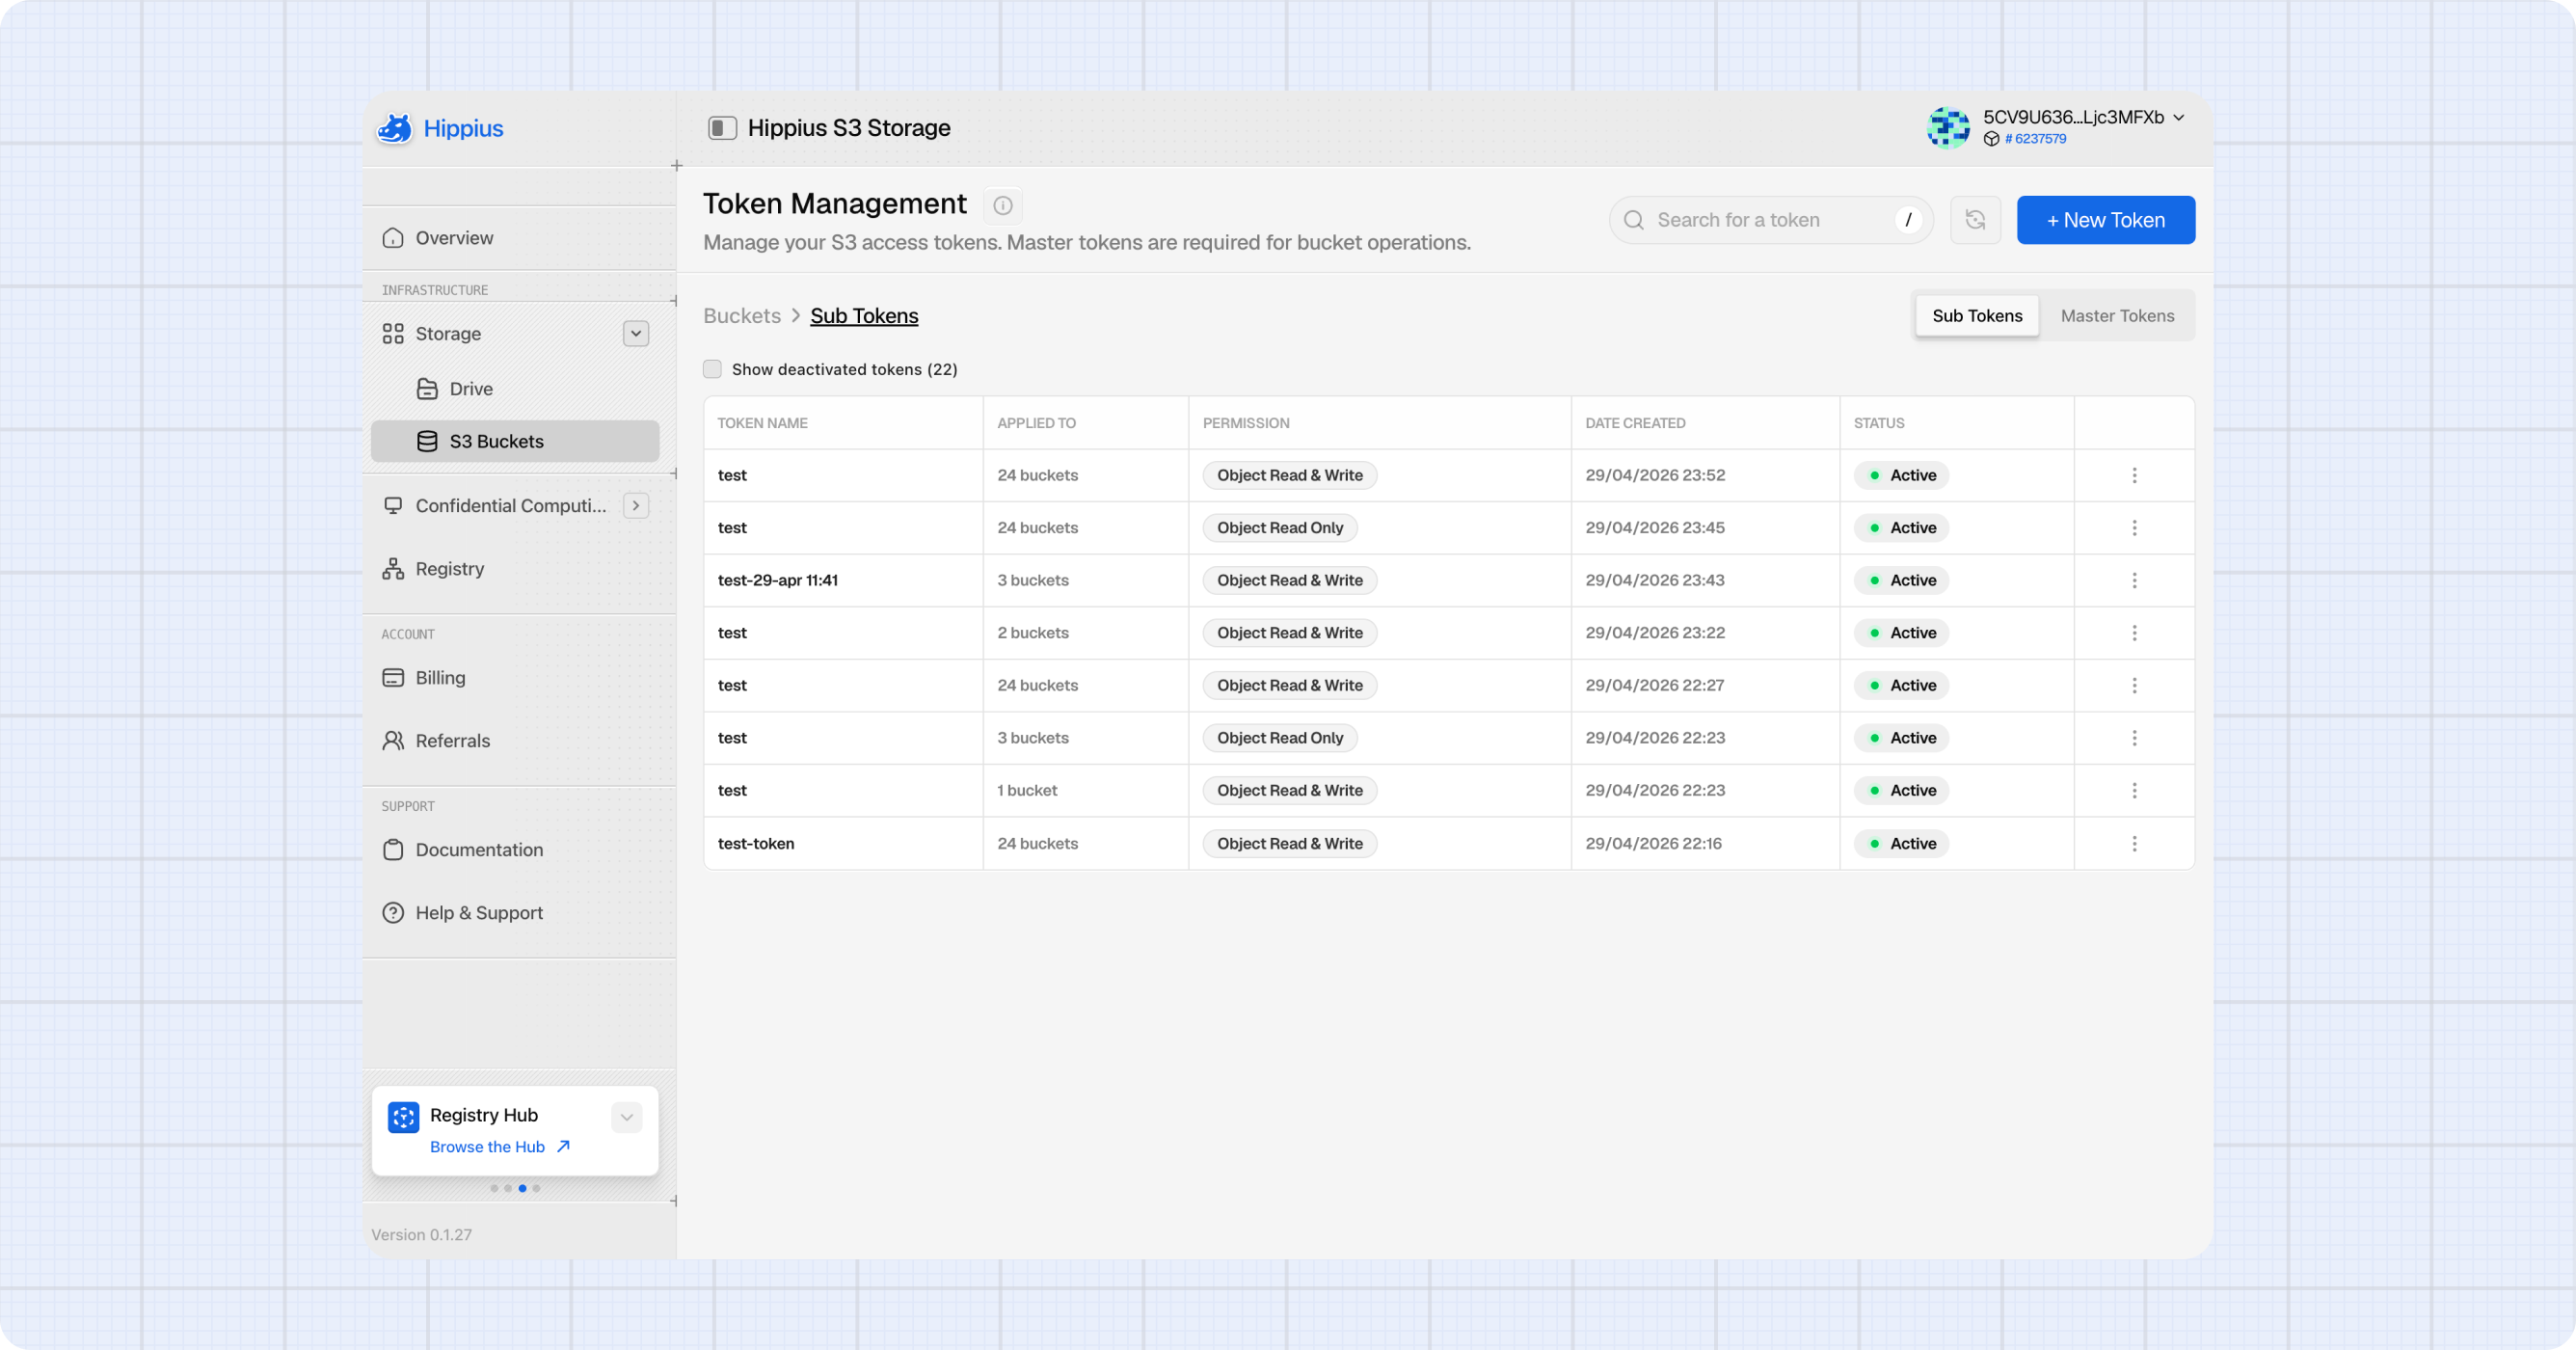
Managing Sub Tokens
Each sub token row shows its name, access key, bucket coverage, permission scope, and expiry date. The action menu on each row lets you:
- View Details: open the details dialog again. The secret key is not shown again.
- Revoke: invalidate the sub token immediately.
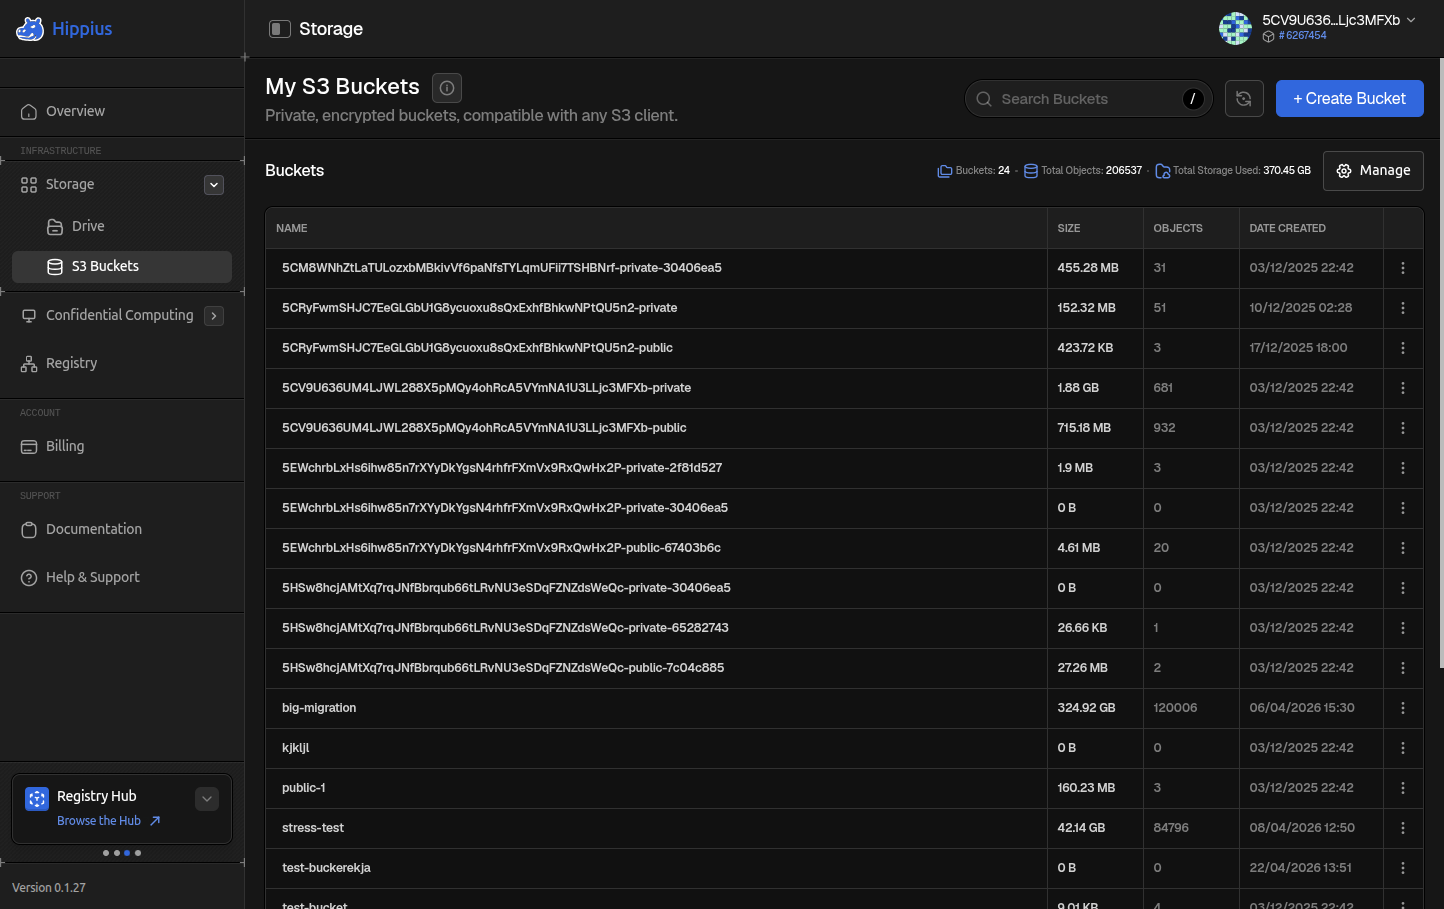
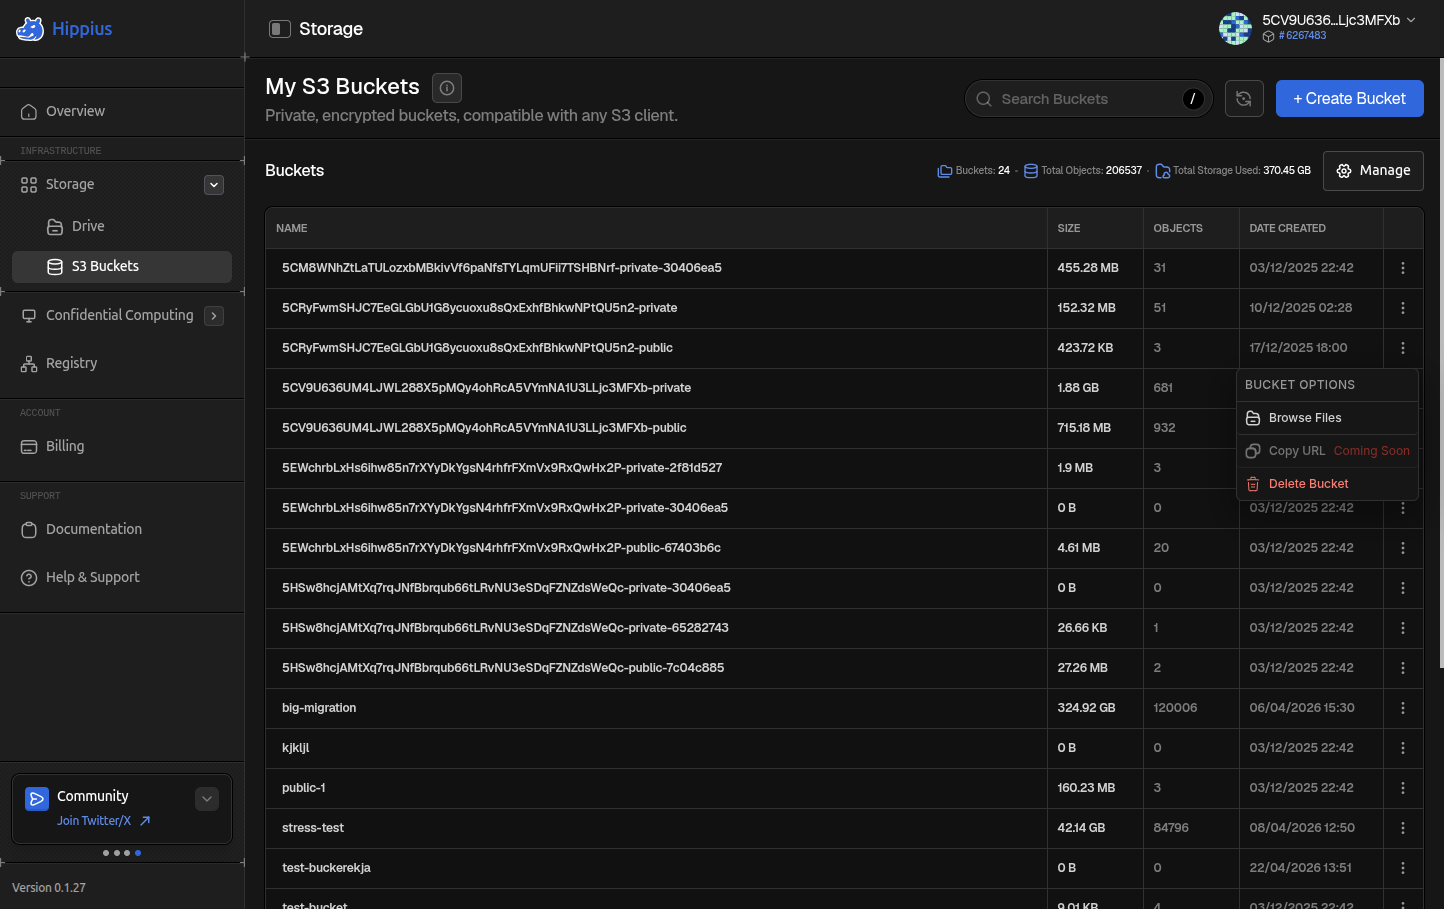
Buckets
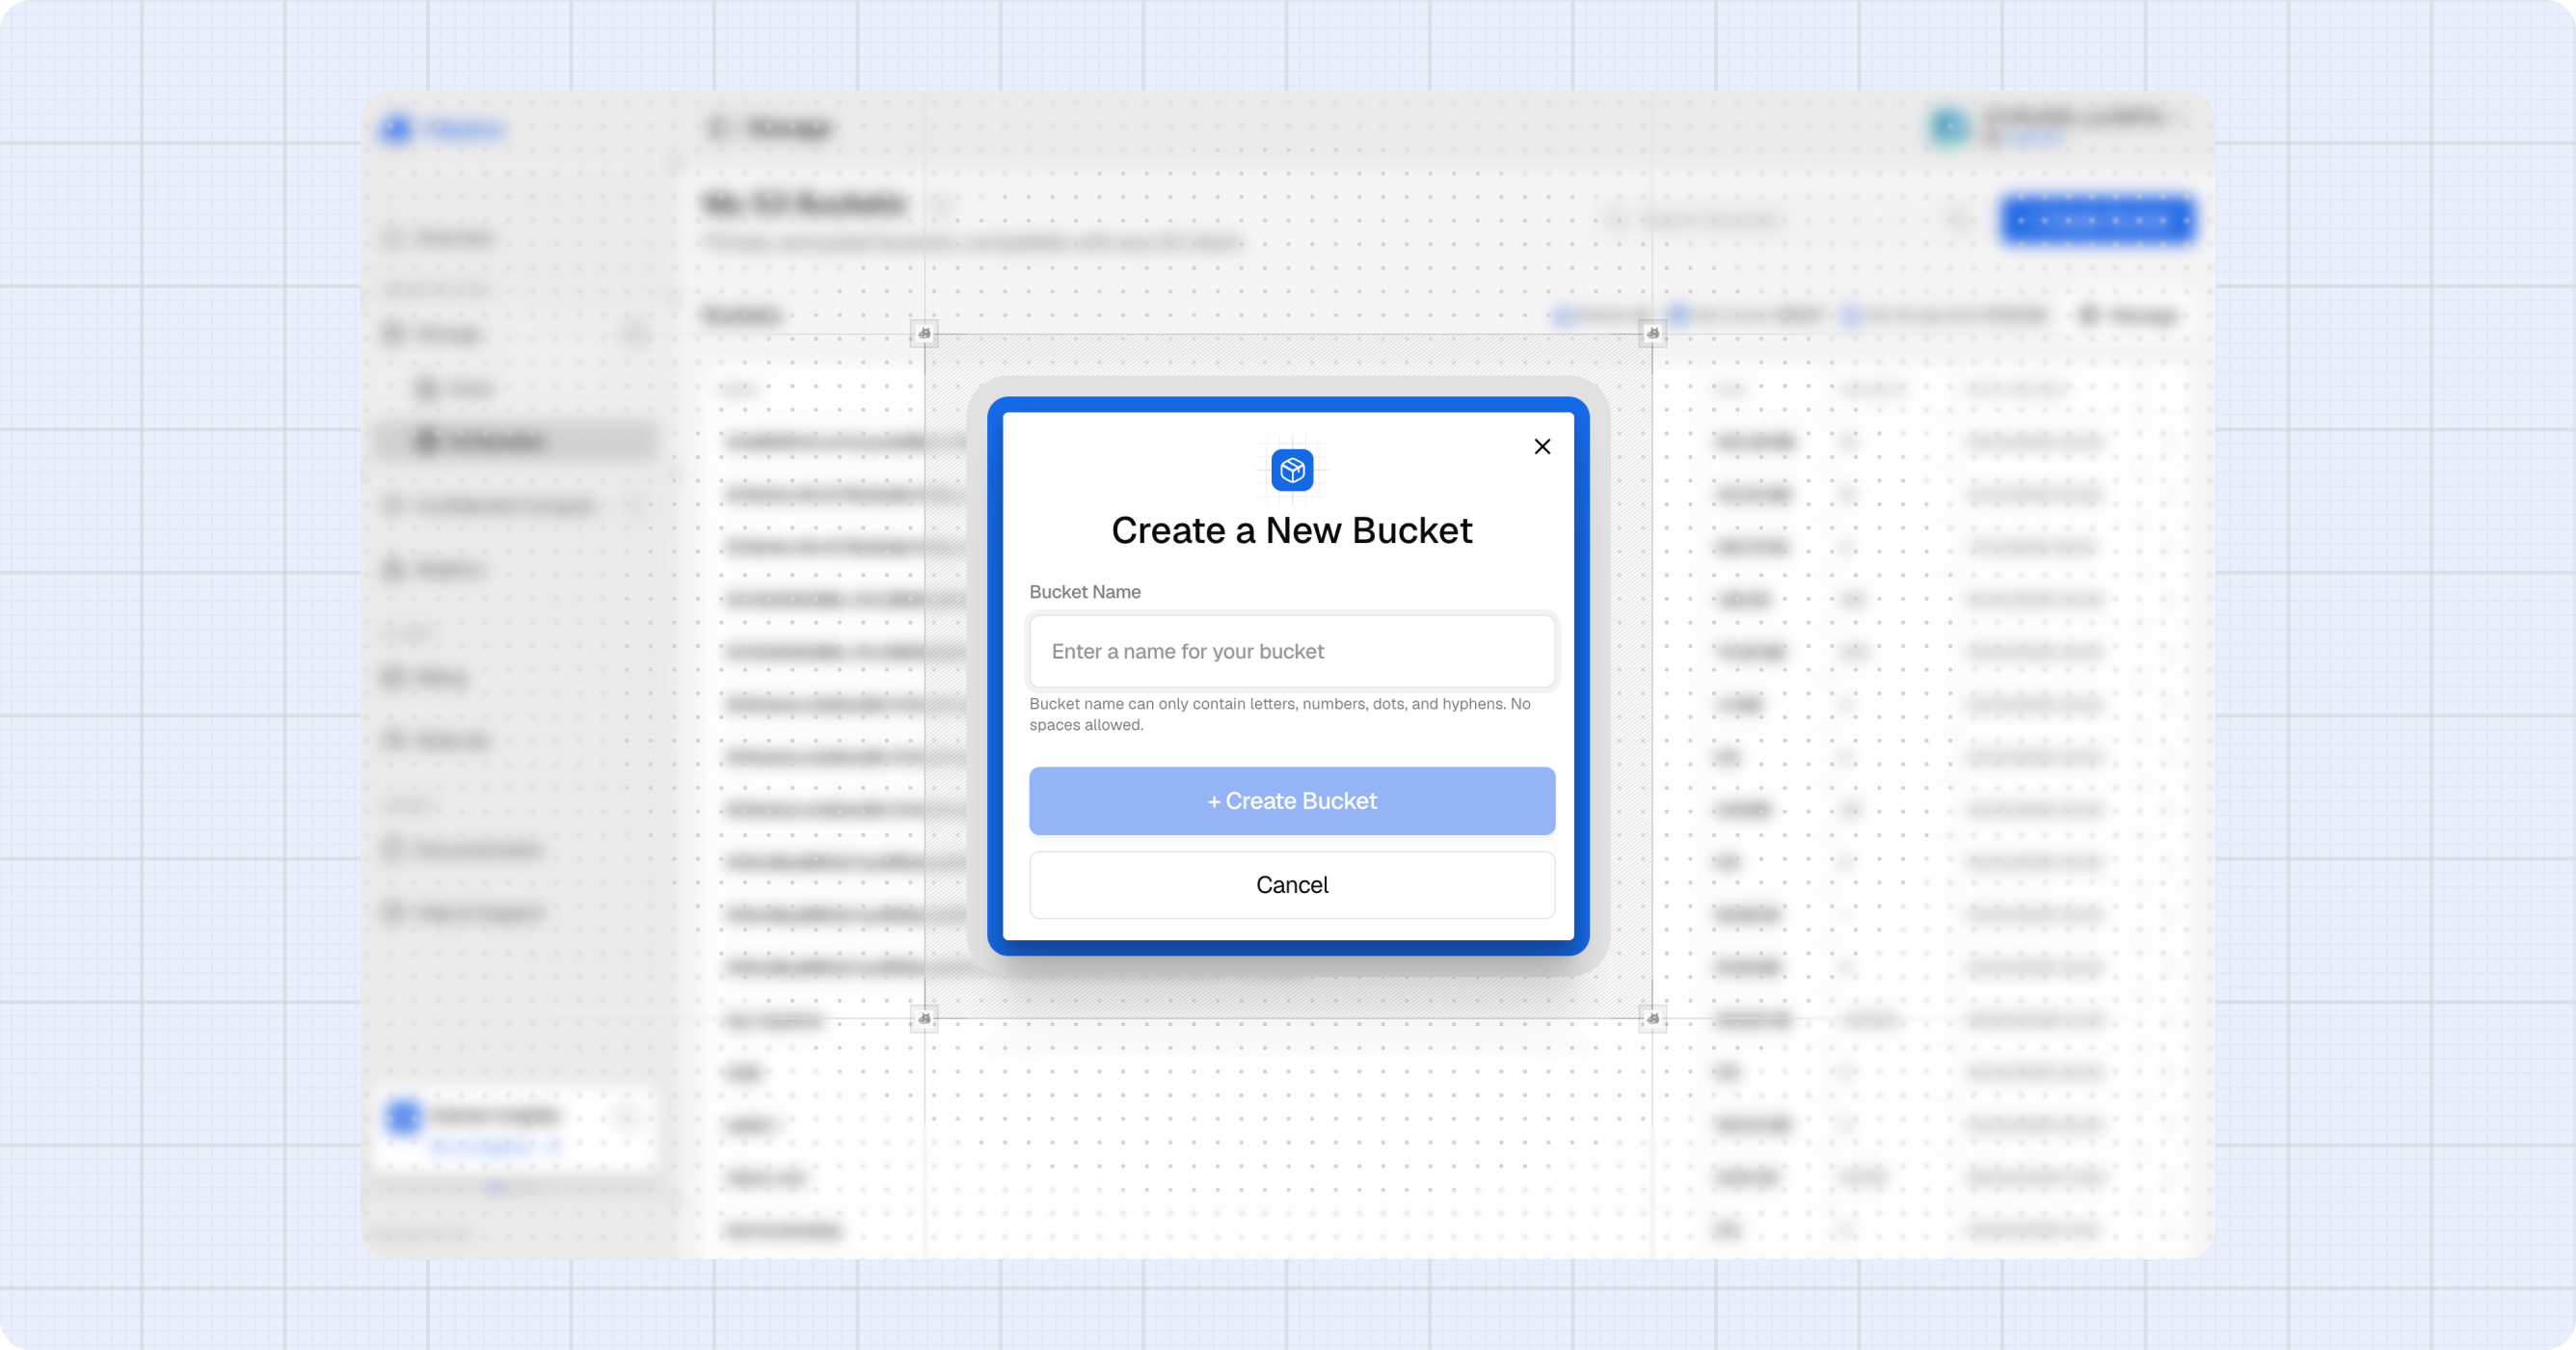
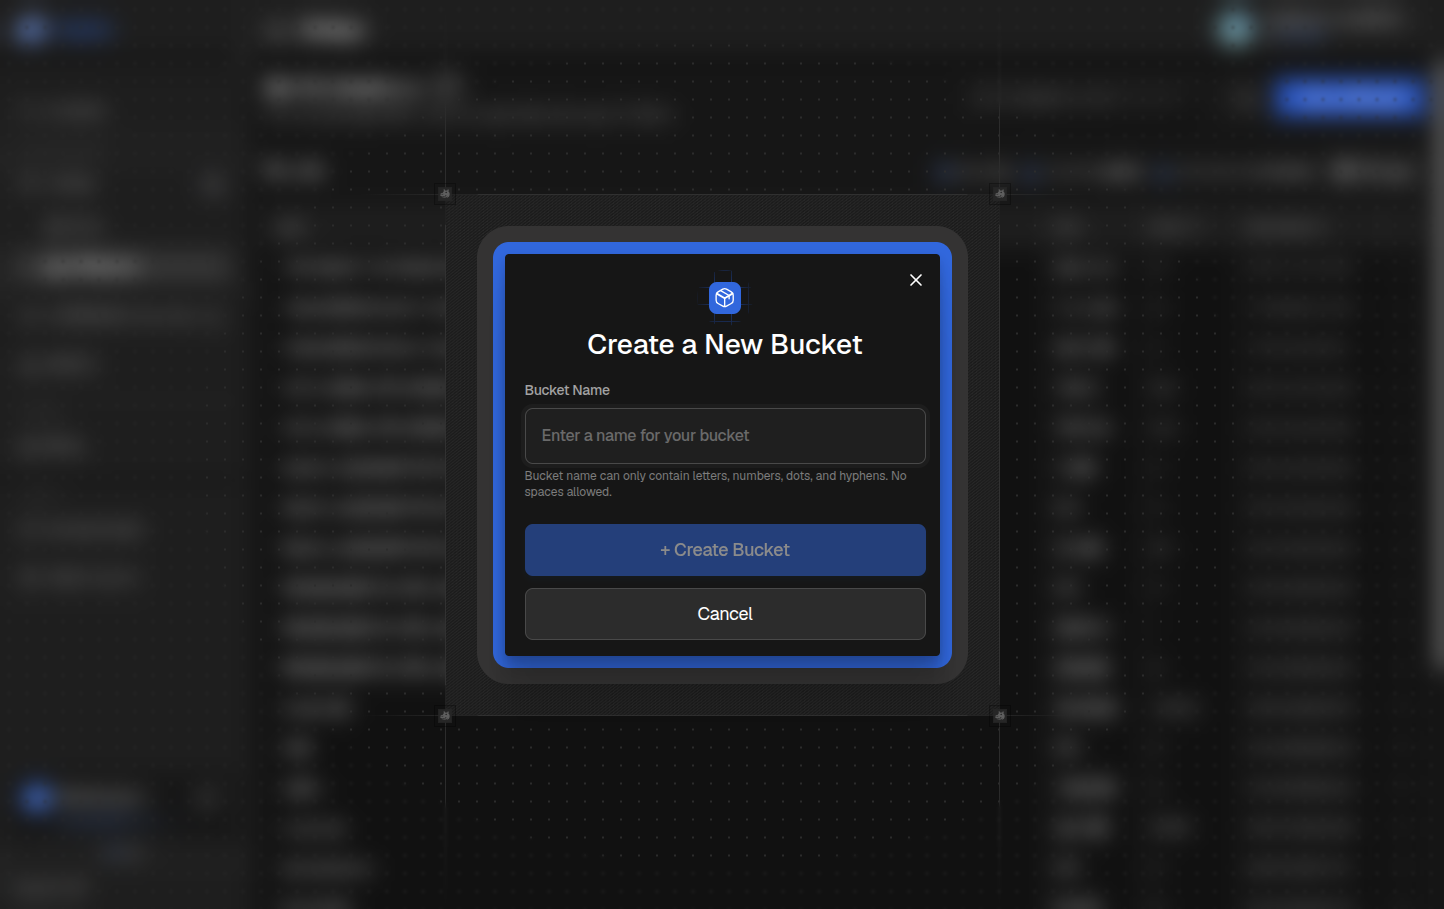
Creating a Bucket
- With an active master token, click + Create Bucket in the page header.
- Enter a bucket name. Names must be lowercase letters, numbers, and dashes only, between 3 and 63 characters, and must start and end with a letter or number.
- Click Create Bucket.
The new bucket appears at the top of the list. Click its row to open it.
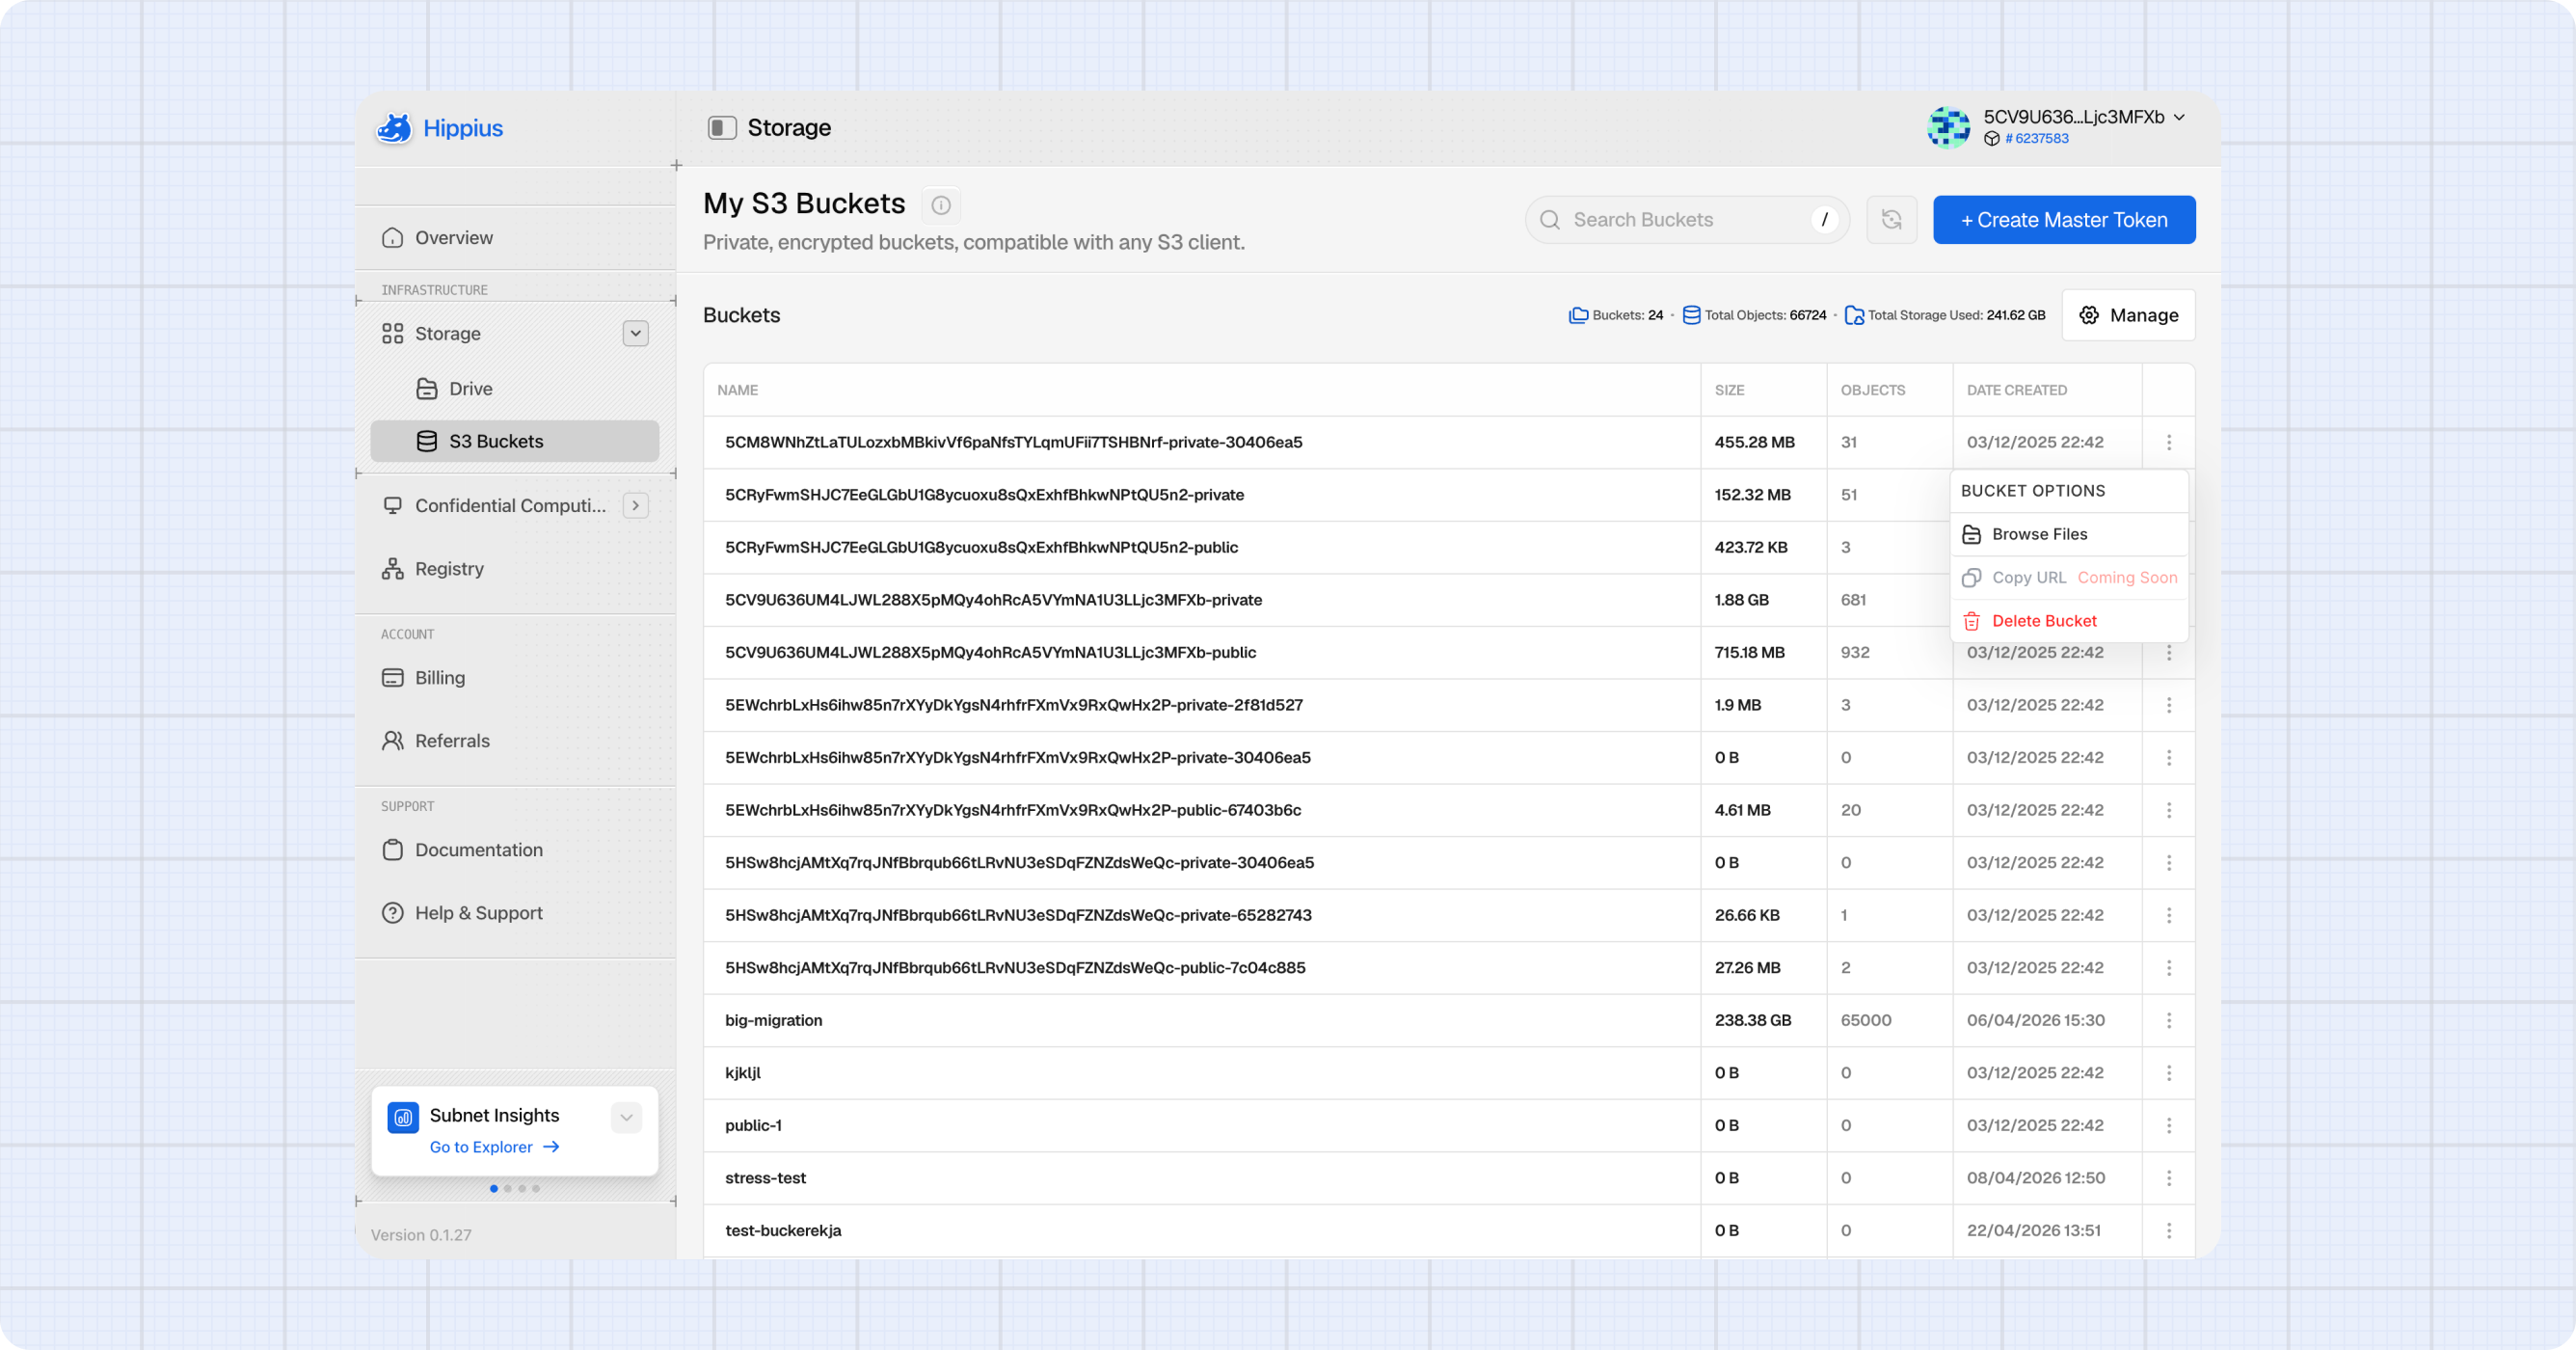
Bucket Actions
Each bucket row has an action menu (three dots):
- Open: open the bucket. Same as clicking the row.
- Copy bucket name: copy to clipboard.
- Delete: permanently delete the bucket. The bucket must be empty first. The dialog will block you if it still contains objects.
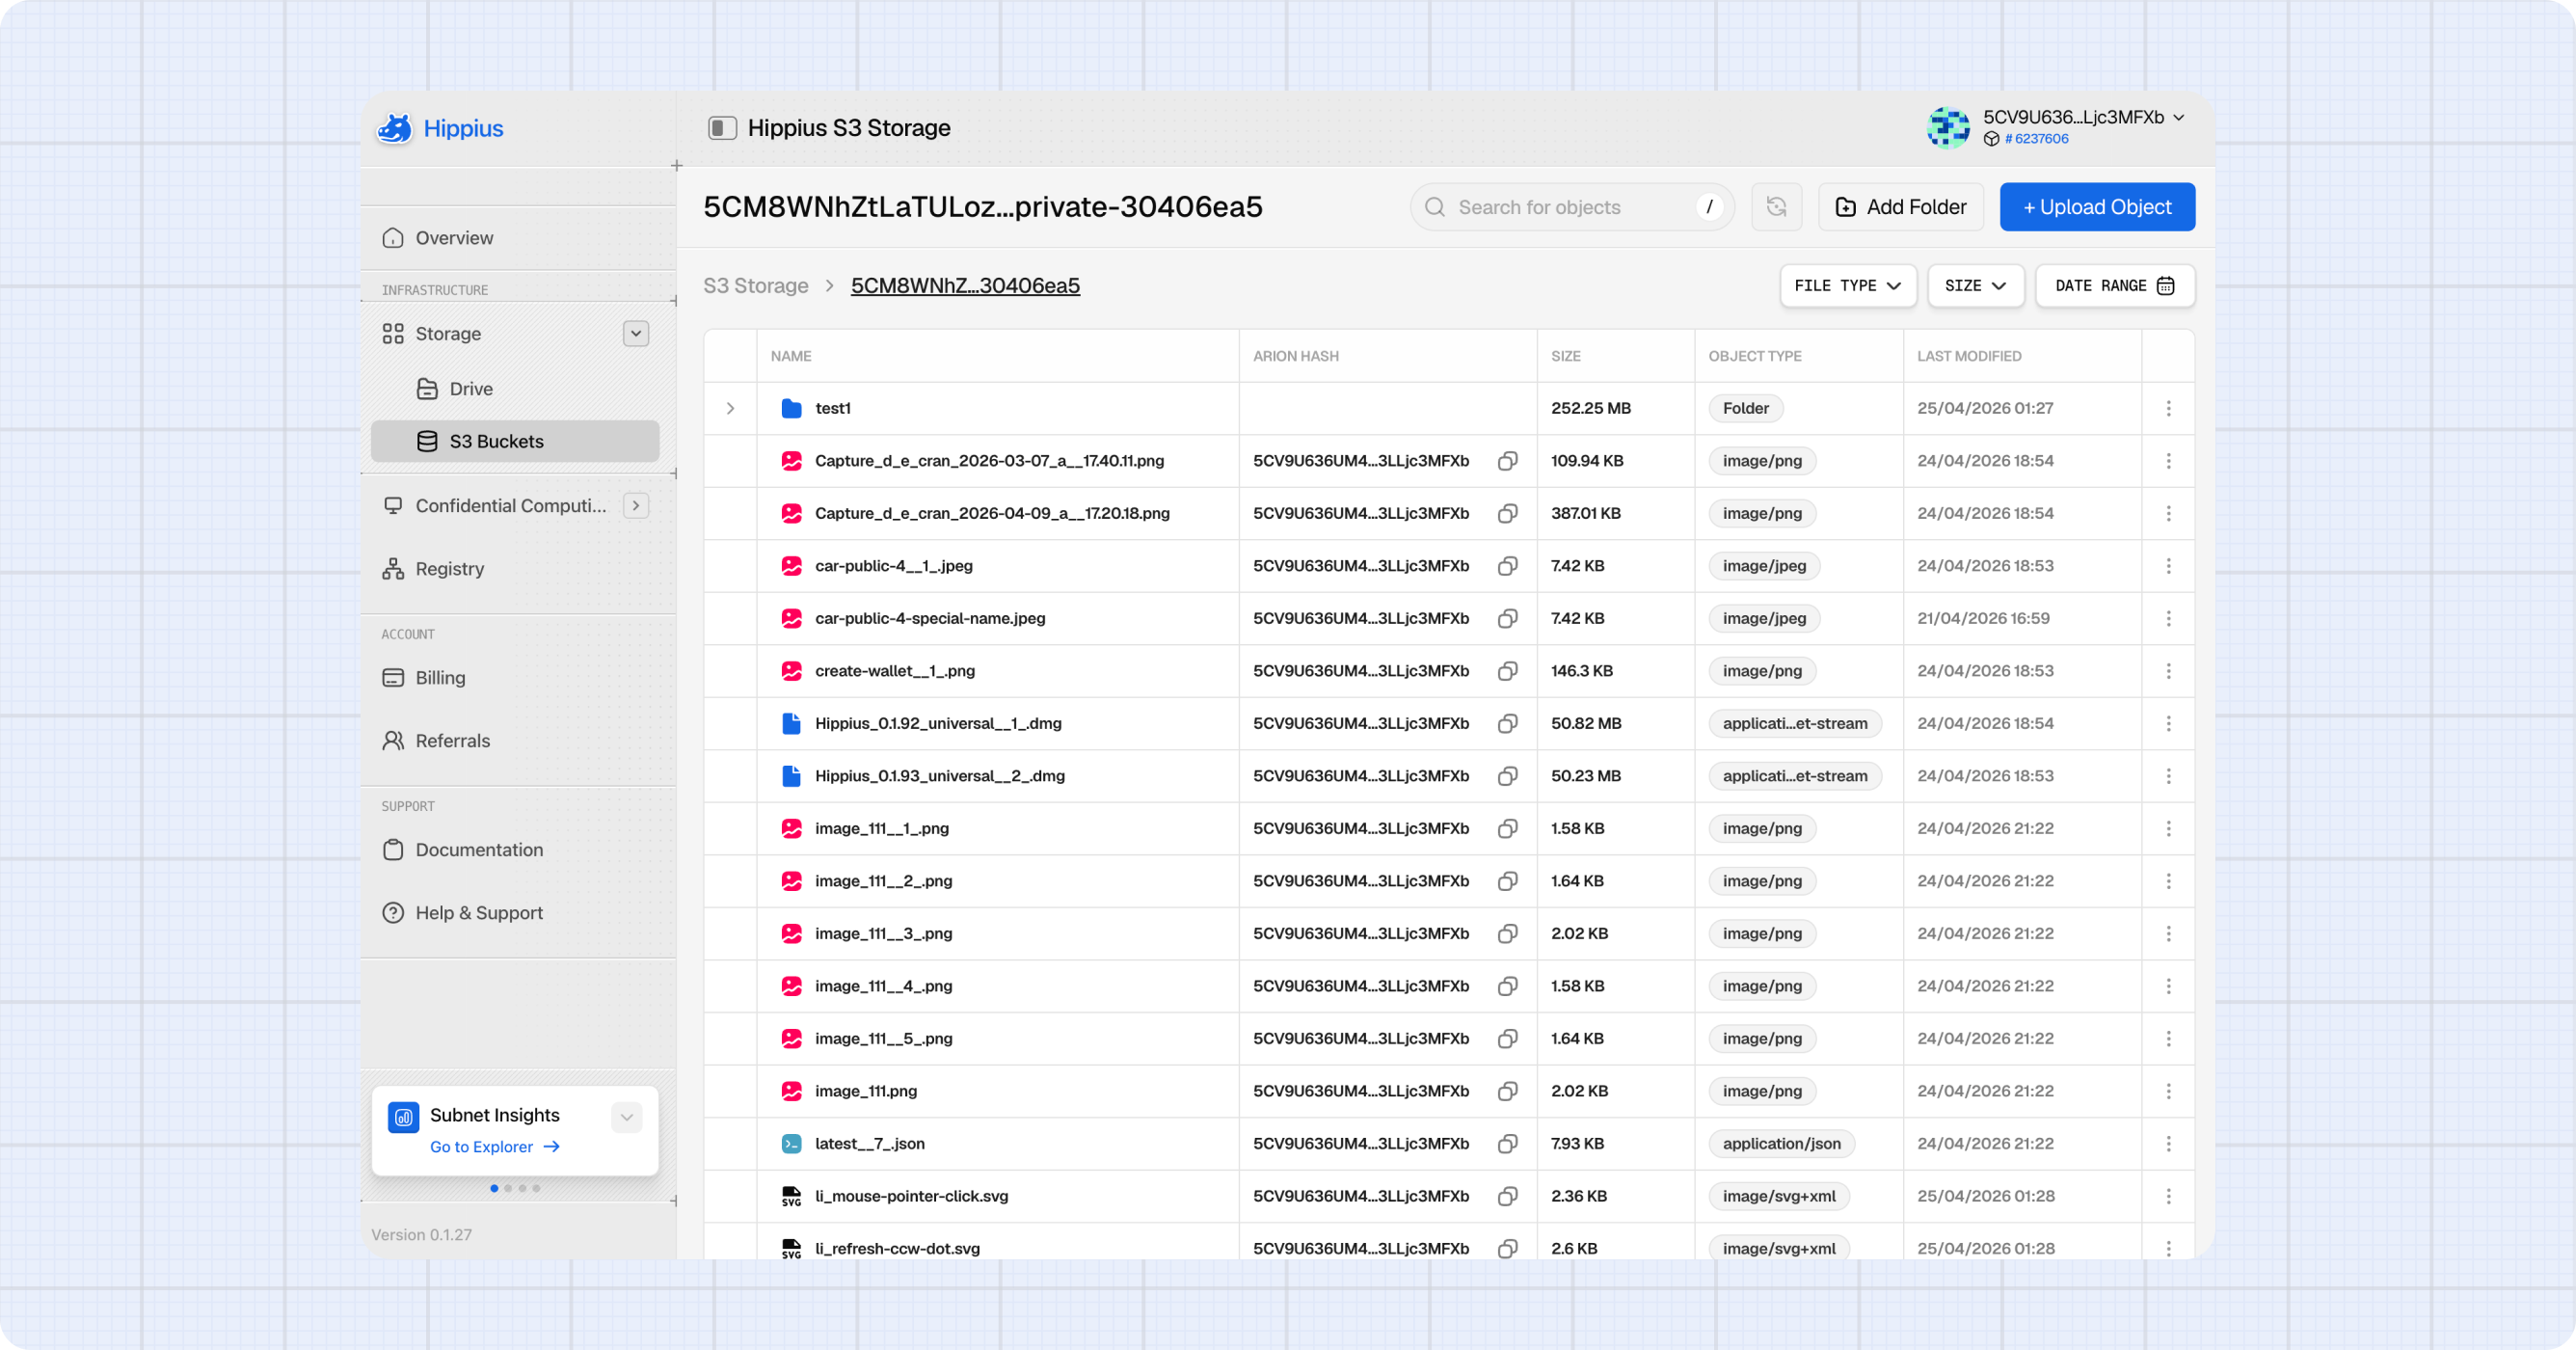
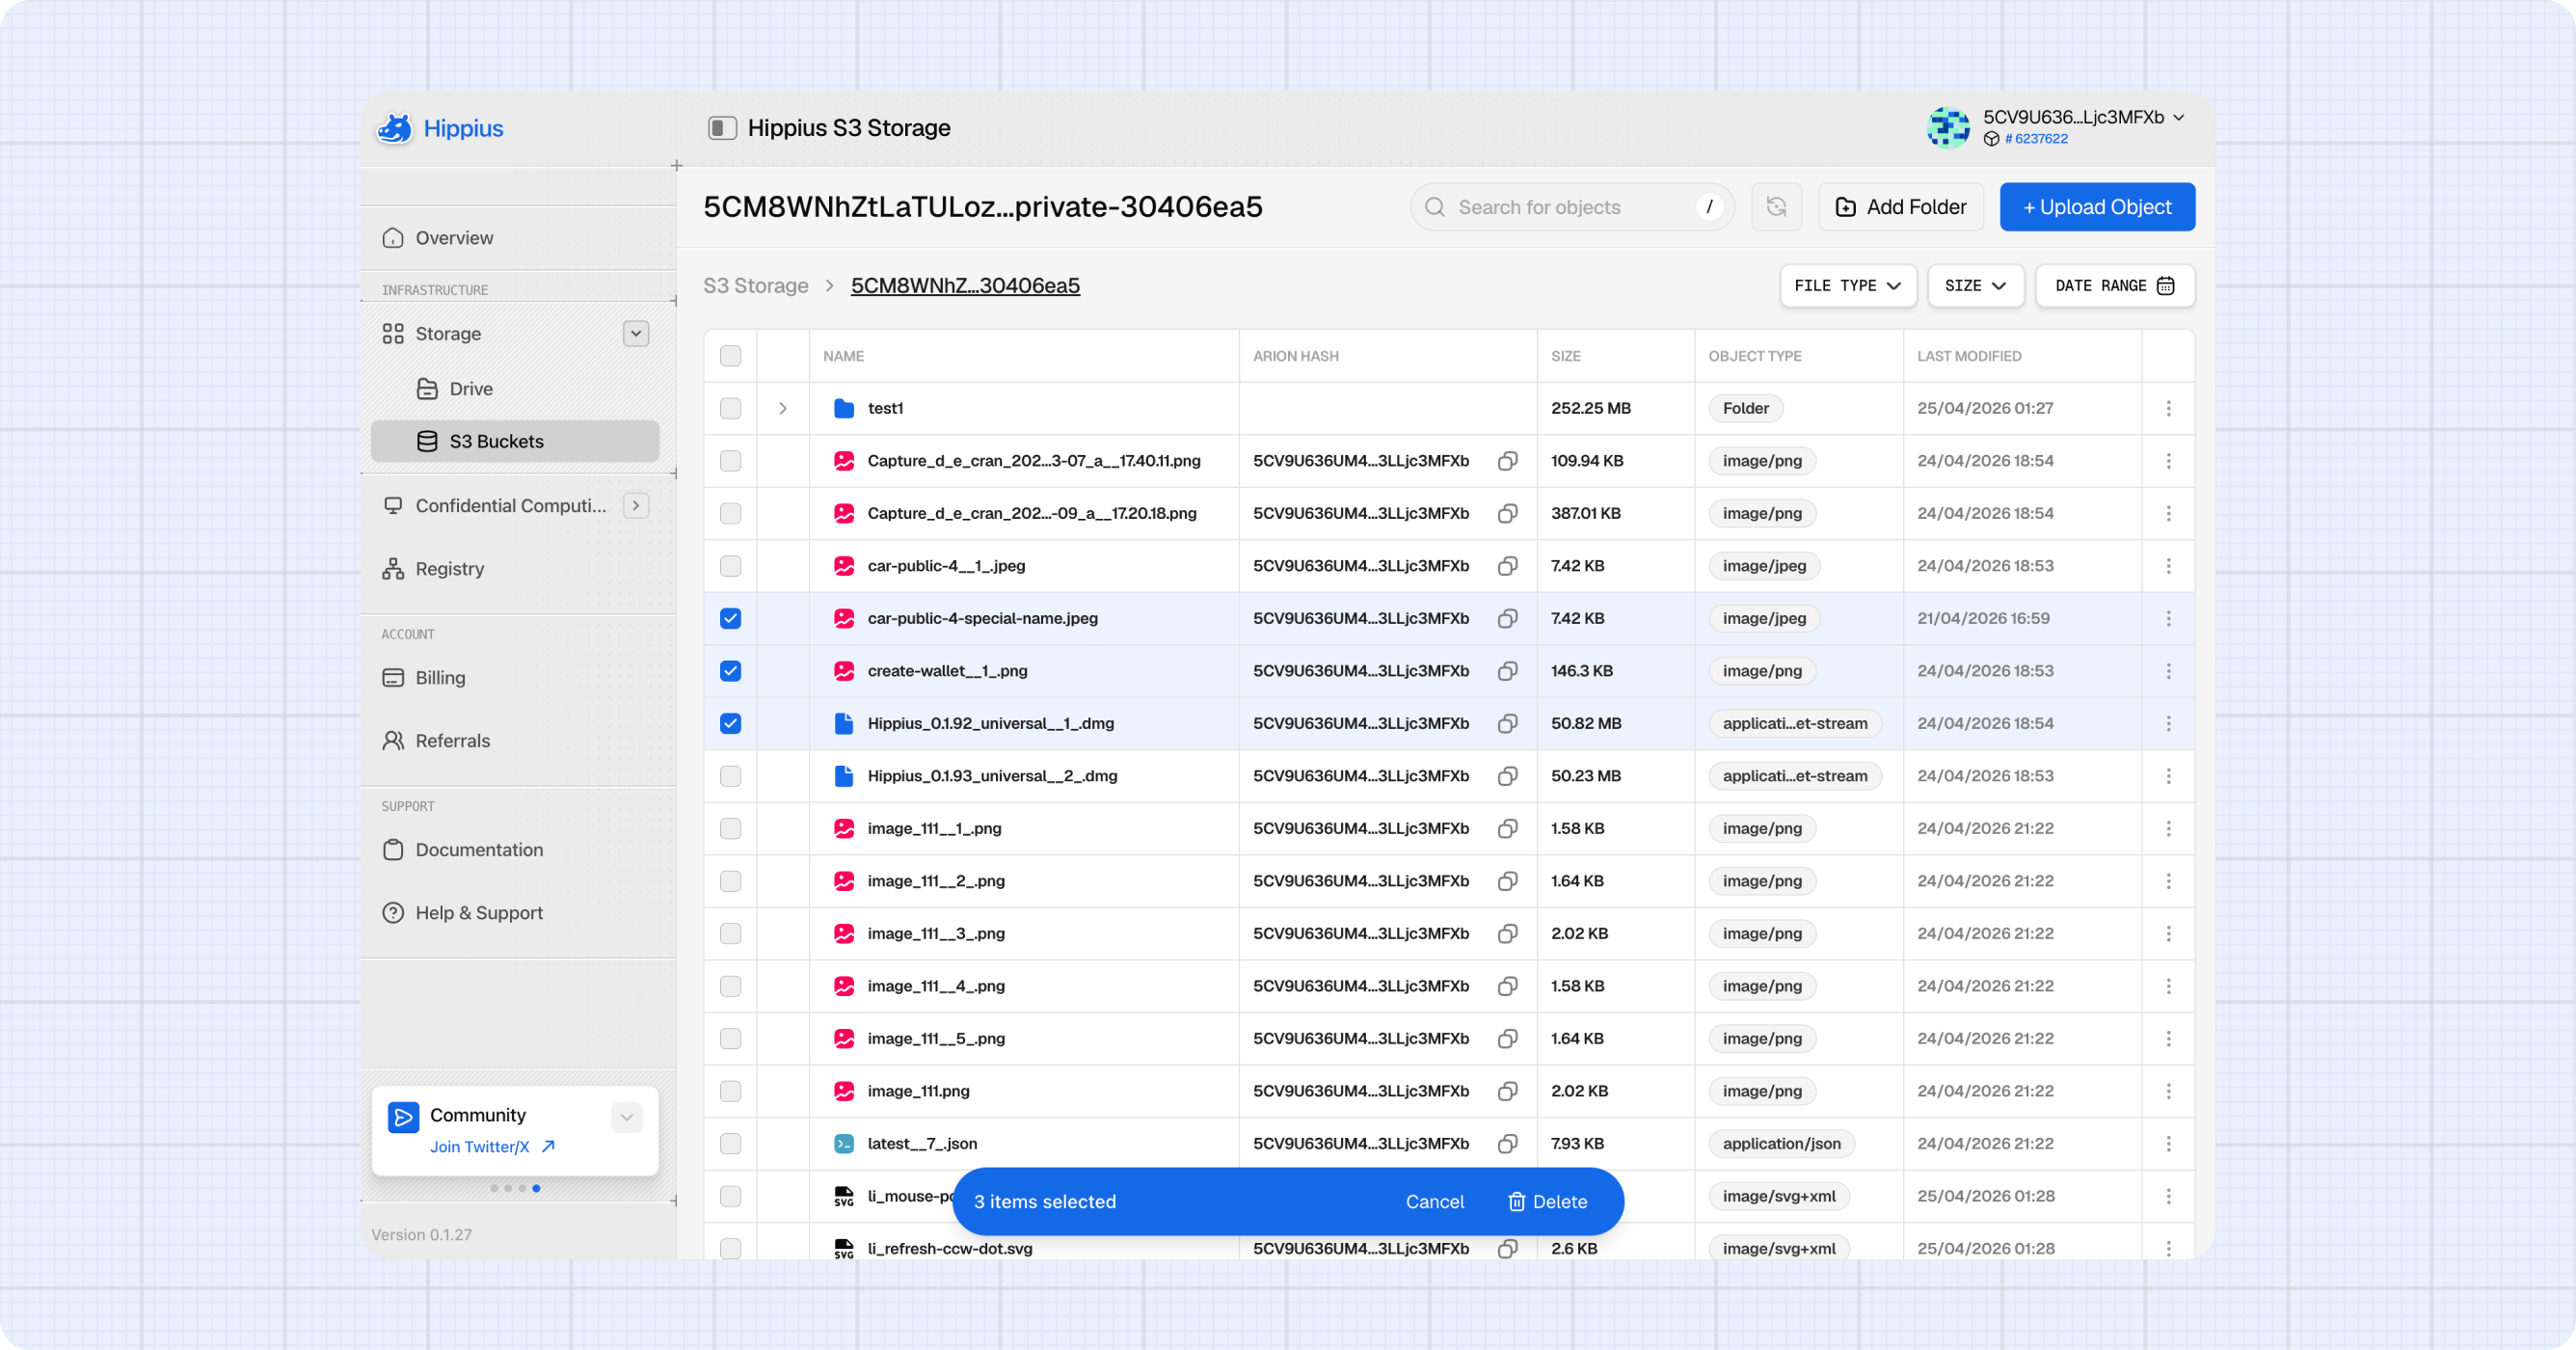
Inside a Bucket
Clicking a bucket opens the bucket browser, where you can manage all its objects.
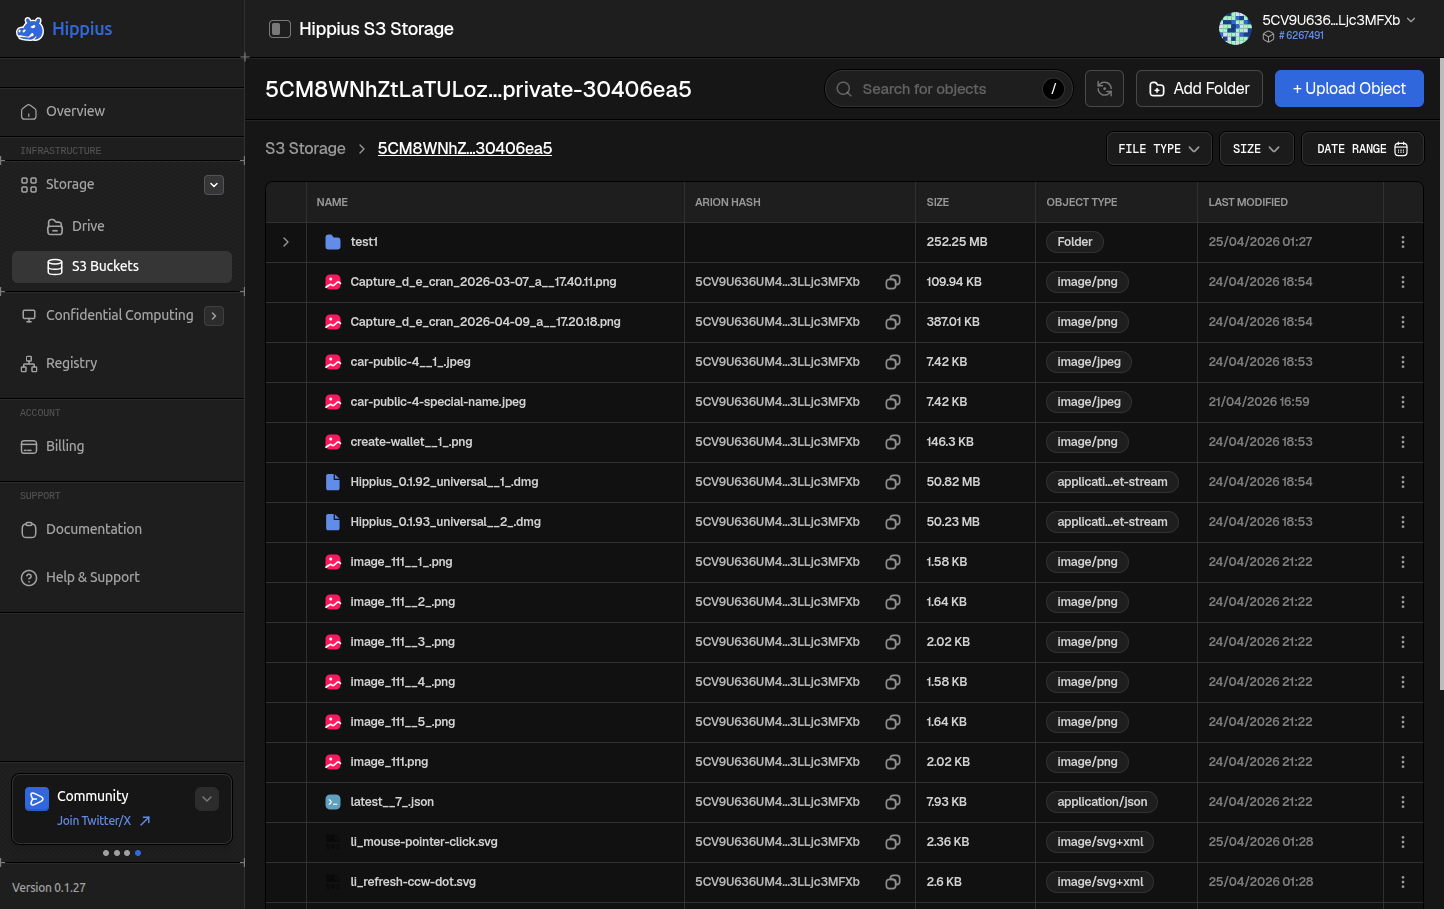
Folders
S3 buckets are flat by design. There are no real folders, only object keys that contain slashes. The console presents these as folders for a familiar browsing experience.
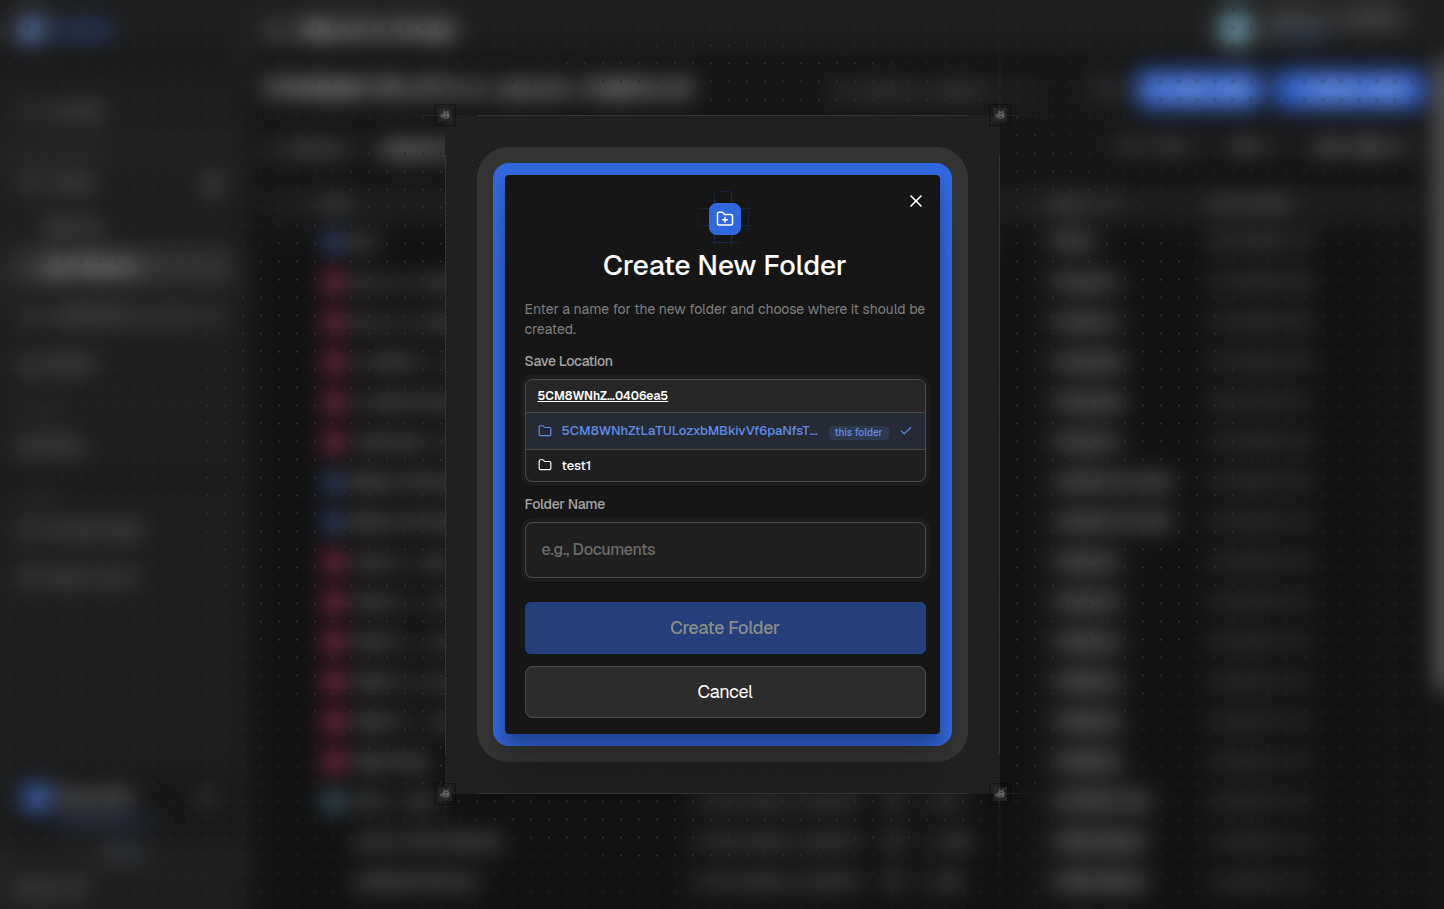
To create a folder:
- Click + New Folder in the bucket toolbar.
- Enter the folder name. It's created relative to your current location in the breadcrumb.
- Click Create.
A zero byte placeholder object appears immediately. It's automatically removed when you upload a real object into the folder.
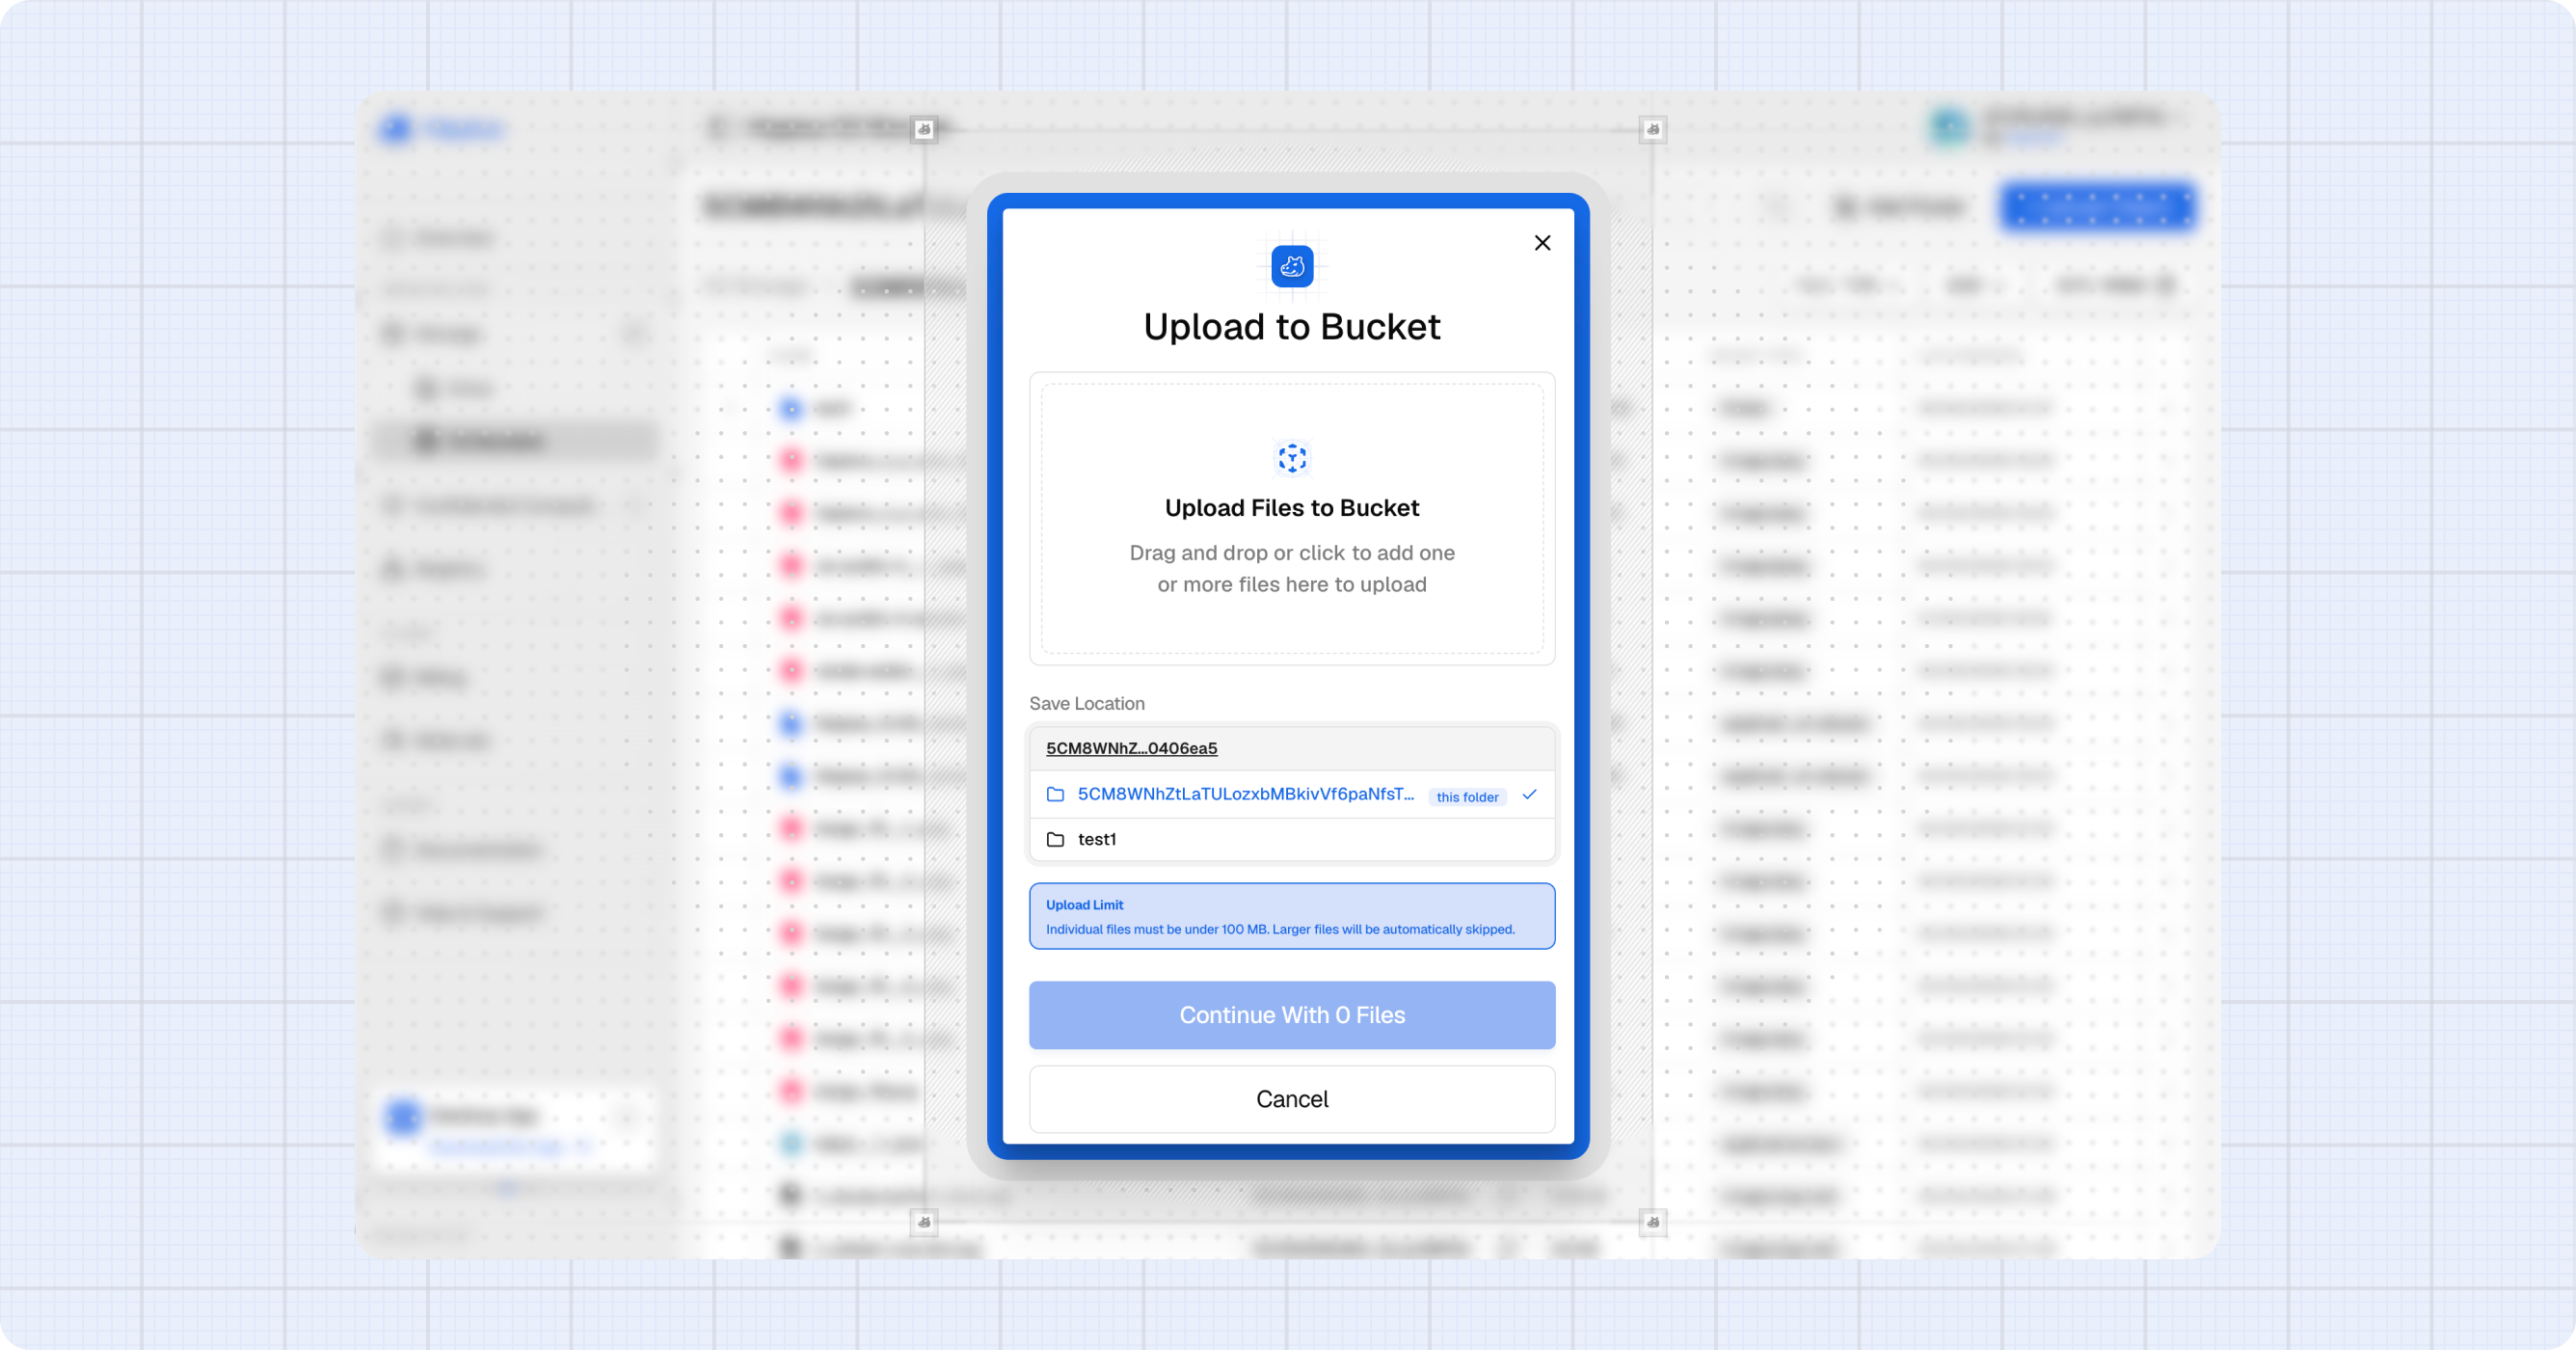
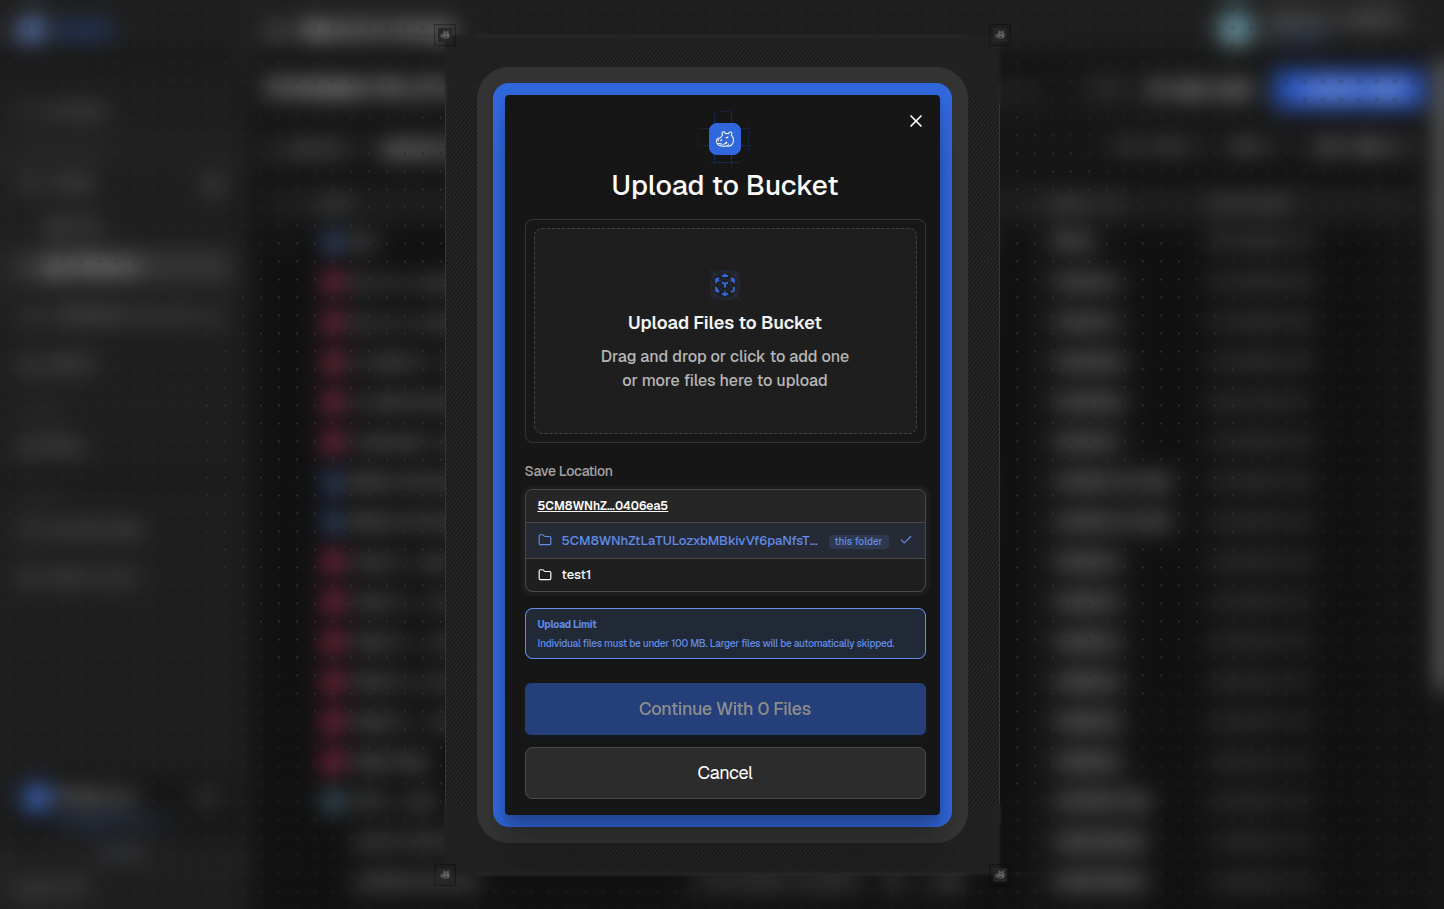
Uploading Objects
Click + Upload to open the upload dialog. The destination is always the folder shown in the current breadcrumb. Navigate to the right folder first, then upload.
Each file must be under 100 MB. For larger files, use an S3 client with multipart upload support. See Connecting an S3 Client below.
Browsing and Previewing Objects
Click any object to preview it. Images, PDFs, and videos open inline in the browser. For all other file types, use the action menu to download the file instead.
Use the search box to filter objects by name in the current folder. Click the refresh icon to reload the listing after another client has added objects in the background.
Object Actions
Each object has an action menu (three dots):
- Preview: open the in browser preview.
- Download: save the object to your device.
- Copy URL: copy the object's S3 URL to your clipboard.
- Details: open the details panel with full metadata (size, MIME type, last modified, key, CID).
- Delete: permanently delete the object.
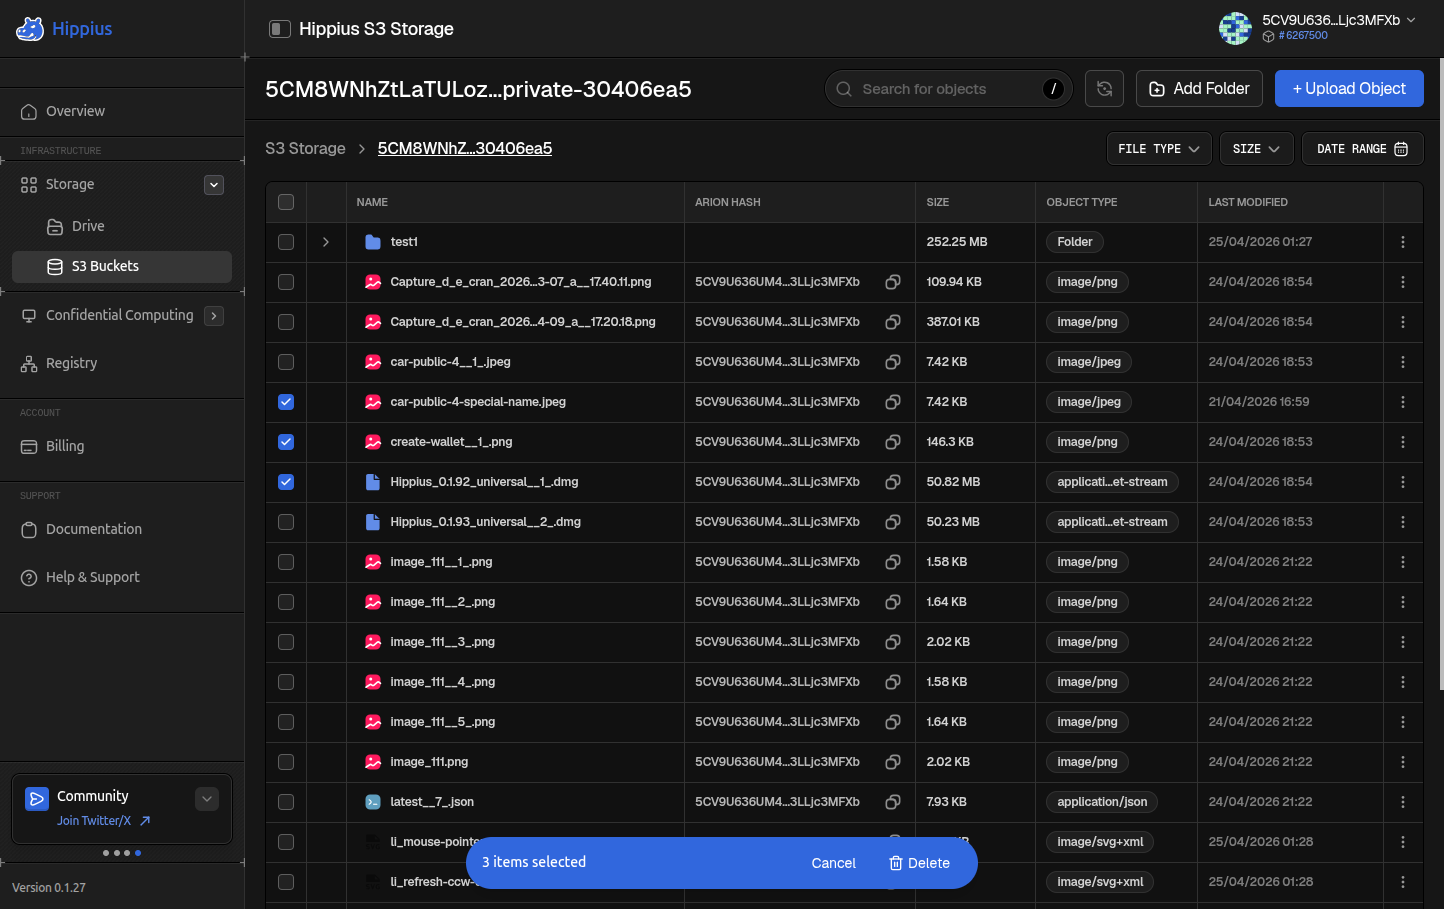
Selecting and Deleting Multiple Objects
Tick row checkboxes (or the header checkbox to select all on the page) to enter selection mode. The Selection Action Bar at the bottom lets you bulk delete or bulk download the selected objects.
Connecting an S3 Client
Once you have a master or sub token, configure any S3 compatible client with these settings:
| Setting | Value |
|---|---|
| Endpoint | The Hippius S3 endpoint (see S3 Compatibility). |
| Region | auto. Hippius is region less, so any value works. |
| Access key | From your master or sub token. |
| Secret key | The secret you copied at creation time. |
| Path style addressing | Required. Hippius does not support virtual hosted style URLs. |
Setup guides for specific clients:
Limits
| Limit | Value |
|---|---|
| Max single object upload via console | 100 MB |
| Max bucket name length | 63 characters |
| Bucket name characters | Lowercase letters, numbers, dashes |
Where to next
- Console Uploads: full upload flow reference.
- S3 Quickstart: set up the most common S3 clients.
- S3 Troubleshooting: common client errors and fixes.
- Drive: end to end encrypted personal storage.