Configure the Plugin
This is where WordPress and Hippius get connected. You'll enter the keys and bucket from the previous page, choose how migration should behave, and save. Saving also checks that everything works, so by the time you see a green message you're ready to move media.
Open Hippius Media from your WordPress admin sidebar. Everything below lives on that one page, in the Configuration and Migration Options panels.
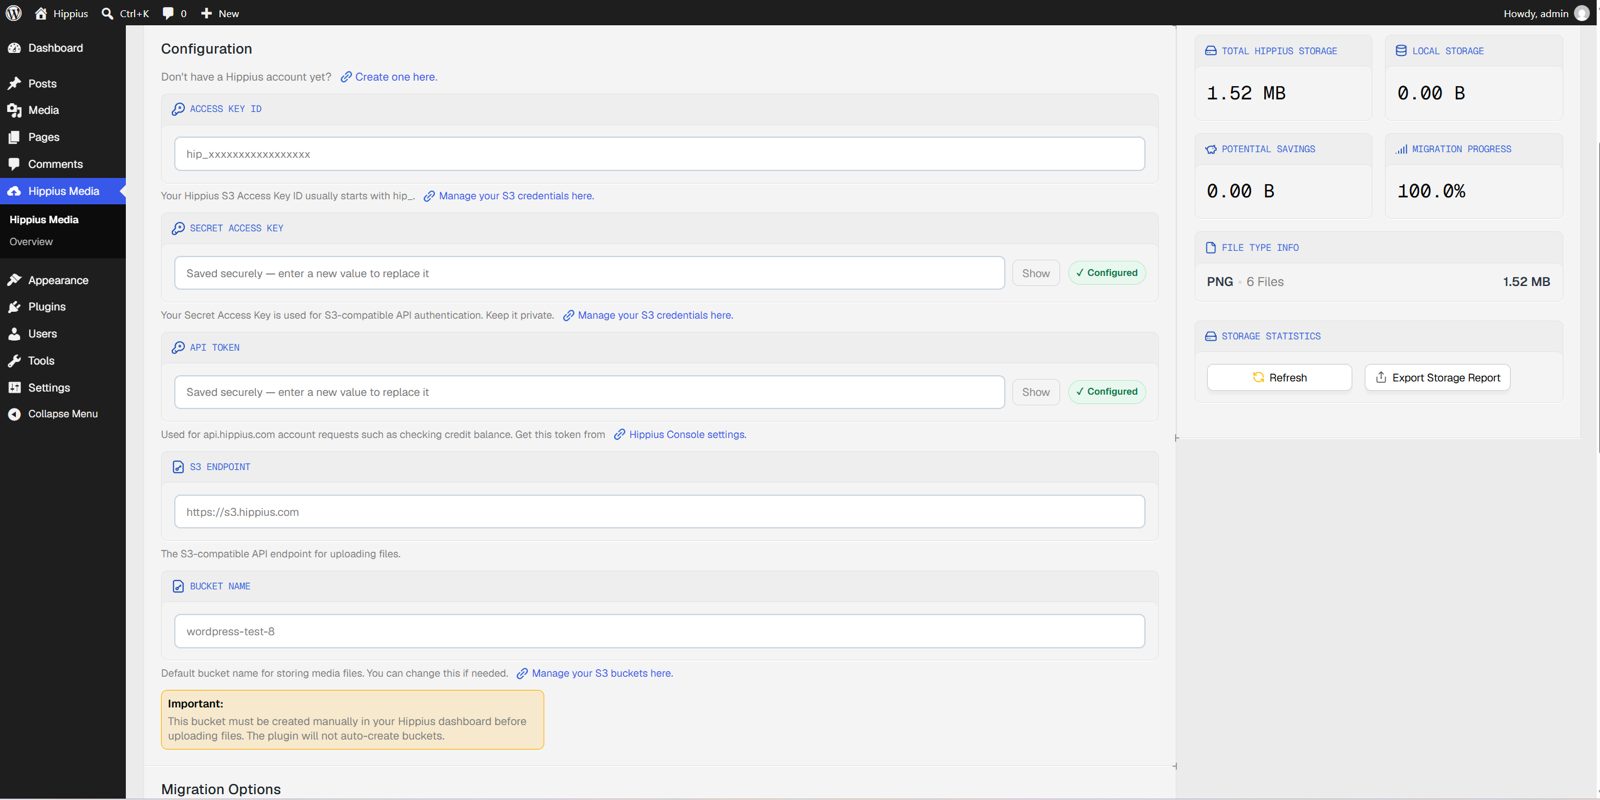
Settings: your S3 access keys, bucket and endpoint.
Configuration fields
| Field | What to enter |
|---|---|
| Access Key ID | The Access Key ID from Get your Hippius credentials. It starts with hip_. |
| Secret Access Key | Your Secret Access Key. The field is masked, and once it's saved the plugin shows it as Configured instead of displaying it again. Leave it blank to keep the saved key when you're only changing other settings. |
| API Token (optional) | Your API token, if you copied one. It's only used to show your account balance in the dashboard. Leave it blank to keep a saved token. |
| S3 Endpoint | The Hippius S3 endpoint. It's already filled in with https://s3.hippius.com, so leave it as it is. That's the endpoint every Hippius S3 tool uses (see Connection details). If you clear the field, saving puts the default back, and anything you type has to start with https://. |
| Bucket Name | The bucket you created in the console in step 4. The field starts out as wordpress-media, and an empty field falls back to it, so replace it with your own bucket name. |
The plugin doesn't create buckets. Bucket names are globally unique, so wordpress-media most likely belongs to someone else. Enter the exact name of a bucket you've already created in your Hippius account.
Switching to a different bucket
You can change Bucket Name at any time. Save, and the plugin uses the new bucket from then on. Files already migrated keep their URLs in the bucket they were uploaded to, so don't delete the old bucket while your site still uses those files.
Migration options
| Option | What it does |
|---|---|
| Keep Local Files | With Keep original files on server after migration checked, your original files stay on your server after migration. Uncheck it and the local copy is deleted once the upload to Hippius succeeds, which frees up disk space. For an image, that means the original and every generated size: if any size fails to upload, the plugin keeps all the local copies. |
| Auto-Migrate New Uploads | Turn this on and every new file you upload to WordPress is offloaded to Hippius in the background, a few seconds after the upload finishes. |
Keep Keep Local Files checked for your first migration. Once you've confirmed everything works and your media is serving from Hippius, you can uncheck it to reclaim disk space. Turn on Auto-Migrate New Uploads after your initial setup checks out.
Save and check the connection
There's no separate test step. When you click Save Settings, the plugin uses your keys to reach your bucket before it stores anything, and tells you how it went at the top of the page.
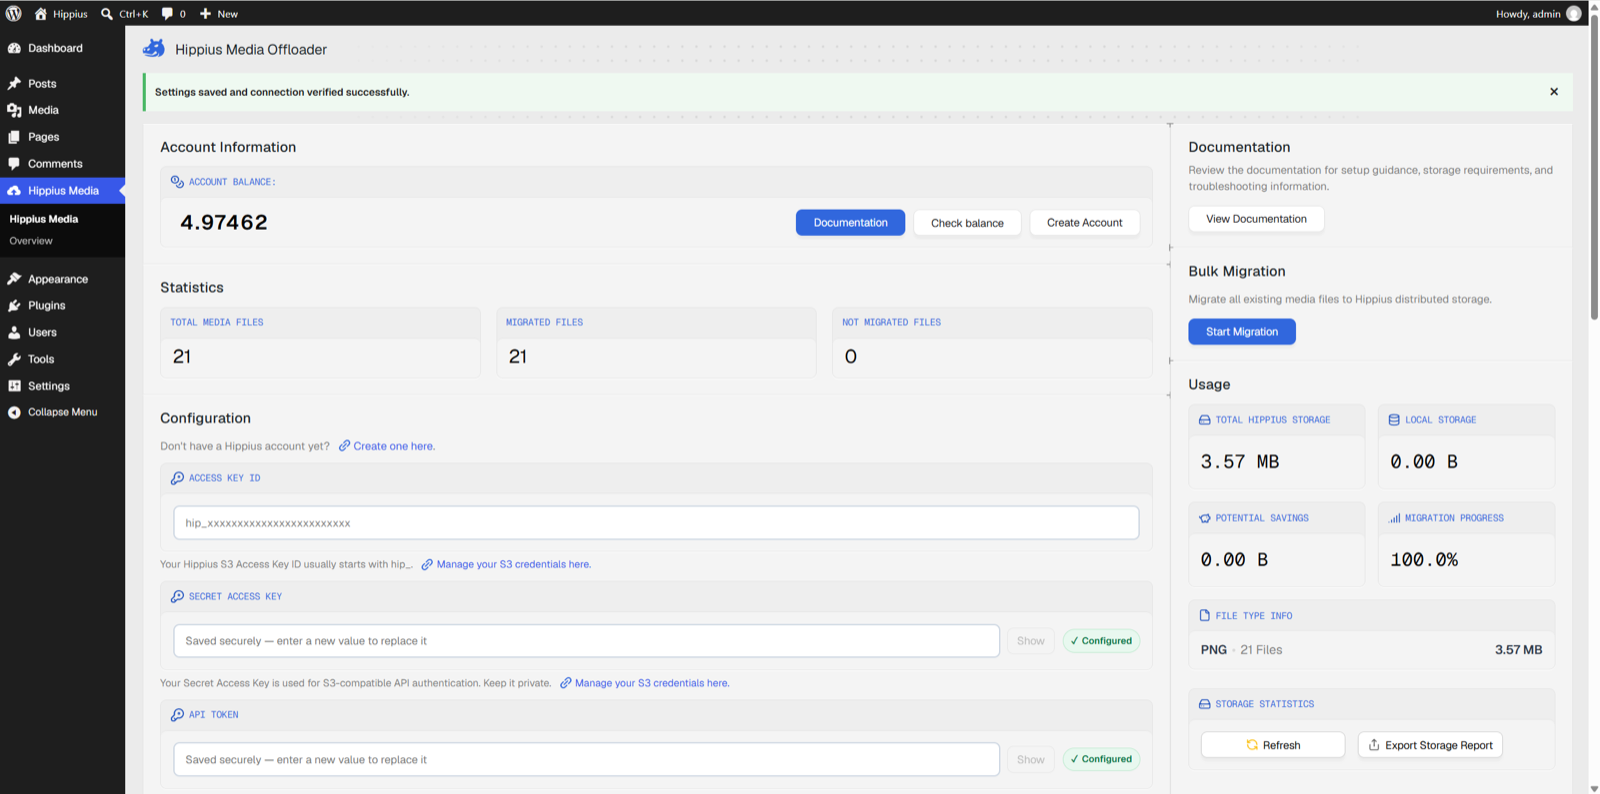
Saving your settings checks the connection to your bucket.
What you might see:
- Settings saved and connection verified successfully. Your keys work, the bucket exists and it's public. You're ready to migrate your media.
- Settings saved and connection verified, but the current bucket is private. Your settings are saved and the plugin can upload, but visitors won't be able to load your media yet. Make the bucket public, as described in the next section.
- Connection successful, but the public/private status of bucket "your-bucket-name" could not be determined. Your settings are saved and uploads will work, but the plugin couldn't tell whether visitors can load your media. Check it as described in the next section.
- Settings were not saved because the connection check failed, followed by the reason, for example an invalid Access Key ID, a signature mismatch from a wrong Secret Access Key, or a bucket that doesn't exist. Nothing is changed: your previous settings stay in place until a save succeeds. Fix what the message points at and save again, or see Troubleshooting.
Make sure your bucket is public
Your site serves each image from its public Hippius URL, so the bucket has to be public for visitors to see your media. Buckets created in the console start out private.
Below the settings, Bucket Policy Status shows what the plugin last found for your bucket:
- Public (Gateway Accessible) means you're all set.
- Private means your media won't load for visitors yet. Click Make Bucket Public and the plugin applies a public-read policy, checks that it took effect, and reloads the page with the new status.
- Not checked means the plugin hasn't looked yet, or looked and couldn't tell. Save your settings, or click Test Bucket Policy Status. If it still says Not checked, use the private-window test in the tip below.
Test Bucket Policy Status checks again at any time, using the settings you last saved, without changing anything, which is handy if you changed the bucket's permissions with another S3 tool. Making the bucket public is your choice: if you'd rather do it yourself, any S3 client works, as shown in Make your bucket public.
After the first file is migrated, open its Hippius URL in a private browser window. If it loads without asking you to sign in, your visitors will see it too. If you get AccessDenied, the bucket isn't public yet.