Migrate Your Media
There are two ways to get your media onto Hippius: bulk migration for the files you already have, and auto migration for new uploads. Most sites use both: one bulk run to move the library, then auto migration so nothing new piles up locally.
Bulk migration for existing files
If your media library is already full of files, bulk migration moves them to Hippius in one run. It lives in the Bulk Migration panel on the Hippius Media page, next to your settings.
- Open Hippius Media from your WordPress admin sidebar and scroll to the Bulk Migration panel.
- Click Start Migration, then confirm. The plugin checks your keys and bucket first, so a setup problem shows up straight away instead of on every file.
- Keep the page open and watch the progress bar. The plugin uploads your files a few at a time and updates the count as it goes.
The button stays greyed out until you've saved an Access Key ID and Secret Access Key in the settings.
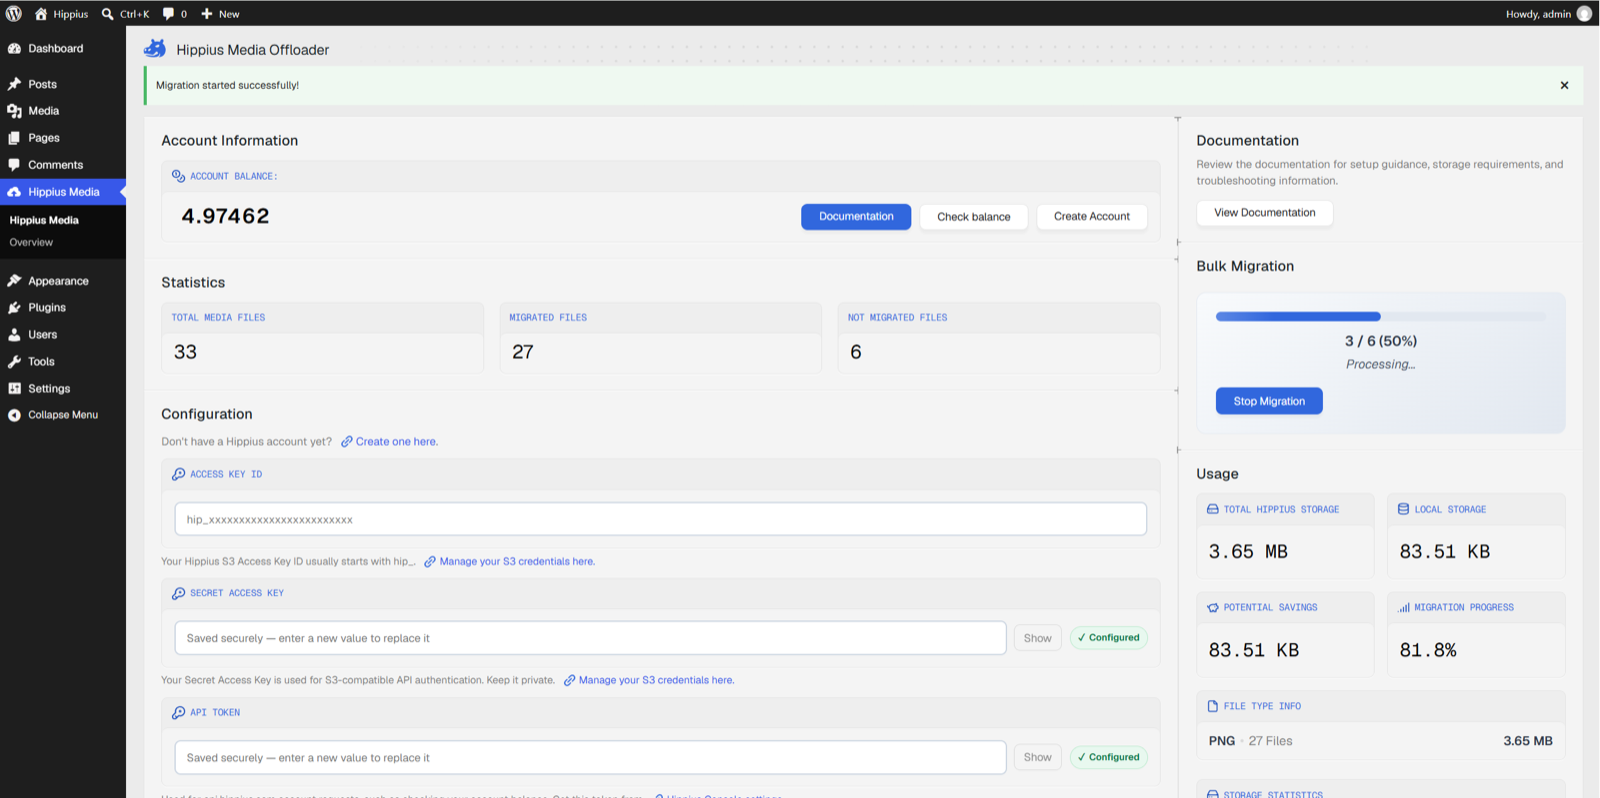
Bulk migration of your existing media, with live progress.
Bulk migration doesn't run in the background. Your browser tab drives it, asking WordPress to upload the next few files each time the last ones finish. If you close the tab or navigate away, the migration pauses.
That's safe, and nothing is lost. Come back to Hippius Media within the hour and it picks up where it left off on its own. After that, just click Start Migration again: it only picks up the files that aren't on Hippius yet.
Stopping and resuming a migration
You can stop a migration at any time with Stop Migration. The upload already in progress finishes, nothing new starts, and everything already uploaded stays in your bucket. When you click Start Migration again, it resumes: the plugin only picks up files that aren't migrated yet, and nothing already uploaded is sent again.
The progress counter starts over for the files that remain, so after a resume you'll see a smaller total than the first time. That's expected.
When a migration finishes or stops, the page reloads and the Error Log starts empty again. To see which files are still waiting, use the Local Only filter in the Media Library, described in Migrate or retry a single file.
What happens during migration
- Each file, and for images every generated size, is uploaded to your Hippius bucket over the S3-compatible API.
- If an upload fails because of a brief network hiccup or a temporary server error, the plugin retries it automatically.
- WordPress starts serving the file from its Hippius URL, including every image size and
srcset, and your visitors never notice the switch. - If Keep Local Files is unchecked, the local copy is removed once the upload succeeds. For an image, that happens only when the original and every size made it.
- Anything that still fails is skipped, and the rest of the migration carries on. While the migration runs, each failure shows in the Error Log with the reason, and it's also written to the Debug Log.
Auto migration for new uploads
Once auto migration is on, there's nothing else for you to do. Every new file you (or anyone else on your site) uploads to the Media Library is offloaded to Hippius in the background, a few seconds after the upload finishes. You don't need to keep any page open for this.
To turn it on:
- Open Hippius Media and find the Migration Options panel.
- Check Auto-Migrate New Uploads.
- Click Save Settings.
Auto migration uses WordPress's built-in scheduler, which runs when your site gets visits. On a very quiet site, or one where WordPress's scheduler is switched off, new files can take a little longer to move.
Migrate or retry a single file
You don't have to run a whole bulk migration to move one file. In the WordPress Media library, switch to the list view:
- The Hippius Status column shows whether each file is Migrated, still Local, or Unsupported.
- The filter above the list lets you show only files that are Migrated to Hippius or Local Only, which is the quickest way to find what's left.
- Hover over a local file and click Migrate to Hippius to upload just that one. This is also the easiest way to retry a file that failed.
- On a migrated file, View on Hippius opens it straight from your bucket.
Check your migration and storage
The Hippius Media page gives you a live picture of what's migrated and how much you're storing.
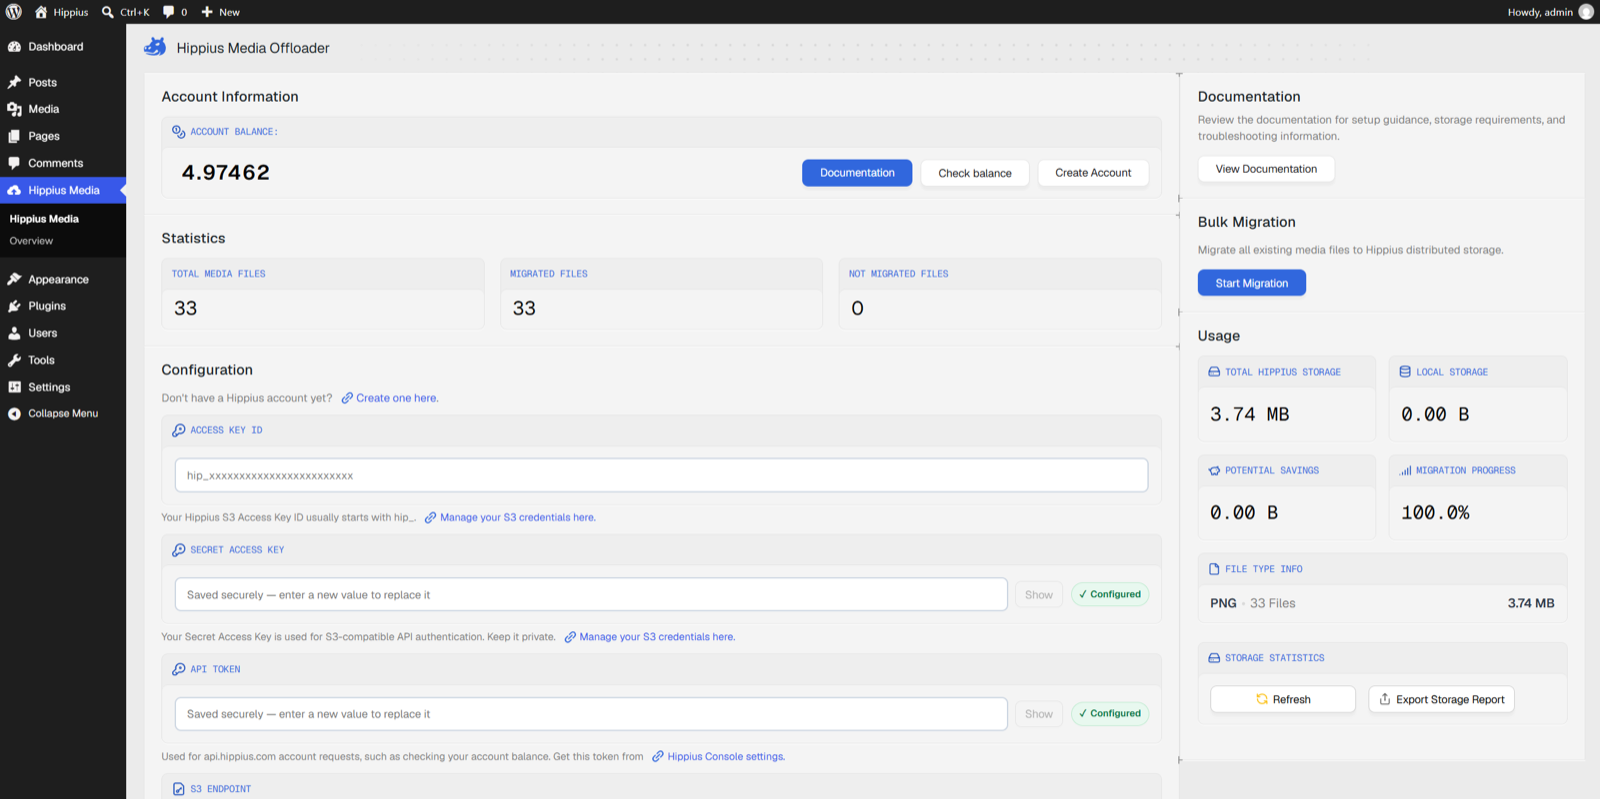
Statistics and usage once your media is on Hippius.
Statistics
- Total Media Files is how many files in your media library are of a type the plugin can move.
- Migrated Files is how many are safely on Hippius.
- Not Migrated Files is what's still only local.
Usage
- Total Hippius Storage is how much data you've stored on Hippius.
- Local Storage is how much disk space the files that aren't migrated yet take up on your server.
- Potential Savings is the disk space you'd free by migrating those files with Keep Local Files turned off.
- Migration Progress is the share of your library that's been migrated.
Below these, File Type Info breaks your migrated files down by type. Refresh re-reads your file sizes and reloads the figures, and Export Storage Report downloads a CSV of your migrated files.
If you added an API token, the Account Information panel at the top shows your Account balance. It loads when you open the page, and Check balance refreshes it.
Confirm a file is really on Hippius
To double-check a specific file:
- Open the WordPress Media Library and edit the file.
- Look at the file URL. It should point to your Hippius bucket, not to
wp-content/uploads. - Open that URL in a private browser window. If it loads, your visitors can see it too.
- You can also check the Debug Log on the plugin page for the upload confirmation. It may say the file's Arion hash, the identifier Hippius gives each file, is still pending. That's normal: Hippius works out the hash shortly after the upload, and your file is already stored and served.
If a file didn't migrate or isn't showing up on your site, see Troubleshooting.